Apple Intelligence and Siri AI have sucked most of the oxygen out of the room at Apple's Worldwide Developers Conference this year—understandable, maybe, given that the AI-powered Siri delays are all anyone has wanted to ask any Apple executive about for the last two years.
But Apple Intelligence is just one of the three big focus areas Apple outlined during its keynote this week. The second is new parental controls—overdue, but promising-looking, as the parent of a 6-year-old with an iPad that I only begrudgingly connect to the Internet. And the third is "platform improvements," a catch-all for a wide range of fit-and-finish changes aimed at boosting responsiveness and addressing common user complaints.
I have the first beta of macOS 27 Golden Gate running on an M1 MacBook Air—the oldest, slowest hardware Apple supports now that Intel compatibility is out the window. With some help from Apple's densely packed wall-of-features slide, here are a few things from the "platform improvements" column I like the most, plus one item I'd still like to see.
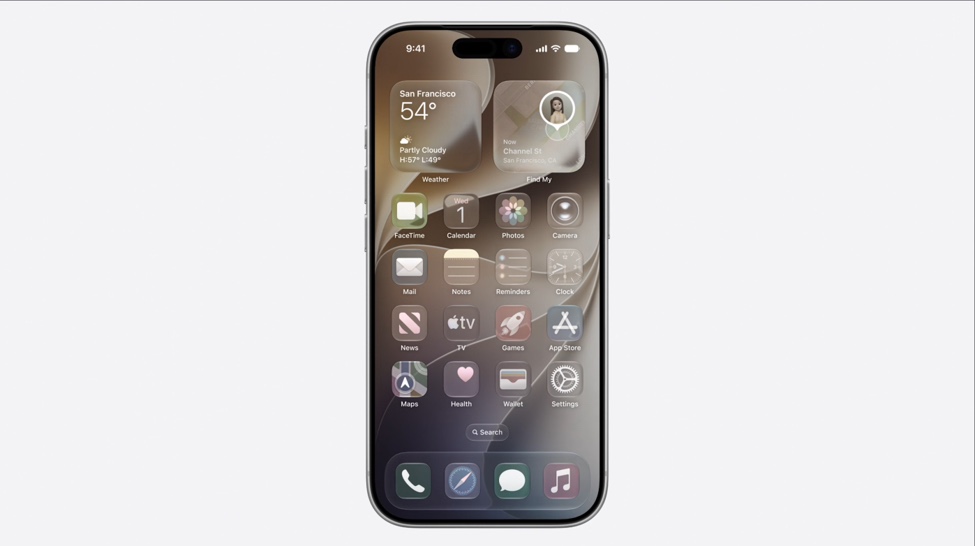
Apple has taken the wraps off of its next-generation operating system updates at its Worldwide Developers Conference today, including iOS 27, iPadOS 27, and macOS 27 Golden Gate. And while the long-awaited Siri AI update is the headliner, Apple also emphasized its efforts to optimize its software, improving its performance and reliability.
For starters, the company is continuing to refine the Liquid Glass design language that it introduced last year. A slider in the Settings will allow users fine-grained control over the translucency of the Liquid Glass effect, ranging from maximally transparent and glassy to fully tinted. Last year's redesigned icons are also being re-redesigned with more glass layers, which Apple says will make them sharper and more distinctive.
On macOS, Apple has also changed the way app toolbars and sidebars work, making toolbars more distinct, making the contents of sidebars extend all the way to the edge of the window, and reintroducing color to sidebar icons. Mac windows are also getting a "tighter corner radius," to address complaints about the way window resizing works in macOS 26 Tahoe.
Despite all the graphics capabilities of modern Macs, being a Mac gamer is generally a thankless existence. Every once in a while, though, Mac gamers get a bone thrown to them that is substantial enough that they think, for a brief moment, everything might be OK. One such bone has been thrown to us today—Age of Empires II: Definitive Edition just came out on macOS.
The game is available on Steam (those who own the Windows version on Steam automatically get the Mac version) and is planned for a later Mac App Store release.
None of these are particularly momentous updates, which is pretty normal this late in their lifecycle, but they add a small batch of new features alongside the pile of patches outlined on Apple’s security vulnerabilities page. This is Apple’s first release to support end-to-end encryption for the RCS messaging standard, for example, which, when enabled, can give green-bubble messages some of the same security and privacy advantages that iMessage users have long enjoyed.
Encrypted RCS messaging has a “beta” label in this release, and Apple says it’s limited to a subset of supported cellular carriers. Expanded support “will roll out over time.” Encrypted chats will show up with a padlock icon in the Messages app; if you don’t see a padlock, the message isn’t encrypted, even if you’re using RCS.
As its name implies, the venerable Notepad++ text editor began as a more capable version of the classic Windows Notepad, with features such as line numbering and syntax highlighting. It was created in 2003 by Don Ho, who continues to be its primary author and maintainer, and it has been a Windows-exclusive app throughout its existence (older Notepad++ versions support OSes as old as Windows 95; the current version officially supports everything going back to Windows 7).
I'm not a devoted user of the app, but I was aware of its history, which is why I was surprised to see news of a "Notepad++ for Mac" port making the rounds last week, as though it were a port of the original available from the Notepad++ website.
Apparently, this news surprised Ho as well, who claims that the Mac version and its author, Andrey Letov, are "using the Notepad++ trademark (the name) without permission."
Wins, the Misses, and the Relentless Pursuit of Better Technology
As Apple approaches its 50th anniversary, it stands as one of the most influential companies in modern history. From a garage startup to a global technology powerhouse, Apple has repeatedly reshaped how we interact with computers, music, phones, and even our own health. But its journey has not been a straight line of success. Alongside category-defining wins sit bold failures, missteps, and experiments that did not quite land.
What makes Apple unique is not just its ability to succeed, but its willingness to rethink, rebuild, and try again.
The Early Years: Reinventing the Personal Computer
Apple’s story begins with a simple idea: computers should be accessible. The Apple II helped bring computing into homes, but it was the Macintosh in 1984 that truly changed the game. With its graphical user interface and mouse-driven navigation, it made computing intuitive for the first time.
This was Apple’s first major pattern. It rarely invents entirely new categories. Instead, it refines, simplifies, and elevates them into something people actually want to use.
That philosophy would define the next five decades.
The iMac G3: Saving Apple and Making Tech Personal
By the late 1990s, Apple was struggling. Then came the iMac G3.
Bright, colourful, and unapologetically different, the iMac turned the computer into something expressive. It was not just a tool. It was an object you wanted in your home. At a time when most PCs were beige boxes, Apple leaned into design, personality, and approachability.
The iMac did more than sell well. It reintroduced Apple to the world and laid the foundation for its design-led future.
The iPod: Simplicity Wins
The early 2000s brought another shift. Digital music existed, but it was messy and fragmented. Apple changed that with the iPod and iTunes.
A thousand songs in your pocket was not just a slogan. It was a promise of simplicity. Syncing music became effortless. The experience just worked.
The iPod did not invent portable music players. It made them usable for everyone.
The iPhone: Resetting the Entire Industry
In 2007, Apple launched the iPhone. Smartphones already existed, but they were clunky, stylus-driven, and often frustrating.
The iPhone replaced all of that with a touchscreen interface built around software. It felt fluid, responsive, and intuitive. It also introduced the idea that a phone could be a platform, not just a device.
The App Store followed, and suddenly the iPhone became whatever you needed it to be.
Entire industries were reshaped overnight. Cameras, GPS devices, music players, and even laptops began to feel redundant for many users.
The Apple Watch: A Quiet Giant
If the iPhone was a loud revolution, the Apple Watch was a quieter one.
Initially seen as a companion device, it has evolved into the world’s most popular watch by focusing on health, fitness, and daily convenience. Features like heart rate monitoring, activity tracking, and fall detection have made it more than just a piece of tech.
It became something personal.
Apple Silicon: The Modern Power Move
One of Apple’s most important recent decisions has been its move to its own silicon.
By designing its own chips, Apple has taken full control of the Mac experience. The result is machines that are faster, more efficient, and significantly better in terms of performance per watt than much of the competition.
Laptops now run cooler, quieter, and with battery life that feels almost unreal compared to previous generations.
This shift is not just about speed. It is about control. Apple now owns the entire stack, from hardware to software to silicon.
The Ecosystem: Apple’s Most Underrated Strength
While individual products often get the spotlight, Apple’s ecosystem may be its most powerful achievement.
Features like Handoff, AirDrop, and Universal Clipboard create a seamless experience across devices. You can start an email on your phone and finish it on your Mac. Copy text on one device and paste it on another.
It feels simple, but it is incredibly difficult to replicate.
This level of integration keeps users invested. Once you are in the ecosystem, everything just works together in a way that competitors have struggled to match.
The Failures: When Apple Gets It Wrong
Apple’s history is not without its missteps. In fact, some of its most interesting lessons come from its failures.
The Newton: Too Early for Its Time
The Newton was Apple’s attempt at a personal digital assistant in the 1990s. It introduced ideas that feel familiar today, like handwriting recognition and portable computing.
The problem was timing. The technology was not ready. Performance issues and unreliable features meant it never reached its potential.
In many ways, the Newton was a glimpse of the future that arrived too soon.
The Butterfly Keyboard: Design Over Reliability
Fast forward to the MacBook lineup in the mid-2010s, and Apple introduced the butterfly keyboard.
It allowed for thinner devices, but at a cost. Keys became prone to failure, often triggered by something as simple as dust. For many users, it became a frustrating and costly experience.
This was a rare case where Apple’s pursuit of thinness directly impacted usability.
The Magic Mouse Charging Port: A Small but Notable Miss
Sometimes Apple’s missteps are not massive product failures but small design decisions that feel out of character.
The Magic Mouse charging port, placed on the underside, is a perfect example. It means the mouse cannot be used while charging, turning a simple task into an inconvenience.
It is a reminder that even the most design-focused company can occasionally prioritise aesthetics over practicality.
Early MacBook Air Trade-Offs
Even one of Apple’s biggest successes, the MacBook Air, had its compromises in its early days.
It redefined portability, but battery life and performance limitations showed the cost of pushing boundaries too far, too quickly.
Still, those early compromises paved the way for the refined, powerful laptops we see today.
The Pattern: Fail, Learn, Refine
What ties Apple’s successes and failures together is a clear pattern.
Apple is not afraid to take risks. When those risks pay off, they redefine industries. When they do not, Apple learns, adapts, and often returns with something better.
The Newton laid conceptual groundwork for mobile computing. The butterfly keyboard led to a renewed focus on reliability. Even smaller missteps inform future design decisions.
Failure is not the end. It is part of the process.
Why Apple Still Matters at 50
Fifty years in, Apple remains at the centre of the technology world not because it gets everything right, but because it consistently pushes forward.
It challenges expectations. It refines experiences. It obsesses over details, even if it occasionally gets them wrong.
Most importantly, it understands that technology is not just about power or features. It is about how people use it, how it fits into their lives, and how it makes everyday tasks feel effortless.
Looking Ahead
As Apple enters its next chapter, the question is not whether it will succeed or fail. It will do both.
The real question is what it will redefine next.
If history tells us anything, it is that Apple’s biggest impact comes when it quietly reshapes the ordinary into something better. Not louder, not flashier, just better.
And that is what has kept it relevant for nearly half a century.
A Proper Look at What Your USB Ports Are Really Doing
USB has quietly become one of the most confusing parts of modern computing. On paper, everything looks fast, powerful, and universal. In reality, performance varies wildly depending on cables, ports, hubs, power negotiation, and even which side of a USB-C connector you plug in.
If you have ever wondered why an external drive feels slow, why a dock behaves differently on another Mac, or why a device refuses to charge at full speed, you are not alone. This is exactly where USB Connection Information earns its place on your system.
For Apple users in particular, this app fits perfectly into the Apple Geek mindset. It exposes useful technical detail without forcing you into terminal commands or obscure system menus.
What USB Connection Information Actually Does
At its core, USB Connection Information gives you visibility. It shows how your USB devices are connected, what speed they are running at, and how much power is being negotiated between your Mac or Linux machine and the device.
This matters more than most people realise. Two identical looking cables can behave very differently. A port on one side of a MacBook can negotiate a faster connection than the other. A hub can quietly downgrade everything attached to it.
USB Connection Information surfaces these details immediately, which makes troubleshooting fast and surprisingly satisfying.
macOS: Menu Bar Insight the Apple Way
On macOS, USB Connection Information lives in the menu bar, which already tells you a lot about the app’s design philosophy. It is always there when you need it, and invisible when you do not.
When you connect a USB device, the app shows:
How fast the device is actually connected, not what the box claimed
Which USB generation the connection negotiated
The identity of the device and its manufacturer
Whether the connection is capable of higher performance
Power related information that hints at charging and delivery behaviour
This is especially useful on modern Apple hardware where USB-C, Thunderbolt, and power delivery are all bundled into the same physical port. Apple’s built-in System Information tool contains similar data, but it is buried several clicks deep and not designed for frequent checking.
USB Connection Information turns this into something you can glance at in seconds.
For anyone running external SSDs, multi-port hubs, capture devices, or audio interfaces, this quickly becomes a daily reference tool
A Perfect Fit for Apple Geek Users
If you enjoy understanding how your Apple hardware actually behaves, this app feels right at home. It does not attempt to oversimplify or hide technical detail, but it also does not overwhelm you.
It gives just enough information to answer questions like:
Why is this drive slower on my Mac mini than on my MacBook
Is this cable limiting my data speed
Is this dock negotiating proper power delivery
Is my device falling back to an older USB mode
These are real questions Apple users run into, especially as setups become more modular and accessory-driven.
Linux Support and Open Source Roots
One of the most refreshing things about USB Connection Information is that it does not stop at macOS. There is also a Linux version built around the same idea, delivered as an open source system tray application.
On Linux, USB diagnostics have traditionally lived in the terminal. Tools like lsusb and usb-devices are powerful, but they are not exactly friendly or convenient. The Linux version of USB Connection Information takes that raw system data and presents it in a desktop-friendly way.
You get a tray icon that updates as devices are plugged in or removed, along with clear summaries of:
Device identity and vendor information
Connection speed and USB version
Power characteristics
Port and bus relationships
Because it is open source, Linux users can inspect how it works, adapt it to their desktop environment, or extend it for niche use cases. That makes it particularly appealing to developers, sysadmins, and hardware tinkerers.
It also makes this tool genuinely cross-platform in spirit, not just in marketing.
Real World Scenarios Where This App Shines
This is not an app you install just to admire numbers. It solves real problems.
If you are diagnosing a slow external drive, USB Connection Information can immediately confirm whether it is running at USB 2 speeds instead of USB 3. If you are testing cables, you can see which ones negotiate higher bandwidth. If a dock behaves inconsistently, you can compare how it connects across machines.
For developers working with USB peripherals, it becomes a lightweight sanity check. For home users, it removes a lot of guesswork and frustration.
It is especially useful on Apple silicon Macs, where everything is fast enough that bottlenecks are not always obvious until you look closely.
Privacy and Local First Design
Another point worth highlighting is privacy. USB Connection Information operates entirely on your local machine. It does not send device data anywhere, does not phone home with analytics, and does not require cloud access.
That is very much in line with the Apple Geek philosophy of understanding and controlling your own hardware.
Final Thoughts
USB Connection Information is one of those rare utilities that feels small but punches well above its weight. It does not try to be flashy, and it does not pretend USB is simple. Instead, it gives you honest, immediate insight into what is happening under the hood.
For macOS users, it is a natural menu bar companion. For Linux users, it is a welcome bridge between powerful system data and usable desktop tools.
If you care about performance, reliability, and actually knowing what your setup is doing, this app deserves a spot in your toolkit.
Sometimes being a geek is not about having more tools. It is about having the right one.
Well when I first started the site some 5 years ago, I didn’t expect to be writing about my own pieces of software. I’ve been pretty handy with websites and sql over the years, and Terminal is my best friend as we all know, but sitting down in front of Xcode to solve a problem has never been on my todo list or even radar.
With the emergence of high power Ai models nothing is beyond the realm of impossible these days, I knew what I wanted, I had some kind of idea how to get there but joining up the middle pieces was never going to happen on my own.
Image : Cornfox & Brothers Ltd.
The problem was, mid “gaming” session playing Oceanhorn 2: Knights of the Lost Realmon the AppleTV my DualShock Playstation controller battery died and to be honest I’ve never really known how much battery life has been left since the day I got it. After googling and searching many of the known “indie” and/or “nerdy” software libraries drawing a blank, I cracked on to make my own.
MacOS does have some level of information available in system settings under Bluetooth and Game Controllers but it’s hidden, battery information is only shown when plugged in via usb, knowing this, if I could then use swift to pull the information? 5 hours later and more back and forth with Ai then I care to remember and Battery Controller Monitor was born.
v1.0 of the app is available from the software page it’ll work with all newer generation game controllers which macOS can pull information from, there are no known bugs or gremlins and I'm looking at adding a few features in v2.0 in the spring of 2026.
So, I’m jumping the gun and getting my 2026 New Year’s resolutions out early in public, before December 2025 is even over.
Long-time readers of The Apple Geek will know I love Apple products and their operating systems. You’ll also know I can’t resist rolling out a Linux-based solution wherever I can and that Windows and I have never really seen eye to eye.
What you might not know is that I’ve kept another side of me separate: I’m a bit of a petrolhead. I’ve got a soft spot for older, retro cars 80s, 90s, and early 00s Volkswagens, plus a few German icons from BMW and Porsche. I absolutely cannot stand electric vehicles, and while I appreciate some aspects of modern car tech (Apple CarPlay being the obvious example), most of the new stuff just doesn’t do it for me. That said, retrofitting CarPlay into a 90s VW? Not impossible, just a fun weekend project.
So yes I love both new and old tech. MiniDisc players are my guilty pleasure (and my kryptonite). I adore new Apple hardware, but I’m also conscious of the waste all those perfectly good old machines and gadgets sitting unused, gathering dust, or worse, heading for landfill.
The 2026 Resolution
For 2026, I’m making myself a promise: if a piece of tech can be repaired, renewed, or reused without buying a new one, I’m doing it.
I want this to be a year of learning, problem-solving, and tinkering a proper hands-on year of reviving forgotten hardware and keeping it useful. To ease myself into it, I’ve already lined up two projects.
Project 1 The Doomed iMac 27”
The 2011 iMac 27” was a problem child from the start. Its internal design traps heat right around the GPU an AMD 6770M with 1 GB of VRAM flanked by a 1 TB spinning hard drive on one side and an optical drive directly below. Add in some warm air from the cooling fans, and you’ve got the perfect recipe for a GPU meltdown.
Mine’s had five lives so far. Originally owned by a graphics and sign company, it’s been passed through a few owners, doing everything from professional design work to family homework and YouTube duty. I’ve now given it a sixth chance.
I’ve upgraded the RAM from 4 GB to 32 GB, swapped the mechanical HDD for a 500 GB SSD, and replaced the optical drive with a caddy holding another 500 GB SSD for storage. The result? Cooler internals and snappier performance but the GPU finally gave up, as they all do.
Yes, you can “bake” the GPU literally stick it in an oven at Gas Mark 9 for nine minutes to reflow the solder and get it working again. I’ve done this four times already, just long enough to fire the iMac up, grab data, and order a proper replacement from iMacGfx on eBay.
Part 1 of this project is to install that replacement GPU. Part 2 is to use OpenCore Legacy Patcher to bring the iMac up to a modern macOS maybe Ventura or later.
Alternatively, I might leave macOS High Sierra in place and dual-boot Linux. Either way, it’s staying alive.
Project 2 The iPod Video (5th Generation)
Back to the 90s again. My Mk2 Golf is a proper throwback complete with a 2000-era Kenwood MiniDisc head unit. It even has an adapter that mimics a CD changer and lets me connect an iPod.
Enter my 5th Gen iPod Video. I remember buying it from Argos the month it came out and it’s still in mint condition. The only problem? The hard drive occasionally clicks, and the battery has become moody.
The plan is simple: upgrade the hard drive using an iFlash SD Card adapter with a fast 32 GB card, and replace the battery with a 2000 mAh one. The Golf’s iPod connection powers the device anyway, but while I’m inside, I may as well future-proof it.
I’m keeping this iPod original no wild mods. But if it goes well, I might pick up another 5th Gen and go all out: 3000 mAh battery, massive storage, and maybe a clear or yellow front shell for that early-2000s look.
Old Tech Shouldn’t Sit in a Drawer
Circling back to the title old tech shouldn’t just sit broken in a drawer or end up in landfill. It’s worth fixing, learning from, and breathing new life into.
There’s a simple joy in listening to an album on an iPod with no notifications, no messages, no distractions. The 5th Gen iPod Video has one of the best DACs Apple ever shipped, giving that warmer, richer sound modern devices can’t quite match.
Once these two projects are up and running, I’ll be hunting for more Apple ecosystem gear to revive maybe finding clever ways to integrate older devices into a smart home setup.
AirDrop is the gold standard for sharing files or media between your own devices or Apple users on your local network, Snapdrop filled the void between Apple and Windows / Android devices but its become a little flakey recently which lead me to use Pairdrop.
Pairdrop between non apple to apple of devices it does a lot of stuff right but just like Snapdrop its relying on the browser to do the heavy lifting. But then there is LocalSend.
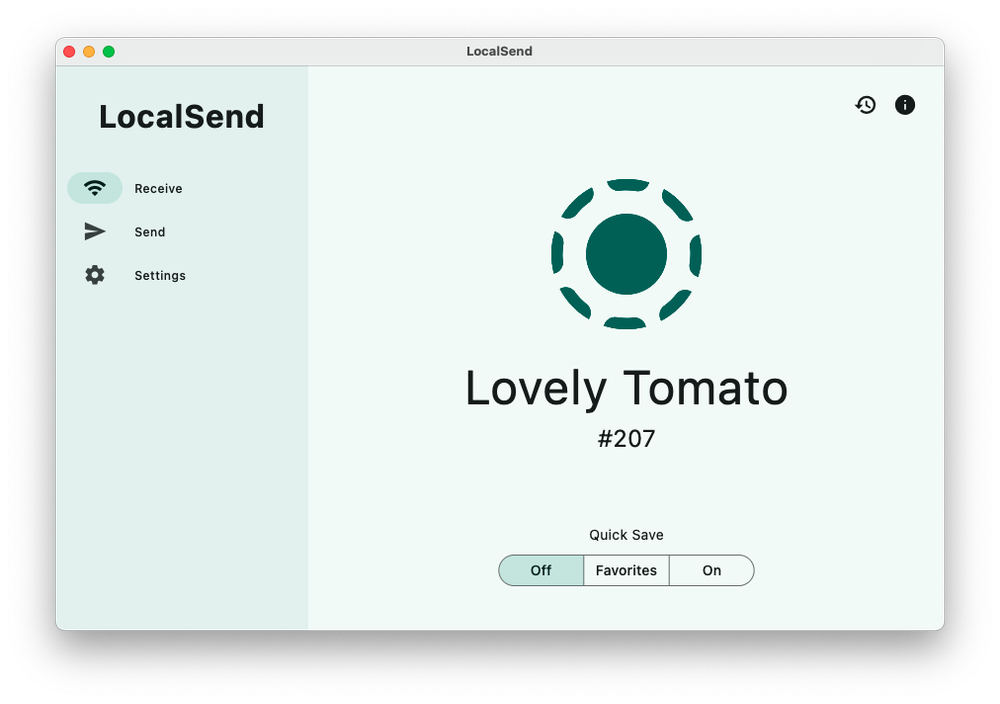
LocalSend Receive mode, each device gets a local unique identifier
On a quest to bring my now Ubuntu powered MacBook Pro, back in to the ecosystem somewhat I discovered LocalSend its an opensource (which you know I love) application that does the same job as AirDrop on an Apple device.
I can be installed via Homebrew, local DMG binaries or via the App Store on Mac. Every base is covered for you.. Linux you have the same choice of binaries options, a snap installer or via FlatHub. The user interface is simple clean and consistent across operating systems, allowing you to support new users and adopters of this program.
Items you want to send are loaded in to App, and when the nearby device comes available you select it and it sends. I find the text function great for sending code or links between devices on different operating systems. The transfers are snappy due to the nature of app to app communication with both acting like server to send and receive, staying away from the bottleneck of modern browsers.
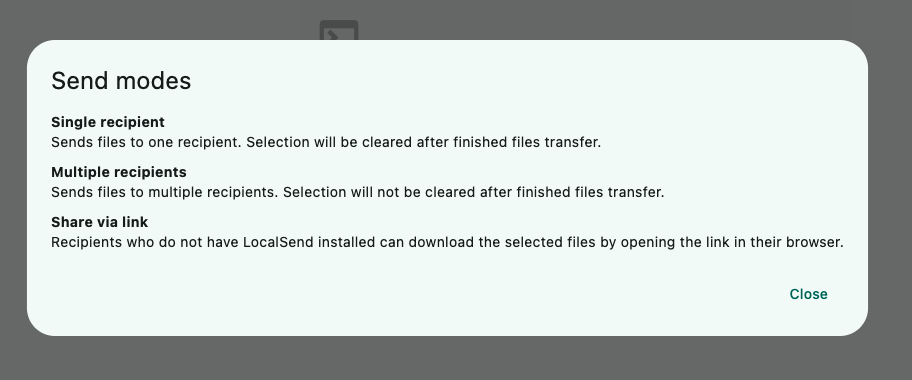
You can build a list of favourites, and give them a more recognisable name for easy identification. There’s also numerous ways of sending the either single send, multiple recipients or via link.
If you like to tweak settings, the settings window has you covered - allowing you to choose a theme, changing the default device name, display language, saving actions on received files, its pretty much covers all you need.
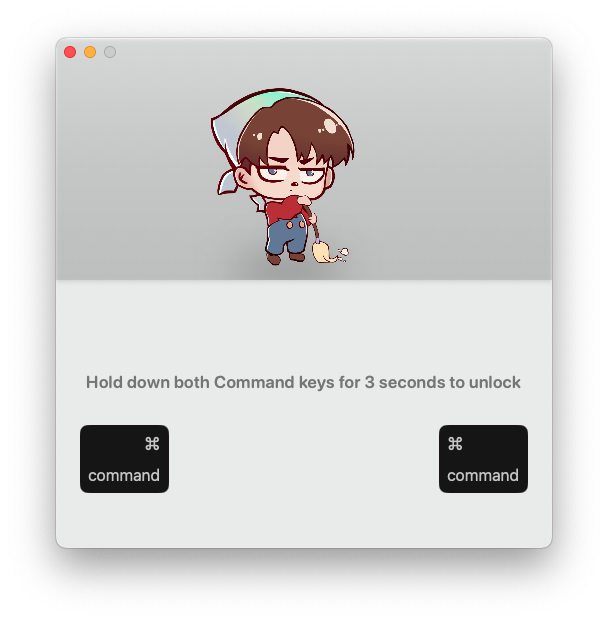
CleanupBuddy is a simple little app I’m always using on one of my Macs. What CleanupBuddy does is lock the keyboard and mouse/trackpad so inputs are ignored during cleaning.
On a MacBook, cleaning the keyboard often risks shutting the device off or forces you to quit everything and be extra careful; with CleanupBuddy you can confidently go to town cleaning without causing any trouble.
You can lock both keyboard and mouse together or either one independently, and it works on any Mac running Ventura or later — so giving the keyboard and mouse a thorough clean on your Mac mini or iMac can be done without powering them down.
To unlock the keyboard once you’ve finished cleaning you simply press and hold both the command keys.
CleanupBuddy is developed by Gui Rambo, who is the developer of AirBuddy another app in constant use in my ecosystem.
Five years ago, The Apple Geek was born out of a simple idea: to share the knowledge I’d acquired over 20+ years of using Apple products. At that time, I was tinkering with old Macs, exploring Linux alternatives, and discovering ways to extend the life of hardware that most people would have discarded.
The first posts were raw, hands-on tutorials sometimes a little rough around the edges but they reflected a genuine love for technology. Early readers were few, but passionate. The joy of seeing someone successfully breathe new life into their old Mac or fix a stubborn software issue made every late-night post worth it.
Over time, The Apple Geek grew from these humble beginnings. We started to explore deeper topics: macOS tweaks, Linux installations, open-source software, and practical guides for tech enthusiasts of all levels. Thank you for being part of a journey that started with a single idea: “Somewhere to document everything I’ve learnt or hacked about with to make work.”
In the past five years, it’s not all been about jotting down what I’ve remembered I’ve ventured down some deep rabbit holes, fully learning more about aspects of the Apple ecosystem I’d previously only scratched the surface of. Each experiment, fix, and project has been a step forward in understanding how Apple technology, Linux, and open-source tools can coexist and complement one another.
Here’s to the next five years of repairs, hacks, open-source discoveries, and geeky adventures. Together, we’ll keep pushing the boundaries of what’s possible one Mac, one Linux install, and one repair guide at a time
MacOS and Linux share something in common that many new users overlook: the Terminal. The Terminal is the command-line interface (CLI) that allows you to communicate directly with your operating system. For many newcomers, it can look intimidating a black screen filled with text, seemingly expecting you to know secret codes. But once you start using it, you’ll quickly see that it’s one of the most powerful tools in your toolkit.
I’ve said it countless times, and I’ll say it again: learning to navigate and function in the Terminal is an essential skill for anyone using macOS or Linux. Even a little familiarity can save you hours of frustration when troubleshooting or performing tasks that would otherwise require several clicks in the GUI.
Before we dive into the commands, here’s a cardinal rule of Terminal usage:
*
Never copy and paste commands from the internet without understanding them.*
While there are many tutorials online offering magical one-liners, blindly running commands can break your system or expose you to security risks. Instead, take the time to type out commands manually, paying attention to spaces, dashes, and syntax. This is how you learn. Trust me, those tiny details matter more than you think.
With that said, let’s explore some basic and safe Terminal commands that every MacOS or Linux user should know.
1. pwd Print Working Directory
The pwd command stands for Print Working Directory. This command shows you your current location within the filesystem.
Example:
pwd
Output might look like:
/Users/Craig/Desktop
This tells you that you are currently in the Desktop folder. Knowing where you are is crucial before performing any other operations—especially when moving or deleting files.
2. cd Change Directory
The cd command allows you to navigate between directories (folders) in the filesystem.
Examples:
cd /Desktop
This moves you into the Desktop directory.
cd ..
This moves you up one level in the directory hierarchy.
cd ~
This brings you back to your home directory.
A quick tip: pressing Tab while typing a folder name will autocomplete it if the folder exists. This is a real time-saver.
3. ls List Directory Contents
ls stands for list, and it displays the contents of your current directory.
Example:
ls
Output might look like:
Documents Downloads Music Pictures
You can also add options for more detail:
ls -l
Shows files with permissions, ownership, size, and date modified.
ls -a
Shows hidden files (files beginning with a .), which are usually configuration files in Unix-based systems.
4. mkdir Make Directory
mkdir creates a new folder.
Example:
mkdir MyNewFolder
Now you have a folder called MyNewFolder in your current directory. Combine it with cd to immediately enter the new folder:
cd MyNewFolder
5. touch Create Empty Files
The touch command creates a new empty file.
Example:
touch notes.txt
This will create a blank file called notes.txt in your current directory. It’s a handy way to quickly create test files or placeholders.
6. cp Copy Files and Directories
cp is used to copy files or directories.
Example:
cp notes.txt backup_notes.txt
This copies notes.txt into a new file called backup_notes.txt.
For directories, use the -r flag to copy recursively:
cp -r MyNewFolder MyNewFolderCopy
7. mv Move or Rename Files
mv can move a file to another directory or rename it.
Examples:
mv notes.txt Documents/
Moves notes.txt into the Documents folder.
mv notes.txt todo.txt
Renames notes.txt to todo.txt.
8. rm Remove Files and Directories (With Caution!)
rm deletes files or directories. Be careful—deleted files don’t go to the Trash.
Example:
rm todo.txt
Deletes the todo.txt file.
For directories:
rm -r MyNewFolder
This recursively deletes the folder and all its contents. Triple check before running this command.
9. man Manual Pages
man shows the manual page for any command. Think of it as the built-in help system.
Example:
man ls
This opens the manual for the ls command, showing all options and usage examples.
10. echo Display Text
echo prints text to the Terminal. It’s simple, but very useful.
Example:
echo "Hello, world!"
Output:
Hello, world!
It can also be used to append text to a file:
echo "My first line" >> notes.txt
This adds a line to notes.txt.
11. cat Display File Contents
cat reads a file and prints its contents to the Terminal.
Example:
cat notes.txt
It’s perfect for quick checks without opening a text editor.
12. clear Clear the Terminal
clear wipes the Terminal screen, giving you a clean workspace.
Example:
clear
13. Combining Commands with Pipes and Redirects
Once you’re comfortable with basic commands, you can combine them for more powerful operations:
Pipe |: Sends output from one command as input to another.
ls -l | grep "Documents"
Finds the word “Documents” in your directory listing.
Redirect >: Saves output to a file.
echo "Hello" > hello.txt
Creates a file called hello.txt with the text “Hello”.
Final Tips for Terminal Newbies
Practice typing commands instead of copy-pasting. It’s how you truly learn.
Start small don’t try to master everything at once.
Use man often it’s your best friend.
Be careful with sudo it gives commands administrative powers, which can break your system if misused.
Experiment in a safe environment create test folders and files to play around.
Learning the Terminal may feel old-school, but it’s an invaluable skill for anyone serious about macOS or Linux. It gives you control, speed, and a deeper understanding of your computer. Even if you only use a handful of commands, you’ll be far better prepared for troubleshooting, automation, and advanced computing tasks.
In its latest chapter of brand storytelling, Apple has released “The Underdogs: BSOD (Blue Screen of Death)”, an eight-minute mini-film that lands as part advertisement, part parable. The video dramatizes a trade show gone haywire — where Windows PCs crash en mass, while Macs quietly soldier on.
It’s clever, provocative, and undeniably provocative.
Rsync is one of those tools that every Mac and Linux user should have in their toolkit. If you’re familiar with Windows, think of rsync as the Unix equivalent of Robocopy a fast, reliable, command-line-based utility for copying or syncing files and folders. Whether you’re backing up your MacBook, moving files between servers, or just organizing your digital life, rsync is a tool that scales from simple tasks to advanced workflows.
In this guide, we’ll cover everything you need to know to get started with rsync, including basic commands, practical examples, and tips for avoiding common pitfalls. By the end, you’ll be confidently moving files around your system like a true Apple Geek.
What is rsync?
Rsync, short for Remote Sync, is a command-line utility primarily used on Unix-based systems, including macOS and Linux. Unlike basic copy commands, rsync is smart: it only transfers the differences between files, saving bandwidth and time.
Some key features:
Incremental syncing: Only new or changed files are transferred.
Versatility: Works locally, over SSH, or even with remote servers.
Speed: Efficiently handles large directories and files.
Cross-platform: Available on Linux, macOS, and even Windows via tools like Cygwin.
On macOS, rsync comes pre-installed. On Linux distributions like Ubuntu, rsync is often installed by default, but if it’s missing, you can easily install it via your package manager:
sudo apt update
sudo apt install rsync
Basic Syntax
The simplest rsync command looks like this:
rsync [options] source destination
Where:
source is the file or folder you want to copy.
destination is the target location.
[options] are switches that modify rsync’s behavior.
For example:
rsync -rv ~/Desktop/Folder1/ ~/Documents/Folder2/
Here’s what the switches do:
-r Recurse into directories, so subfolders are included.
-v Verbose mode, which shows you what’s happening.
Switches can be stacked, making commands cleaner: -avz is a common combination:
-a Archive mode (preserves permissions, timestamps, symbolic links).
-v Verbose output.
-z Compress files during transfer for faster syncing, especially useful over networks.
rsync Help and Documentation
Before diving into advanced features, it’s a good idea to familiarize yourself with rsync’s built-in help. In the terminal, type:
rsync --help
You’ll see a list of all options, switches, and examples. Spend some time reading through this rsync is powerful, but a small typo can lead to unexpected results.
Your First rsync Command
The best way to learn rsync is hands-on. Let’s create a simple experiment:
Create a folder on your Desktop, e.g., TestSource.
Create a folder in Documents, e.g., TestDestination.
Network Errors: Use -P for partial transfers and progress display.
Why Every Apple Geek Should Know rsync
Reliable Backups: Incremental syncing saves time and bandwidth.
Cross-Platform Power: Works on Linux, macOS, and even Windows with Cygwin.
Automation Friendly: Cron jobs and scripts make scheduled syncing trivial.
Transparency: You see exactly what’s being copied.
Whether you’re restoring a MacBook after a hard drive failure, syncing projects between Linux servers, or tinkering with old hardware, rsync is an indispensable tool for Apple enthusiasts who love control, efficiency, and reliability.
Wrapping Up
Rsync may seem intimidating at first, especially if you’re used to GUI-based file management, but once you start using it, it becomes an essential part of your workflow. Its speed, flexibility, and reliability make it perfect for everyday file management, backups, and more.
Start small, experiment with simple file movements, and gradually explore advanced options like remote syncing, exclusions, and automation. In no time, you’ll be an rsync pro the true Apple Geek way.
Next Steps for Apple Geeks:
Experiment with --exclude and --delete to create smart backup strategies.
Automate your backups using cron (Linux) or launchd (macOS).
Combine rsync with SSH for secure offsite syncing.
With rsync in your toolkit, your Mac and Linux systems are faster, safer, and more organized than ever. Welcome to the geek side!
Apple products have a rich history of innovation, and for enthusiasts, collectors, and IT professionals, keeping track of all the models, specifications, and changes can be overwhelming. Fortunately, Mactracker provides a comprehensive solution. Available for macOS and iOS, Mactracker is a free application that serves as an extensive database of every Apple product ever released. Whether you’re looking for details on the latest MacBook or a vintage Macintosh from the 1980s, Mactracker has you covered.
What is Mactracker?
Mactracker is an application developed by Ian Page that provides an in-depth look at Apple’s entire product history. It includes specifications, release dates, operating system support, benchmark data, and even original pricing. It covers everything from Macs, iPhones, iPads, and Apple Watches to peripherals like keyboards, mice, and software.
For Apple enthusiasts, Mactracker is an essential resource to track the evolution of Apple’s technology. For IT professionals, it’s a valuable tool for managing hardware lifecycles, understanding compatibility, and determining repair eligibility.
Features of Mactracker
Extensive Database
Mactracker includes detailed technical specifications for every Apple product. This includes processor types, RAM, storage, display specifications, and much more. Each product listing also includes a history of operating system support, showing which macOS or iOS versions the device originally shipped with and which updates it can support.
Mac Benchmarks
One of the standout features is the inclusion of benchmark data for Mac computers. This allows users to compare the performance of different models over the years, which is particularly useful when deciding whether to upgrade.
Lifespan & Support Information
Mactracker provides key information on Apple’s support status for devices. It indicates whether a product is still receiving software updates, classified as vintage (no longer sold but still supported), or obsolete (no longer receiving hardware or software support). This is particularly helpful for IT departments managing older Apple hardware.
Software Information
Not only does Mactracker cover hardware, but it also includes details on Apple software releases, including macOS, iOS, and classic Mac OS versions. It provides insights into each operating system’s features, release dates, and compatibility.
Notifications & Tracking
Users can create custom lists of Apple products they own and receive notifications about software updates, warranty coverage, and support changes. This feature is beneficial for Apple users who want to stay informed about their devices.
Why Use Mactracker?
Mactracker is an invaluable tool for anyone with an interest in Apple’s products. Whether you’re an Apple collector researching historical models, a tech enthusiast comparing specs, or an IT professional managing Apple devices, Mactracker simplifies access to detailed product information.
The best part? It’s free and regularly updated to include Apple’s latest releases. With its wealth of information and user-friendly interface, Mactracker remains the ultimate Apple product reference guide.


 Little Snitch is now on Linux. See which apps are making network connections, block unwanted ones and find out how chatty your system really is.