❌

Reading view

There are new articles available, click to refresh the page.

25+ Best Free Illustrator Brush Sets for Digital Artists in 2026

Finding high-quality Illustrator brushes can take time, especially when compared to the huge number of options available for Photoshop. But the right brush pack can quickly improve your workflow and help you create more detailed, expressive artwork.

Illustrator brushes make it easier to add textures, patterns, and hand-drawn effects that would be difficult to build from scratch. They are useful for everything from vector illustrations to typography and branding work.

This collection brings together some of the best free Illustrator brush packs available. You will find a wide range of styles, including stipple, grunge, watercolor, doodles, and more, so you can quickly find brushes that fit your project.


Stipple Illustrator Brushes

Free to Download, 8 Illustrator Brushes

With this free stipple brush set, you can add texture, shading, and depth to your digital art. They’re also great for creating dotted shading, halftone textures, and retro-style gradients. Perfect for comic illustrations.
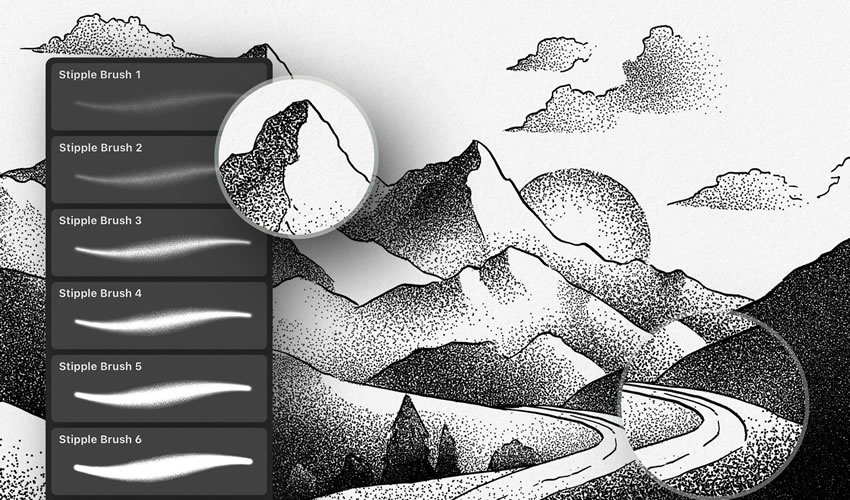
Stipple Brushes adobe illustrator brush brushes abr pack set free

Massive Pack of Brushes & Symbols

330 Illustrator Brushes

This pack is a must-have for any project. This huge collection of Illustrator brushes contains over 330 strokes, speech bubbles, swooshes, splashes, and tons of other high-resolution drawings and paintings.
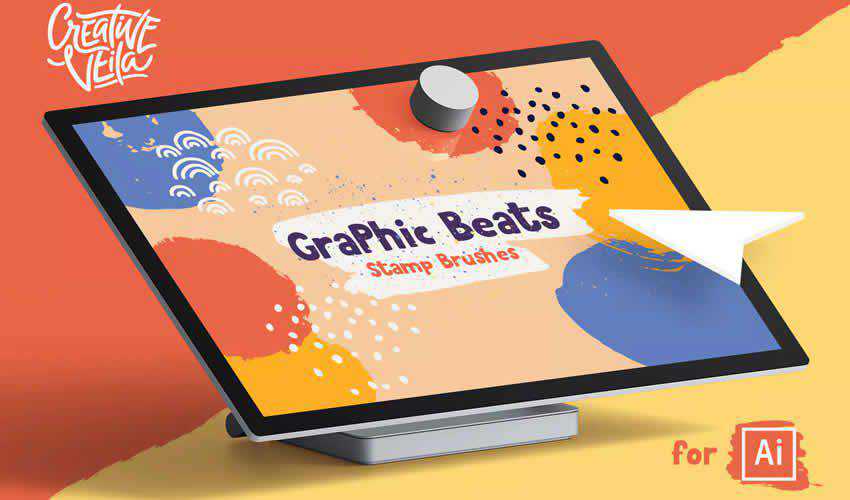
Massive Pack Symbols adobe illustrator brush brushes abr pack set free

Preppy Art Illustrator Brushes

Free to Download, 29 Illustrator Brushes

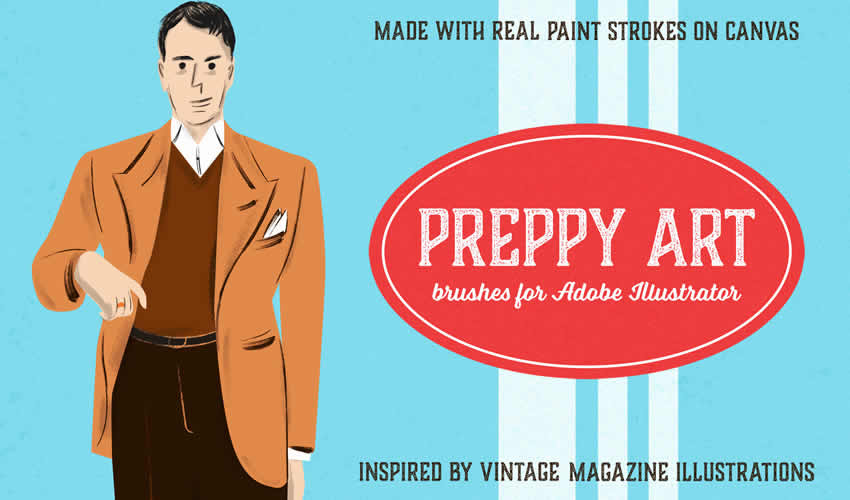
With the Preppy Art Illustrator Brushes Kit, you can add a hint of elegance to your work. This free set includes 24 high-quality brushes, each with a preppy, sophisticated look and feel. These brushes are perfect for adding delicate details and subtle textures.
Preppy Art adobe illustrator brush brushes abr pack set free

Watercolor & Black Pattern Brushes

42 Illustrator Brushes

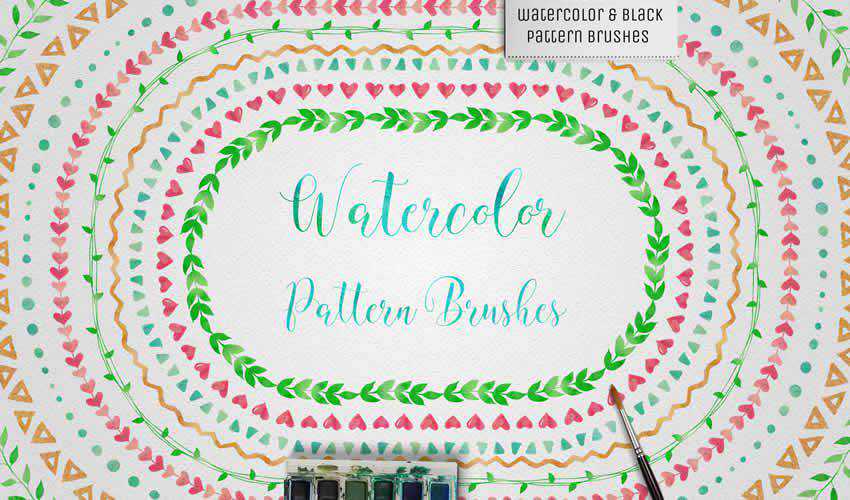
This set of Illustrator brushes includes 42 watercolor brushes and a bonus set of 42 black pattern brushes. You can easily use them to create mandalas, wreaths, or borders.
Watercolor Black Pattern adobe illustrator brush brushes abr pack set free

Wax Crayon Brushes

Free to Download, 40 Illustrator Brushes

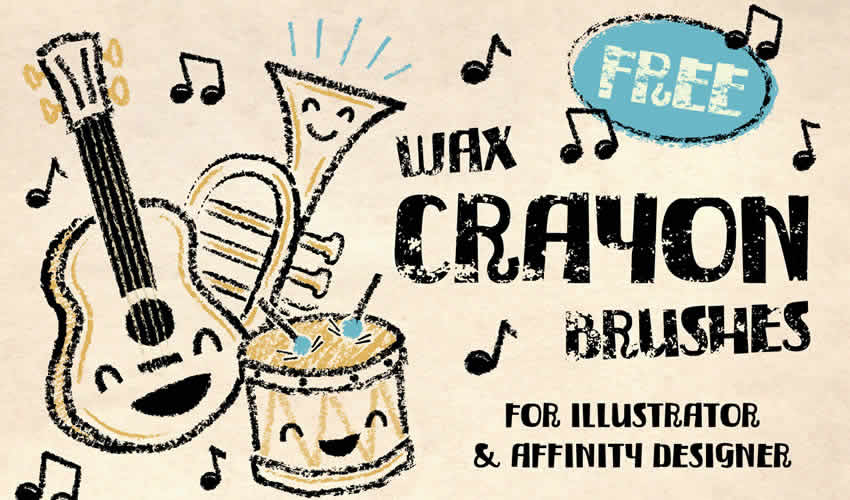
If you’re looking to add a naive charm to your designs, then look no further than this free chunky texture brush set. There are 40 wax crayon brushes in the free pack. You can also use this brush pack in Affinity Designer.
Wax Crayon adobe illustrator brush brushes abr pack set free

Patts Brush Collection

50 Illustrator Brushes

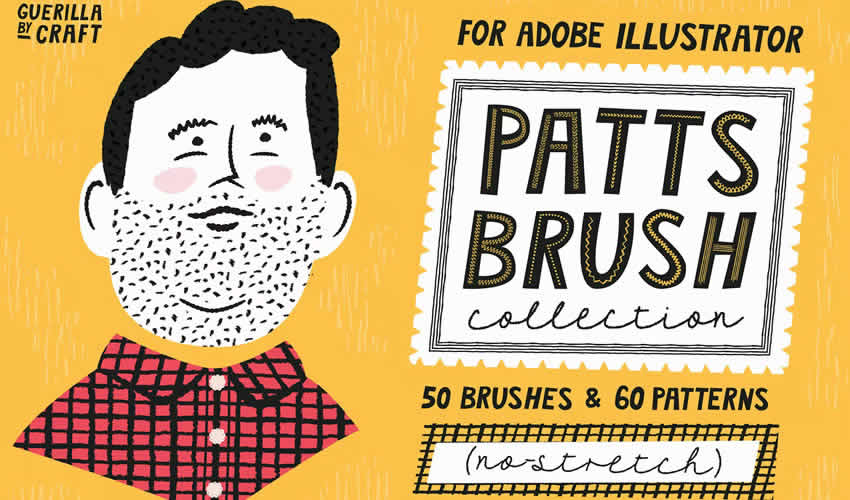
As well as including 50 Illustrator brushes, this pack also comes with seamless patterns. With this Illustrator brush pack, you can make simple illustrations look beautiful.
Patts Brush Collection adobe illustrator brush brushes abr pack set free

Spray Paint Stipple Brushes

Free to Download, 12 Illustrator Brushes

This free set includes 12 high-quality Illustrator brushes that add a realistic spray-paint effect to your designs. Perfect for creating edgy artwork such as graffiti-style posters, punk rock album covers, and urban landscapes.
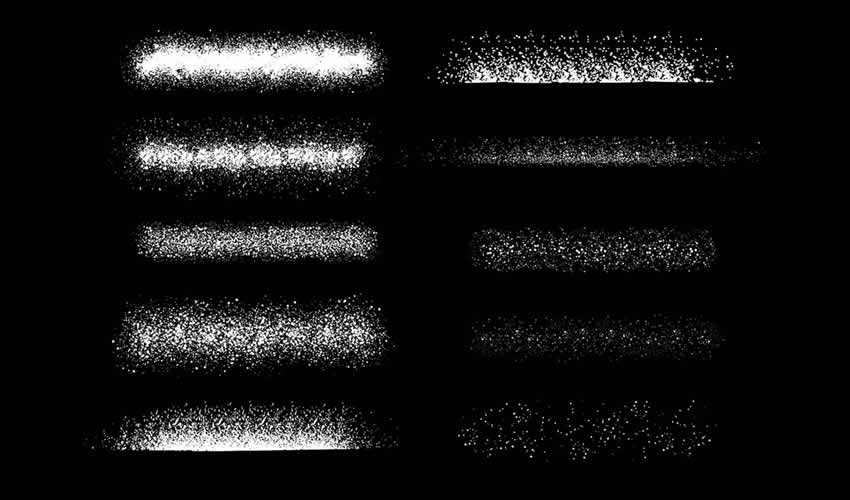
Spray Paint Stipple adobe illustrator brush brushes abr pack set free

Scribble & Scrawl Brushes

44 Illustrator Brushes

This set of 44 Illustrator brushes is perfect for any primitive-looking artwork or childlike drawings. You’ll find various elements that are easy to apply and edit to suit your project’s needs.
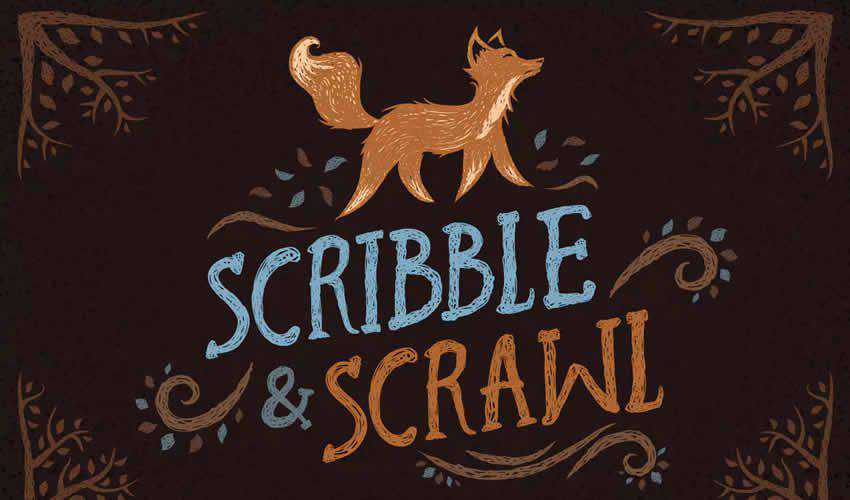
Scribble Scrawl adobe illustrator brush brushes abr pack set free

Sketch Brushes for Illustrator

Free to Download, 10 Illustrator Brushes

This free Illustrator set includes 10 brushes for creating pencil sketches with rough, hand-drawn lines. They’re perfect for concept art or for adding a natural, handmade feel to your art.
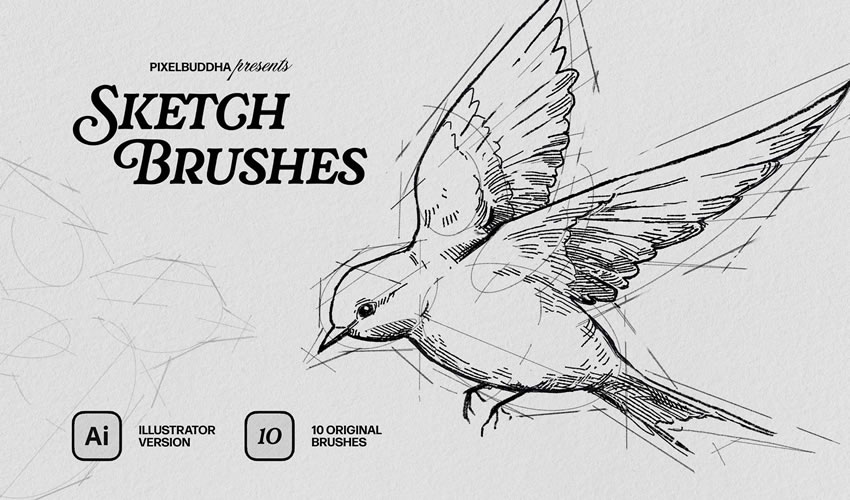
Sketch Brushes adobe illustrator brush brushes abr pack set free

Spray & Hatch Brushes

Free to Download, 20 Illustrator Brushes

This free Illustrator texture package includes ten spray and ten hatch brushes. These brushes allow you to create volume and shadow, highlight details, and emphasize composition elements.
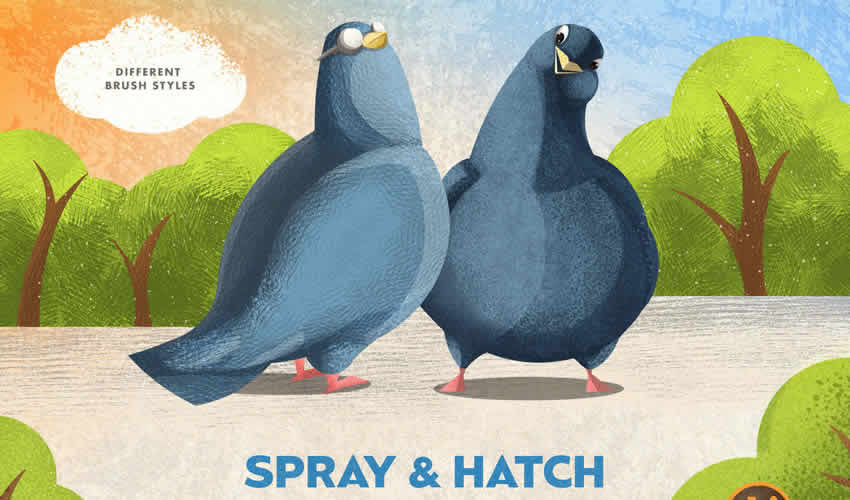
 adobe illustrator brush brushes abr pack set free

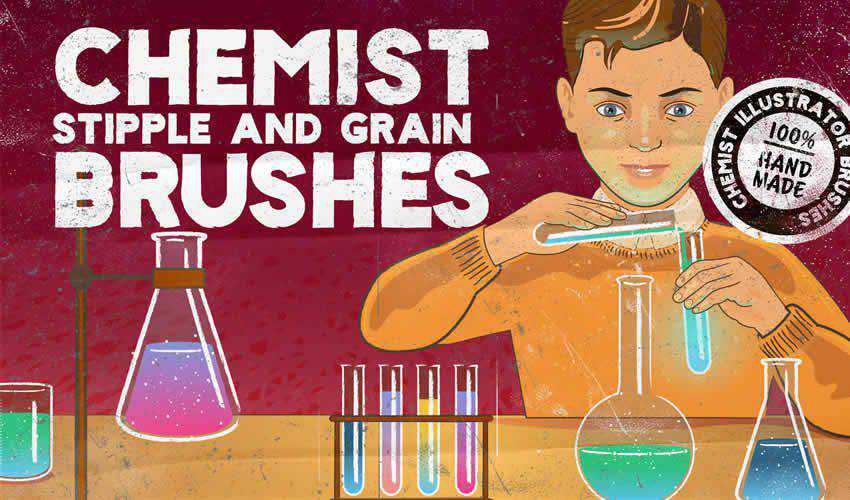
Chemist Stipple & Grain Brushes

Free to Download, 35 Illustrator Brushes

Are you working on a design project for a chemistry lab? This set includes scatter shader brushes, textured and clear line brushes, grain and stipple brushes, and, as a bonus, retro texture brushes for Photoshop.
Chemist Stipple Grain adobe illustrator brush brushes abr pack set free

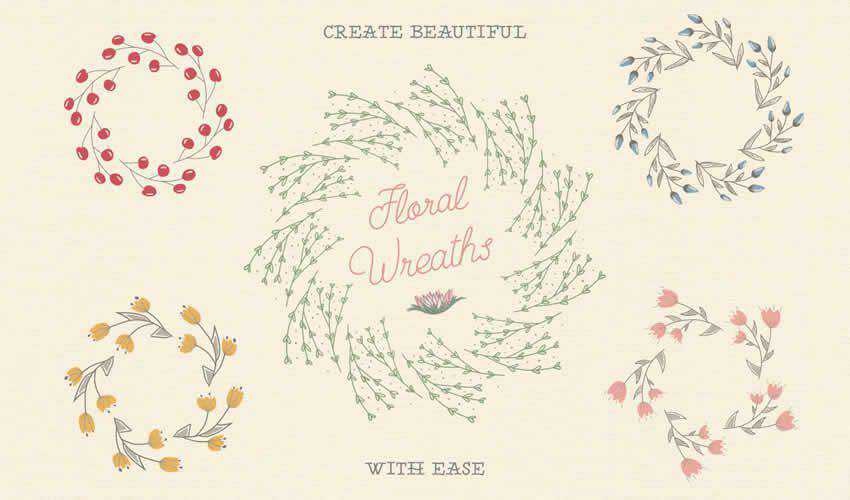
Floral Pattern Brushes For Illustrator

Free to Download, 25 Illustrator Brushes

This brush pack features a lovely collection of floral pattern brushes for Illustrator. You’ll find 25 pattern brushes and 25 individual illustrations for your projects.
Floral Pattern adobe illustrator brush brushes abr pack set free

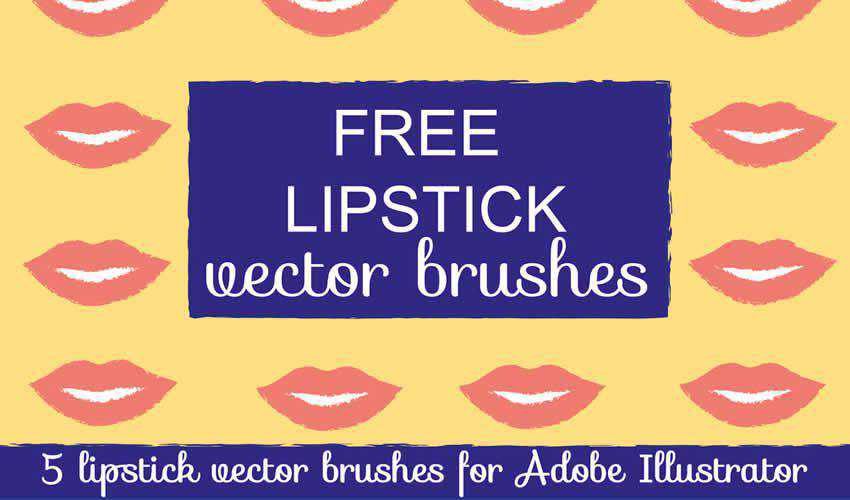
Lipstick Vector Brushes for Illustrator

Free to Download, 5 Illustrator Brushes

Consider this free pack for Illustrator if you need a unique vector brush for a fashion or beauty project. The pack contains five individual brushes and is free for personal and commercial use.
Lipstick Vector adobe illustrator brush brushes abr pack set free

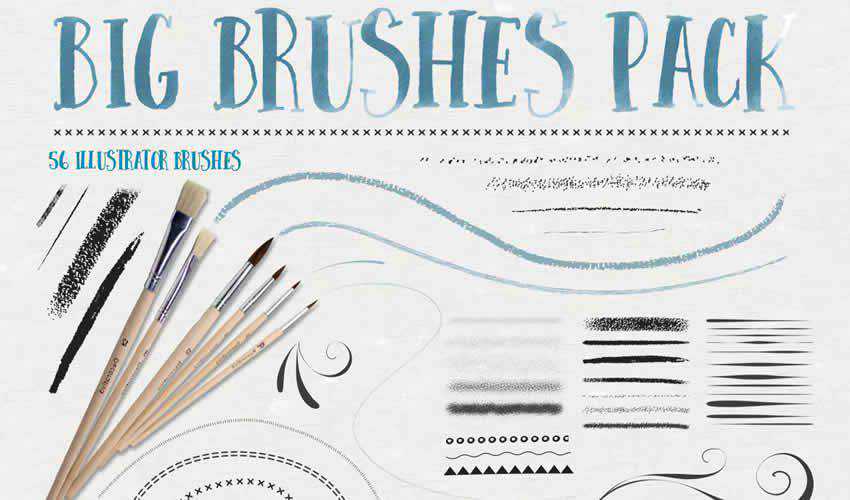
Big Illustrator Brushes Pack

56 Illustrator Brushes

This pack includes a set of 56 Illustrator brushes, including stipple, chalk and pastel, ink, flourish, patterns, and more. The download also contains four distressed stipple seamless vector swatches.
big adobe illustrator brush brushes abr pack set free

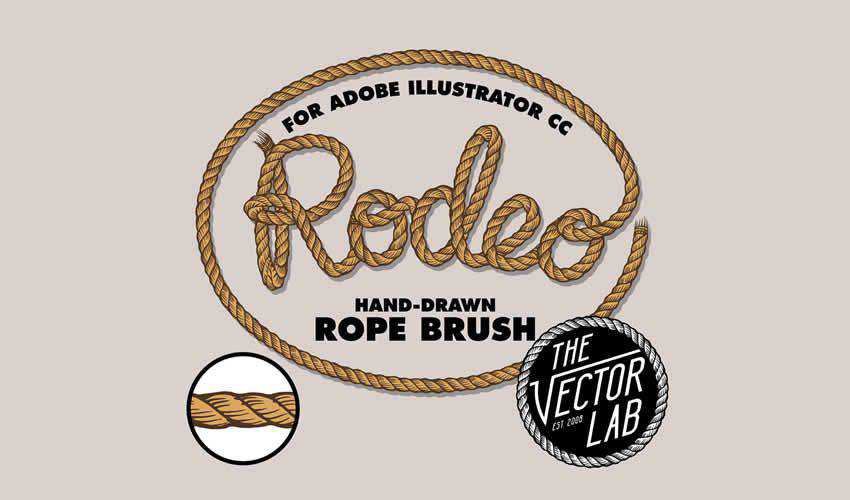
Rodeo Hand Drawn Rope Brush

Free to Download, 5 Illustrator Brushes

This brush pack includes a hand-drawn rope brush that’s perfect for any design. You can easily adjust the rope’s width and change its color. The brush set is free for personal and commercial projects.
Rodeo Hand Drawn Rope adobe illustrator brush brushes abr pack set free

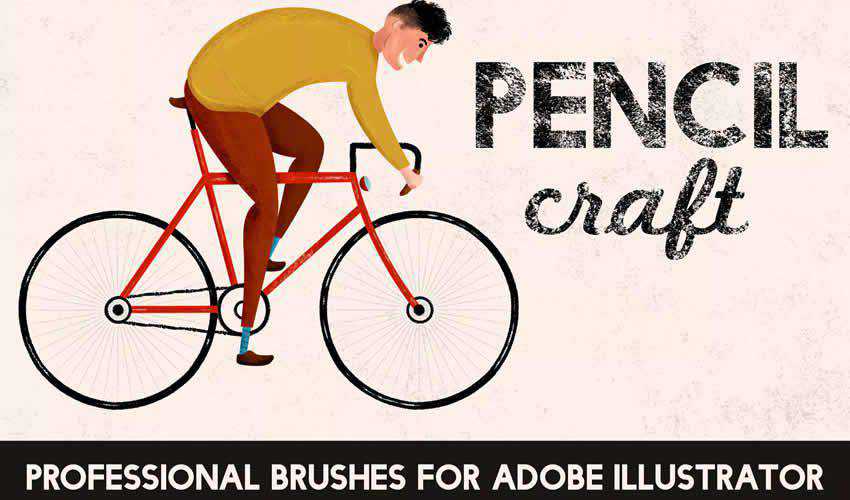
Pencilcraft Illustrator Brushes

30 Illustrator Brushes

This brush pack is a perfect choice if you need to give your illustrations a real-life, hand-drawn feel. The free pack contains 30 brushes with infinite lengths.
Pencilcraft adobe illustrator brush brushes abr pack set free

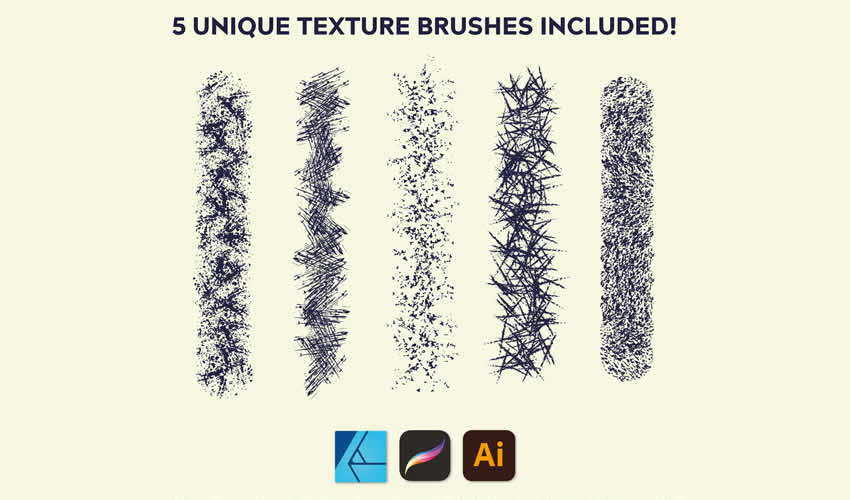
Texture Illustrator Brushes

Free to Download, 10 Illustrator Brushes

These 10 free texture brushes will add depth to your illustrations. They’re perfect for adding realism to your work.
Texture adobe illustrator brush brushes abr pack set free

Vintage Banner Illustrator Brushes

Free to Download, 19 Illustrator Brushes

This free set includes 10 hand-drawn Illustrator brushes that add a vintage touch to your illustrations. Perfect for retro-inspired posters, website banners, and social media graphics.

Vintage Banner adobe illustrator brush brushes abr pack set free

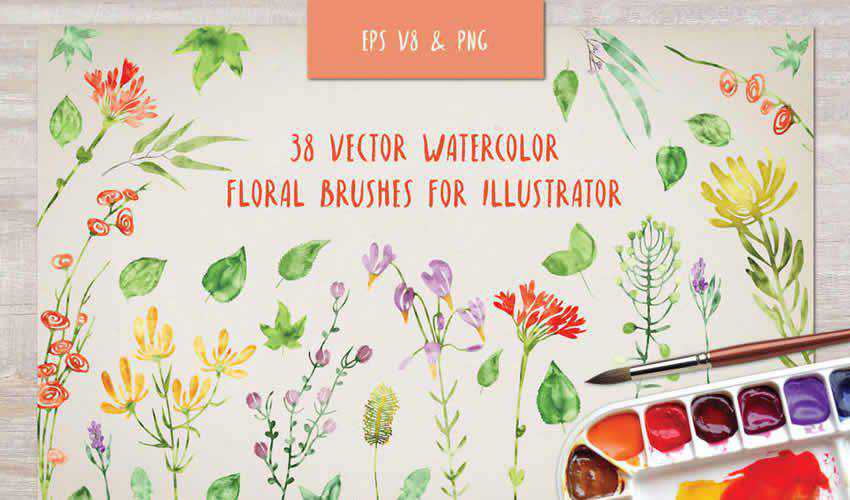
Floral Watercolor Brushes Bundle

Free to Download, 38 Illustrator Brushes

Try this floral watercolor brush pack if you’re working on a wedding project. These brushes can create unique backgrounds or trims for wedding invitations. The free package includes 38 brushes, usable for both personal and commercial projects.
Floral Watercolor adobe illustrator brush brushes abr pack set free

Doodle Brushes for Illustrator

Free to Download, 4 Illustrator Brushes

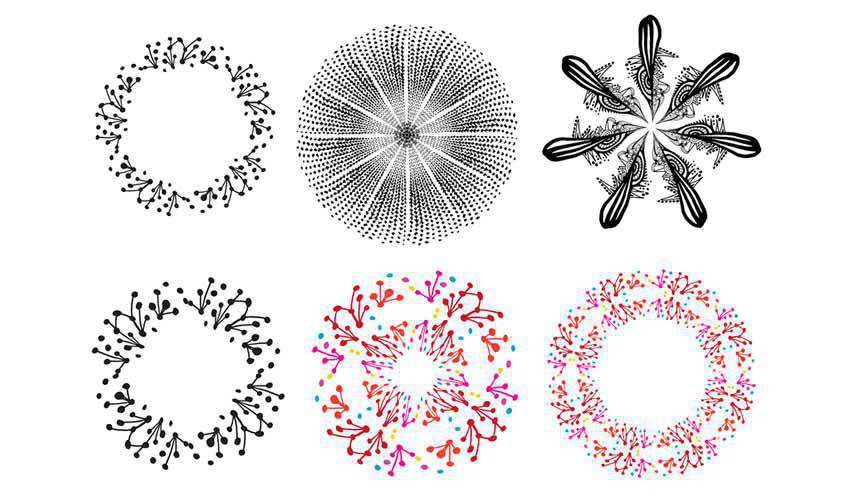
With the help of this doodle brush pack, you’ll be able to create unique wreaths and borders. The package contains four different brushes, and you can easily change the colors to match the project you’re working on.
Doodle adobe illustrator brush brushes abr pack set free

Halftone Vector Brushes

Free to Download, 5 Illustrator Brushes

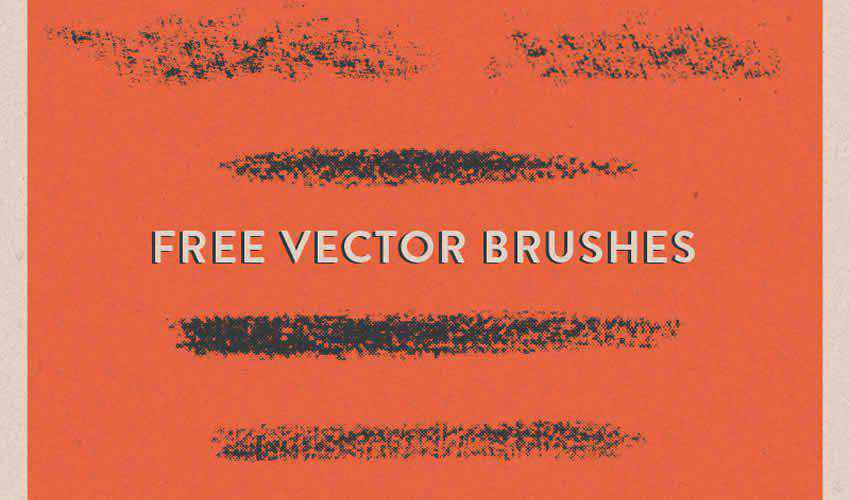
Consider this brush pack of halftone vector brushes to add a grungy feel to your digital art. The package includes five brushes and can be used in both your personal and commercial projects.
Halftone Vector adobe illustrator brush brushes abr pack set free

Paper Tooth Line Brushes

Free to Download, 4 Illustrator Brushes

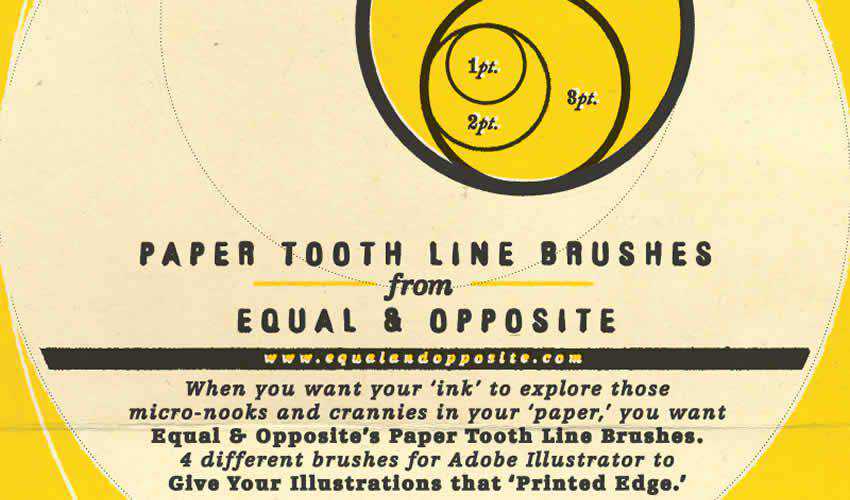
If you’re trying to achieve a printed look for your design project, then this brush pack is the perfect choice. The package contains four brushes that give your artwork a “jagged edge” printed look.
Paper Tooth Line adobe illustrator brush brushes abr pack set free

Adobe Illustrator Metal Gradients

Free to Download, 140 Illustrator Brushes

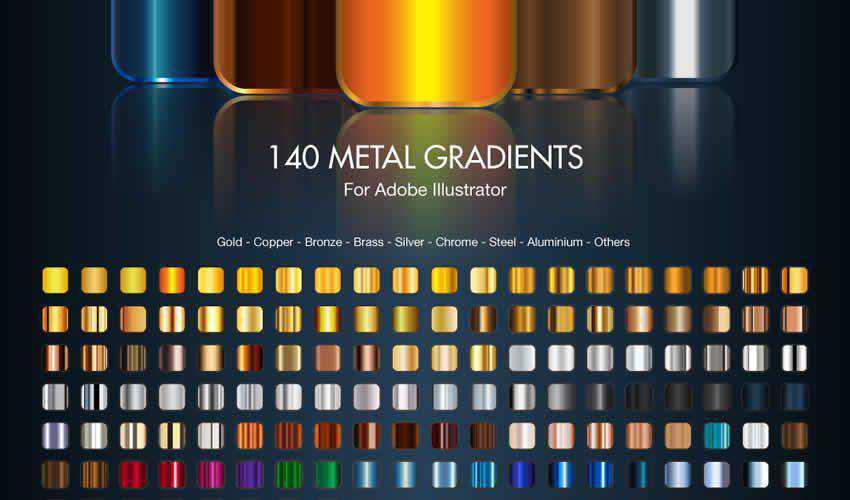
Finding high-quality gradients for Illustrator can be challenging. With this set, you will no longer feel like you are lacking. The pack comes with 140 free brushes.
Metal Gradients adobe illustrator brush brushes abr pack set free

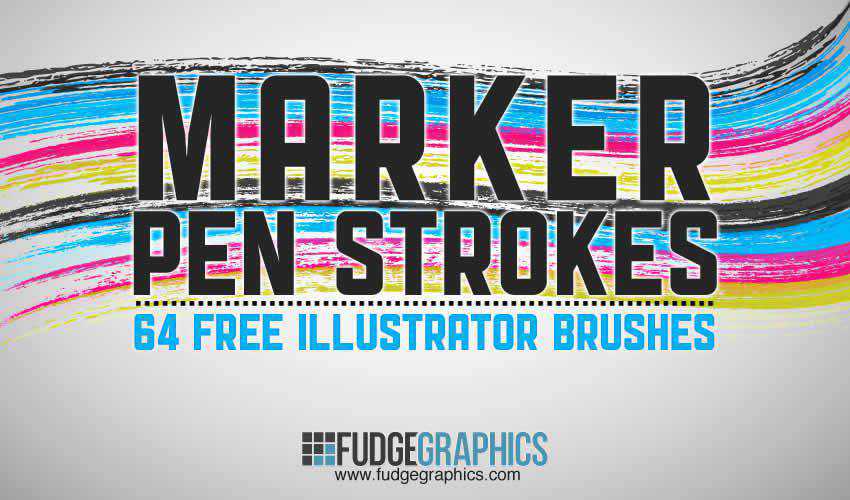
Marker Pen Strokes AI Brushes

Free to Download, 64 Illustrator Brushes

This set contains 64 high-quality brushes of marker pen strokes and scribbles. You can use them in both personal and commercial projects, and attribution is not required.
Marker Pen Strokes adobe illustrator brush brushes abr pack set free

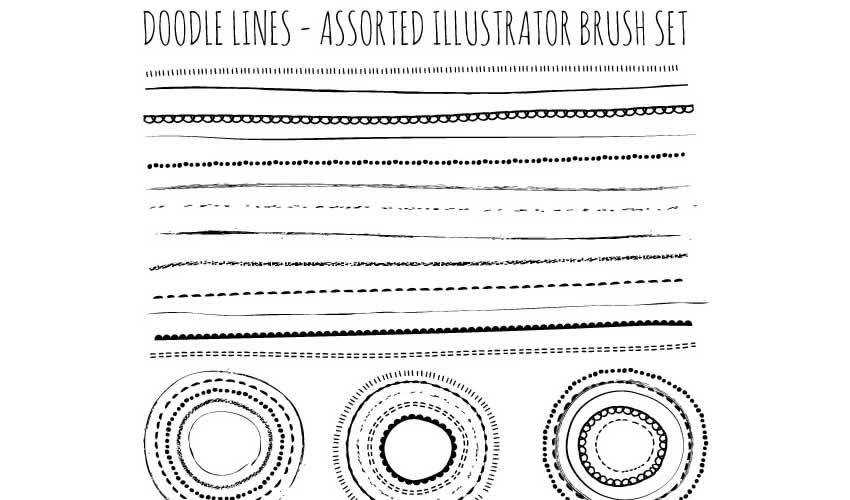
Natural Sketch Doodle Line Brushes

Free to Download, 16 Illustrator Brushes

This is another excellent set for adding a hand-drawn feel to your designs. You’ll find various doodle lines, and you can use them freely in any personal project.
Natural Sketch Doodle Lines adobe illustrator brush brushes abr pack set free

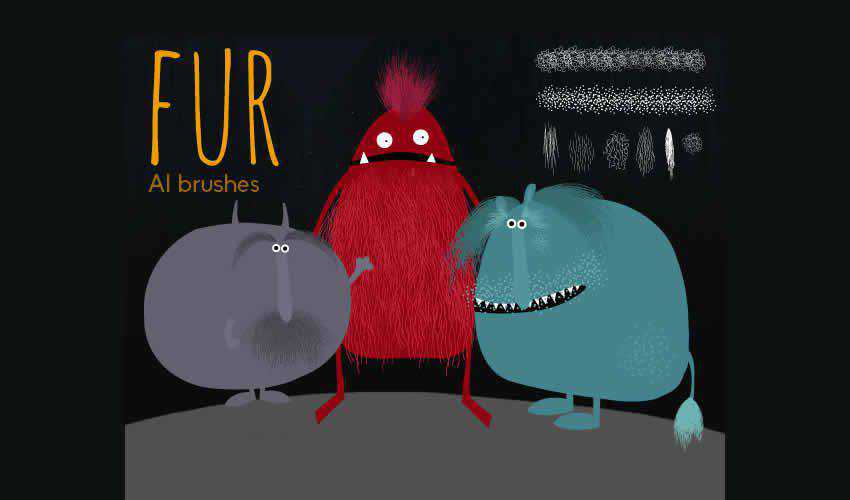
Hairy Fur Illustrator Brushes

Free to Download, 8 Illustrator Brushes

This set of 8 furry brushes is perfect for any design project featuring pets and animals. The brushes are free for personal use and work best when applied gradually in different tones.
Hairy Fur adobe illustrator brush brushes abr pack set free

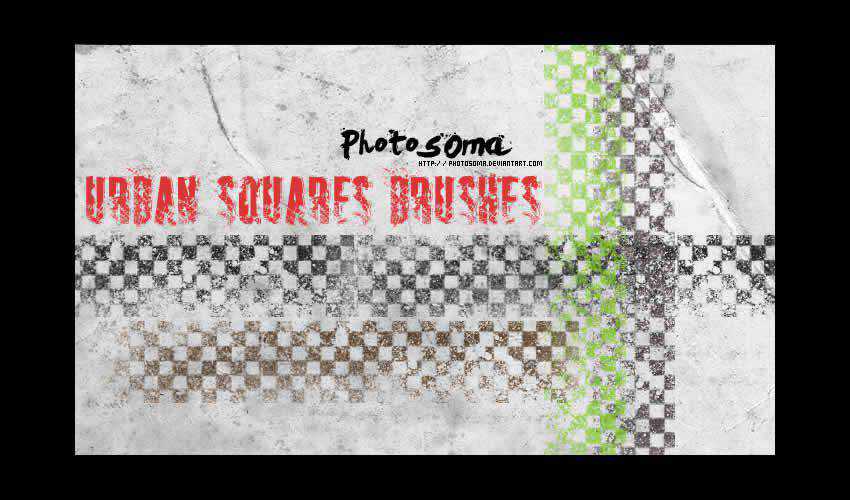
Urban Squares Illustrator Brushes

Free to Download, 10 Illustrator Brushes

Add a unique touch to your designs with this free urban square brush pack. These brushes can be used in personal and commercial projects, with attribution appreciated but not required.
Urban Squares adobe illustrator brush brushes abr pack set free

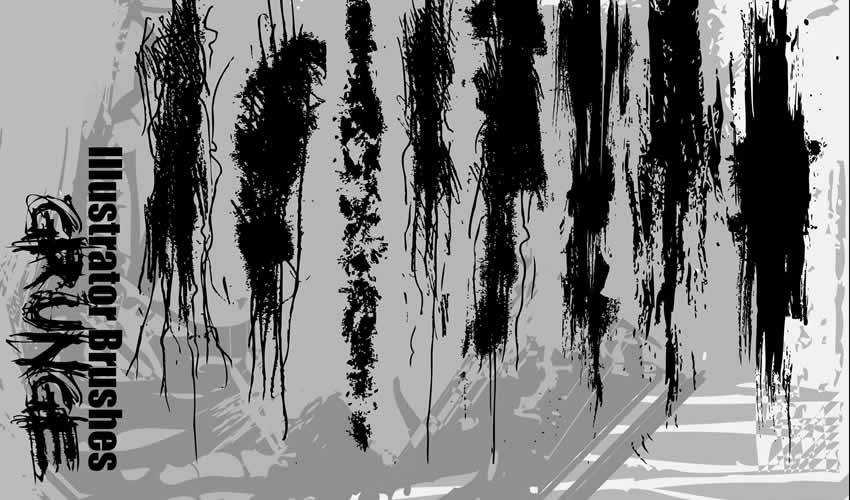
Illustrator Grunge Brushes

Free to Download, 8 Illustrator Brushes

These grunge brushes are great for adding a grungy aesthetic to your artwork. The pack includes a variety of brushes for personal and commercial projects.
Grunge adobe illustrator brush brushes abr pack set free

How to Install Brushes in Illustrator

Installing Illustrator brushes is simple. Here’s how to do it:

  1. Download Brushes: Download one (or all) of the brush sets from this collection, or you can create your own. Brushes often come in AI, EPS, or ABR file formats.
  2. Locate Brushes Folder: Open Illustrator and go to the Brushes panel (Window > Brushes). Select Open Brush Library in the panel menu and then choose Other Library.
  3. Import Brushes: Navigate to the downloaded file and select the corresponding brush. Click Open to import the brushes.
  4. Organize Brushes: After importing, the brushes will appear in the Brushes panel. You can now create new brush libraries and organize brushes into categories for easier access.

How to Use Brushes in Illustrator

Illustrator brushes offer many creative possibilities and can add depth and texture to your illustrations, designs, and artwork. Here’s how to use them:

  1. Select Brush Tool: Choose the Brush Tool from the Tools panel on the left.
  2. Select Brush: In the Brushes panel, select the brush you want to use. You can preview the brush strokes by hovering over the brushes.
  3. Adjust Brush Settings: Customize the brush settings using the Brush Options panel (Window > Brush Settings) to control the size, opacity, color, and more.
  4. Start Drawing: Click and drag on the artboard to create brush strokes. Experiment with pressure, speed, and direction for different effects.
  5. Change Stroke Color: You can change the stroke color of the brush by selecting the stroke and using the Color panel.
  6. Modify Strokes: After creating a brush stroke, you can modify its appearance using the Stroke panel (Window > Stroke) to adjust stroke weight, style, and more.
  7. Expand Appearance (Optional): If you want to convert the brush strokes into editable paths, you can select the strokes and go to Object > Expand Appearance.

How to Create Your Own Illustrator Brushes

Creating your own Illustrator brushes allows you to add unique textures, patterns, and strokes to your designs. Here’s how to create custom brushes in Adobe Illustrator:

  1. Design Your Element: Create the design, shape, or pattern that you want to turn into a brush. This could be a line, texture, scatter of objects, or even calligraphy.
  2. Select and Define: Select the artwork you want to turn into a brush and open the Brushes panel (Window > Brushes).
  3. New Brush: In the Brushes panel menu, choose New Brush. A dialog box will appear with different brush types: Scatter, Art, Pattern, or Calligraphic.
  4. Choose Brush Type: Select the brush type that fits your artwork. Each type has unique properties for applying the brush stroke.
  5. Brush Options: Customize the brush settings based on the brush type you selected. Change settings like size, spacing, angle, and scattering.
  6. Preview and Name: Click OK to create the brush. You’ll see a preview of the brush stroke. Give your brush a descriptive or memorable name.
  7. Save and Use: Click OK again to save the brush, and it will appear in the Brushes panel and be ready to use.

The post 25+ Best Free Illustrator Brush Sets for Digital Artists in 2026 appeared first on Speckyboy Design Magazine.


Oh captain, our captain: Ars staff remembers Patrick Stewart

Along with the rest of the world, we at Ars are mourning Sir Patrick Stewart—the beloved award-winning actor best known as Captain Jean-Luc Picard in Star Trek: The Next Generation and Professor Charles Xavier in the X-Men franchise—who died Wednesday at the age of 86.

A statement released by Stewart's representatives said:

We announce with great sorrow the passing of Sir Patrick Stewart yesterday at his home in Los Angeles, in the loving care of his beloved wife Sunny, following a brief and poignant journey with Alzheimer’s Disease and Lewy Body Dementia. He has been held in the warm embrace of family and friends, surrounded by live music, prayer, tears, laughter, and the kind of profound emotion that only he could inspire after a lifetime of devotion to us all. We will forever cherish the peaceful ease and reflection on his face, an enduring reminder of his invincible grace.

Through the actor's X account, the family has requested that, in lieu of flowers, memorial contributions be made to the Johns Hopkins Alzheimer’s Disease Research Center Fund and the Alzheimer’s Foundation of America Caregiver Resources.

Read full article

Comments

© CBS/Paramount+

PHP2Shell scare sees SuperTuxKart pull its online server

SuperTuxKartSuperTuxKart has taken several online services offline, having pulled the server that powers them rather than risk it being exploited by PHP2shell. The open-source karting game is not alone in ‘pitting’ to patch, with Wikimedia, DeviantArt, government websites and many more taking various systems offline to harden against it. While offline, gamers can’t reset their online account passwords, check rankings or upload new add-ons. Offline components, like split-screen and LAN multiplayer, do work, as do online add-on downloads and online play, but only for registered users. SuperTuxKart notes that attempts to exploit php2shell were recorded as early as 17 October, […]


You're reading PHP2Shell scare sees SuperTuxKart pull its online server, a blog post from OMG! Ubuntu. Do not reproduce elsewhere without permission.

PHP2Shell scare sees SuperTuxKart pull its online server

SuperTuxKartSuperTuxKart has taken several online services offline, having pulled the server that powers them rather than risk it being exploited by PHP2shell. The open-source karting game is not alone in ‘pitting’ to patch, with Wikimedia, DeviantArt, government websites and many more taking various systems offline to harden against it. While offline, gamers can’t reset their online account passwords, check rankings or upload new add-ons. Offline components, like split-screen and LAN multiplayer, do work, as do online add-on downloads and online play, but only for registered users. SuperTuxKart notes that attempts to exploit php2shell were recorded as early as 17 October, […]

You're reading PHP2Shell scare sees SuperTuxKart pull its online server, a blog post from OMG! Ubuntu. Do not reproduce elsewhere without permission.

Does opting out of smart TV tracking work? Research finds “suspicious” traffic.

Smart TVs running operating systems from Samsung, Vizio, and Roku continue sending data to automatic content recognition (ACR) endpoints after users opt out of tracking in the devices’ settings, according to research published on Monday. The paper from Northeastern University researchers points to potential privacy violations from some of the biggest TV brands.

ACR captures video screenshots or audio clips from smart TVs and sends the data to remote servers, where it's used for things like measuring content viewership and serving targeted ads.

The paper, "Watching the Watchers: Privacy Analysis of US Smart TV Automatic Content Recognition," examined eight smart TV OSes across 12 smart TVs from 10 manufacturers (Amazon, Hisense, LG, Roku, Samsung, Sony, Supersonic, TCL, Vizio, and Westinghouse) to examine when smart TVs use ACR and how effective opting out of user tracking is.

Read full article

Comments

© https://www.gettyimages.com/detail/photo/modern-living-room-with-smart-tv-and-remote-control-royalty-free-image/2226225055

She Taught the Macintosh to Smile

The Macintosh didn’t always smile. Susan Kare gave it one — and with a handful of black pixels, helped transform the computer from an intimidating machine into something that felt human. More than 40 years later, we’re still speaking the visual language she helped create.

Dave the Diver is wrapping up its DLC plans with an aquatically appropriate Subnautica 2 collab

I am not a huge fan of collaboration DLCs, mostly because my curmudgeonly self can only see them as attempts at multiple companies trying to profit off of one another's things. But I do have to admit that yes, the just announced collab between Dave the Diver and Subnautica 2 does make total sense. Certainly more sense than the Godzilla one from a couple of years back.

Read more

It’s Not Enough to Make Art

You also have to jump through hoops to sell it and account for it.

When was the last time you bought something from the person who made it? A piece of pottery, a wooden jewelry box, a framed painting, a hand-bound notebook, a leather wallet, a pair of earrings?

Do you have any idea what went into that item, from the moment it was imagined by the artist to the moment you took possession of it?

A Painting by Janet LeRoy
My friend Janet LeRoy has been painting mostly wildlife on turkey feathers for longer than the 30 years I’ve known her. When people ask her how long it takes to do a photo, she tells them 40 years — that’s the amount of time it has taken her to hone her craft to where she is today.

Let’s look at the skills required, which is probably the least considered piece of this puzzle. Babies don’t emerge from the womb knowing how to make things. Their ability to creatively design and then construct a piece of art is something learned over years. Sure, some of it might be natural — lots of people (but not me) seem to have an eye for drawing or making music. But most folks, no matter what their natural skills seem to be, need training and practice to hone those skills. A kid has to come a long way from drawing with crayons in kindergarten to painting fine art images with acrylics on turkey feathers.

The next time you browse an art show, take a moment to consider the kinds of skills the artist needed to hone to make what you see in her booth. Think about how she got them. Maybe it’s self-taught with years and years of practice. Or maybe she took often expensive hands-on classes. (I did a bit of both.)

Now consider the often specialized tools and equipment. I bet you can’t even imagine half the tools a potter or a woodworker or a jewelry artist uses to make their artwork. Next time you’re at an art show, if an artist you admire isn’t too busy, take a moment to learn more about the tools and equipment they use in their studio.

Pietersite Pendant
Two color-matched Pietersite stones double bezel set in sterling silver. I made everything in this photo except the stones. (I’d rather make jewelry than polish stones.) You can find my work in my online shop.

Here’s a photo of a pendant I finished yesterday, and here’s a run-down of the tools and equipment I used to make it:

  • Jeweler’s bench (homemade)
  • Adjustable jeweler’s stool
  • Cutting mat
  • Metal shear (tabletop)
  • Metal sheer (handtool)
  • Steel hammer
  • Weighted nylon-head mallet
  • STERLING stamp
  • Custom Makers mark stamp
  • Flush cutters
  • Flex shaft (basically a foot-controlled Dremel)
  • Sanding wheel
  • Bail template
  • Bail-making plyers
  • Chain nose pliers
  • Smith Little Torch setup
  • Propane Tank
  • Oxygen Tank
  • Quenching bowl
  • Pickle pot
  • Neutralizing solution
  • Silver patina
  • Tumbler with ceramic media
  • Tumbler with steel shot
  • Strainers (two meshes)
  • Bezel setter

All together, this is about $2,000 worth of equipment. And it doesn’t include the the thousands of dollars of other equipment I use in other work. Not only did I have to acquire all of these tools, but I had to learn how to use them properly. (I’m still working on the Smith Little Torch.)

Silver Prices
Rio Grande, my jewelry supply provider, keeps up-to-date pricing information for all precious metals right on its website.

And then there are the materials. I had sticker shock this morning when I checked the price of sterling silver; it’s up more than 100% in two years. Thank heaven I stocked up earlier this year and have enough to take me through the winter. I’ll need to have a few good shows before I stock up again. I’m fortunate that I now have enough cabochons in my collection to last the rest of my life. (Buying stones is a bit of an addiction for me.)

Now I’m getting into monetary costs and I really didn’t mean to go there. So let’s take a turn back to what prompted me to write this post: updating my jewelry business online shop.

The point is, it’s not enough to be creative and have the skills and tools and materials to turn ideas into a piece of art. Today’s artists need to be able to sell that art to keep making it. And that means they’re usually in charge of marketing and sales — after all, how many artists can afford to hire someone to handle that for them?

Marketing, to me, means mentioning my work on social media, trying (and mostly failing) to keep a website up-to-date, photographing all my new work. I’m lucky (or stupid) because I’m only on one social media platform — Mastodon — so I’m not dealing with Twitter, Facebook, Instagram, or Tik Tok. (I occasionally put videos on YouTube, but since losing my login information for my jewelry account, that’s been a bit difficult.) I simply can’t see spending hours of every day promoting my work on social media when I should be making the work I have to promote.

Sales means applying to and then attending often costly art shows with setup and teardown that suck the physical life out of me. Even just sitting in my booth all day, eating snacks out of a little cooler and having to rely on other artists to keep an eye on things when I run to the restroom to take a leak can be exhausting. Heck, when I do the Leavenworth WA show some weekends, my day is 11 to 14 hours (long door to door), depending on whether it’s a setup day. The show I’m attending in Seattle soon is costing me more than $800 for a 10 x 6 foot space; do you know how much jewelry I have to sell to cover that? (At least it’s indoors.)

Sales also means updating an online shop. I know a lot of folks use Etsy and depend on it for sales. I don’t. I’m tired of them taking such a large chunk of my revenue and displaying my work among so much cheap crap. I’m tired of having to maintain two inventory systems that I have to manually sync up when I make or sell something. I’m tired of giving money to an organization that misleads buyers and sellers. And when you shop there, have you ever stopped to consider how much sellers have to jack up their prices to make a profit after Etsy takes its fees?

So I have my own Square-based shop. It’s free to set up and use; the only fee is the standard credit card fee I pay when a sale is made. But it still takes time to update the site with photos and descriptions when I make new items or sell items outside the square system.

Did I mention that I have to be a photographer, too? Yep. I have to take decent photos of all of my work. I do the best I can, but I’m not pretending it’s good. It’s passable. (Yesterday I considered hiring someone to do it. But I quickly realized I didn’t have the budget to pay someone else to do it.)

And did I mention that I also have to account for all my sales? And file sales tax returns for every state I sell in? So yes, I have to be an accountant, too. (Good thing I got that accounting degree back in the 1980s.)

So I guess that what I’m trying to say is that unless an artist is independently wealthy and can make art for fun, there’s a lot more to making art than just making art.

Think about that the next time you see original artwork available for sale.

Doing the Math on Art Shows (and Other Ways to Sell My Silversmithing Work)

I take an objective, dollars and cents look at the various ways I can sell my jewelry to see how they stack up financially.

Last weekend, I made the nearly 5-hour drive to Sequim, WA to attend a 3-day Lavender Festival that featured, among other things, artists and vendors selling their wares. I was one of those artists.

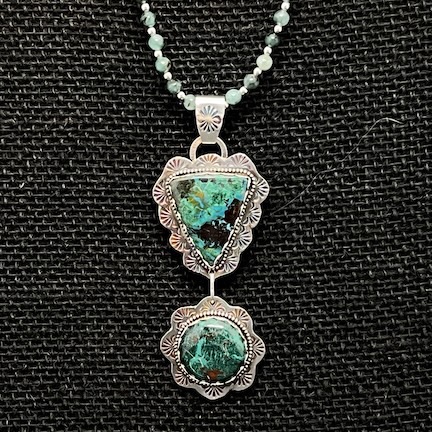
Malachite and Azurite Pendant
I was very pleased that this double pendant sold for $229 at the Lavender Festival, along with the $99 sterling silver and emerald necklace I’d paired it with. (Those beads were expensive!)

I’ve done plenty of art shows before. I’ve done a handful here in Washington State and a handful down in Arizona. I’ve had mixed results, mostly depending on the stage I was in in my silversmithing journey and the kind of show I was attending. Some shows are good for low-end items, other shows are good for fine art items. My work straddles those two worlds, for a variety of reasons.

But rather than talk about the evolution of my work, I want to talk about something I know well: the finance end of things. After all, I do have a BBA in Accounting with Highest Honors from Hofstra University. (LOL.) And even though I don’t use that degree in my daily work, I haven’t forgotten a lot of what I learned along the way, including marketing and finance. It is, after all, what makes it possible for me to handle the financial records and do the marketing for all of the businesses I operate, even if I can never really count how many there are.

And here’s what I learned about the various ways I sell my work.

Item Costs

When you’re making something for sale, you need to get a good handle on what each item costs to make. Costs include a few things, some of which are more obvious than others:

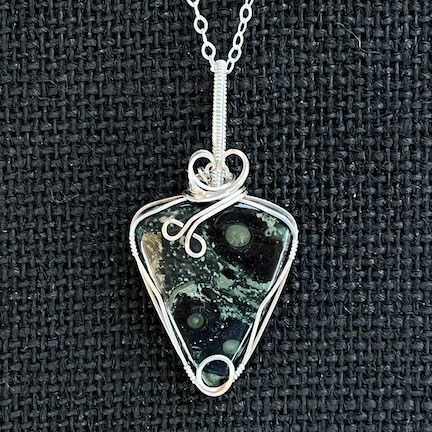
  • Wire framed pendant
    Remarkably, these wire-framed pendants still sell. I make them when I’m sitting idle in my booth at a show. They are the least expensive pendants I make, but with the price of silver rising 50% in the past two years, I’ve had to raise my prices on them, too.

    Materials cost. I’m using sterling silver and gemstone cabochons for most of my work. There was a definite identifiable cost to acquire these materials. I try to record the cost of materials where I store those materials. There’s a cost code on a sticker on the bottom of every cabochon in my collection. I also write the cost per square inch on flat pack silver packages and the cost per inch on the spools or coils of silver wire. Although I’m not quite anal enough to track the exact materials cost for every item I make, I do have a fair idea. I can tell you this: bezel-set stones on backplates cost a heck of a lot more for materials than wire framed pendants.

  • Supplies cost. I use a variety of supplies when making jewelry. Solder, flux, torch fuel, sanding and polishing wheels, etc. In most cases the amount of supplies I use are minimal, but they were purchased at a cost and I need to keep that cost in mind when calculating what an item costs to make.
  • Want a good idea of what kinds of tools I use? Watch this YouTube video tour of my shop.

    Tools cost. Tools are the things I use to manipulate the metal and can include hand tools like pliers, wire cutters, hammers, and saws; desktop tools like my flex shaft, rolling mill, metal shear, and torches (Big Shot with butane refills and Smith Little Torch with propane and oxygen tanks); and other tools like mandrels, templates, soldering boards, annealing tray, third hand, anvil, etc. There are literally too many to list. Tools can be used over and over — often for years and many projects — but they still cost money to obtain. I have literally thousands of dollars invested in shop equipment and all of that is eventually paid for with the sales of my jewelry.

  • Time cost. Time really is money and my time ain’t cheap. If it takes me 4 hours of active work time to make a pendant, don’t you think I should be compensated for it? I build the cost of my time into my price.

I’m fortunate. My jewelry studio is in my home. I don’t need to rent a space and deal with associated costs. Other folks do. That has to be taken into consideration as well.

These are the costs of actually making items. Selling them is another story.

Cost of Sales is More than Item Costs

Artists can sell their work one or two ways: directly or through a middleman. Each way has its own costs.

Direct Sale: Selling in Person

This is the sweetest way to sell your work: sell it directly to someone who wants it who is meeting with you face to face. This could be a friend or a friend of a friend or perhaps at another place where you happen to be with your merchandise.

The best example I have of this is selling at an Artists Table at a boating event I attend every year. There’s one table for each artist (unless you get there early and hog multiple tables) and there’s no fee. For three hours, other event attendees check out what’s for sale and buy. I bring just a table cover and about a dozen pendant displays. I bring all of my pendants and about 1/4 of my other inventory. And I sell at retail price. My only cost is packaging and credit card fees. My return is roughly 95% at these events. I love them because they’re short and sweet and I’m there anyway. I can set up and tear down in about 15 minutes. Of course, I don’t make very much money at these events, but it’s nice to get compensated for my work.

Direct Sales: Selling online

I have an online shop that I use to sell my work directly to customers. This is actually the least expensive way for me to sell because I use an extremely cost-effective platform to sell on: Square. Square is my credit card provider and when I sell online, it just charges me the credit card fee, which is generally around 3%. I still have to buy packaging (my cost) and ship items out (usually my cost because large sales ship free). But looking at an example, suppose someone buys a $50 pendant, which ships free. I spend about $1.50 for credit card fees, $1.00 for packaging, and $4 to $10 on shipping. If I keep it as cheap as possible, I net $43.50 on that $50 item or 87%.

I should note here that not all online sales solutions are this cost effective. Etsy, for example, will charge a percentage of the sales price after it already charged you to list it and can charge an additional marketing fee if it claims people found your item through one of its Google ads. You can learn my thoughts about Etsy and why I won’t use it here.

I like direct sales through my website. It’s easiest and most cost effective for me to do.

Direct Sales: Selling at Art Show and Other Venues

I do most of my selling at art shows. Art shows have a variety of costs associated with them.

  • Jury or application fees, which range from $10 to $50, are non-refundable and you’ll pay them even if your work isn’t judged good enough to be part of the show.
  • Booth fees can range from $35 to $1,200 or more, depending on the show. You’ll pay those to get your booth.

But that’s not where the costs end. You still have to get to and from the show, pay for overnight accommodations if the show is more than one day, and cover the cost of fees for credit card sales.

And some shows require you to pay a percentage of sales. One I do quite regularly charges only $35 for my booth for the weekend — which can be up to 5 days, depending on how summer holidays fall — but also keeps 21% of all sales. They also handle sales centrally, so at least I don’t have to pay credit card fees. The good thing about this arrangement is that if I have a crappy weekend, I can’t lose money. But, on the other hand, if I have a kickass weekend, I still gross only 77-78%.

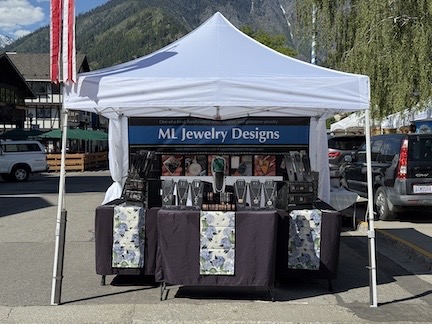
My Booth
My booth at a recent Leavenworth show. Canopy, tables, table covers, table runners, necklace displays, earring displays, bracelet displays, signage, chair, point-of-sale supplies. It all costs money.

And don’t forget your booth. You’ll need a white fire retardant canopy with zip-up sides, four 30-40 pound weights to hold it in place, and tables, walls, or other display equipment. Just outfitting your booth could cost $1000 or more; mine has a tent, three tables, table covers, dozens of custom pendant display “necks,” bracelet displays, and special boxes to display earrings. You’ll also need a vehicle to schlep all that stuff around. Fortunately, these are mostly one-time expenses, but you need to maintain and replace these items periodically. Before my last show, I re-finished every single one of my pendant displays. And two months ago, I replaced my aging canopy.

Finally, your sales depend quite a bit on a few factors:

  • Is your work with your price points a good match for the people attending the show? If you’re overpriced or your work is too highbrow for the people attending, you won’t get sales. If you’re underpriced, your work could be seen as junk.
  • What’s your competition like? I sell jewelry, which is often a very popular category at art shows. A smart promoter will use the jury system to select jewelry artists whose work is different. Then they’ll lay out the show so all of the jewelry artists aren’t together. If my work is very similar to another artists, we’ll have to split the sales for work like ours between us.
  • Is the show well attended? If people don’t show up because the show was poorly advertised, promoters charge a hefty entrance fee, or the weather was crappy for an outdoor event, sales will suffer.
  • Are people actually spending money? One of the things I hate about doing shows in tourist towns is that show browsers might just be walking around to kill time. The state of the economy comes into play here.
  • Do you accept credit cards? If you don’t, you’re in the wrong business. Cash might be king, but few customers use it these days.

Either way, you have to remember the other costs of direct sales, which includes packaging. My packaging is simple: drawstring bags for pendants and plastic zip bags for earrings on cards. For multiple item purchases, I have larger drawstring bags. But other vendors might have bubble wrap, boxes, shopping bags with tissue paper, or more. All of these things cost money and need to be considered as part of the cost of sales.

So let’s look at some numbers. I’ll compare a recent weekend at Leavenworth Village Art in the Park with the Lavender Festival in Sequim.

Item Leavenworth
(July 3-6)
Sequim
(July 18-20)
Days 4 3
Jury Fee $15 $25
Booth Fee $35 $495
Overnight Lodging $0 (home) $100 (dry camping)
Gross Revenue $2,094 $4,064
Commissions $440 $0
Credit Card Fees $0 $109
Net Revenue (excluding travel costs*) $1,619 $3,335
Percentage of Gross 77% 82%

—
* I excluded travel costs because I figure that driving to and from Leavenworth 4 times is about equal to driving to and from Sequim once, despite the much longer distance to Sequim.

My takeaway from this? My percentage return was only 5 percentage points higher in Sequim for the Lavender Festival than it was in Leavenworth (a tourist town) on a holiday weekend.

But the interesting thing to remember here is that my percentage return in Leavenworth will always be the same because of their commission fee structure: 77-78%. If I’d grossed $5,000, for example, in Sequim, my return percentage would have been closer to 85% (even considering more credit card fees). But if I’d grossed just $3,000 in Sequim, my percentage return would have been about 76%. Clearly, the more expensive a show is to attend, the more you have to sell.

I’ll tell you why the percentage return is important in a moment, although I expect most of you to be able to figure it out.

Middleman Sales: Consignment

I want to start out by saying that I hate consignment sales.

In consignment sales, you drop off some of your merchandise with the owner/manager of a shop or gallery and they sell it for you. Sounds good, right? Well here are some of the problems:

  • Consignment fees. The shop or gallery keeps between 20% (which is crazy low and pretty much unheard of these days) to 50% (which is crazy high). The average I’ve paid is 35%-40%. (I will not sell on consignment if they want 50%.) Take 100% and deduct that percentage and you get your percentage return: 60% to 65%. To be fair, it’s easy, takes hardly any time at all, and has no other costs like credit card fees or packaging.
  • They have your inventory so you can’t sell it. You can’t sell something you don’t have. And if they don’t sell it, it doesn’t get sold.
  • There’s no provision for loss due to shoplifting. If someone steals your work from where it’s displayed in the shop or gallery, it’s your loss. After all, the shop or gallery hasn’t paid you for it.
  • If they go out of business you might lose your work. I’ve heard these horror stories. A shop goes out of business and the owner/manager disappears with all the inventory, never to be seen again. This has not happened to me, but that’s because I’m very careful about who I leave items with on consignment.
  • You have to rely on their honesty. If they’re dishonest, you work will disappear and you’ll never see a penny for it. Again, I don’t think this happens very often.
  • Items can be shop worn or broken. I can’t tell you how many times I’ve gone to a gallery I work with to give them new items and get items back that are either severely tarnished — we are talking about silver after all — or broken. That means I need to work on them before I can put them back into my inventory and sell them.

The main reason I don’t like consignment sales is because I have to keep track of what’s out there. Letting inventory sit elsewhere, unsold or perhaps not even on display, is also problematic. I currently sell on consignment in only two places and I’m not bringing anything new to one of them.

Middleman Sales: Wholesale

Wholesale is a lot like consignment sales but once you sell it, it’s gone. You don’t have to track it or worry about getting it back in bad shape or worry about it getting stolen. You sell it and it’s gone.

The drawback, of course, is that the buyer wants a deep discount — perhaps as much as 50%. I’ve been lucky so far. I’ve done all of my wholesale sales at 35% with payment by check right on the spot. Although that means my percentage return is only 65%, at least the item is sold with zero additional cost or effort on my part.

Needless to say, if I’m going to use a middleman, I want it two be a wholesale client.

Why the Percentage Return Matters

Let’s put it all together now.

When you make an item, you have direct and indirect costs as discussed at the beginning of this article. When you sell at item you have additional costs. You need to price your item with a profit margin that makes it profitable to sell no matter how you sell it.

Suppose I make a pendant that takes me 4 hours and uses about $15 worth of silver and stones. I price my time at $25/hour (which is a steal). So my direct costs are $115. Add another $5 for the cost of supplies and a portion of the equipment costs. Now we’re up to $120. If I price this item at $199, I’ve got a 65.8% profit margin. (Calculate as (199-120)÷120.) So if I sell it at consignment and they get 35%, I’m barely breaking even.

I have three options:

  • Price it higher
  • Accept less for my time (or work faster)
  • Don’t sell anywhere I’ll make less than 65.8% percentage return

If I sold this at Leavenworth or at the Lavender Festival, I’d still only have a profit margin of 12% or 17%. That means that for every $1 of costs, I’d earn a profit of 12¢ or 17¢. Ouch.

This is the problem faced by all artists and makers. People don’t understand our costs to make or sell. They just see the end product. And then they value it based on what it might cost in Walmart or on Amazon or from an “artist” who has her work mass produced overseas with inferior quality materials — maybe silver plate and plastic “stones”? — and passes it off as handmade.

Advancing My Art

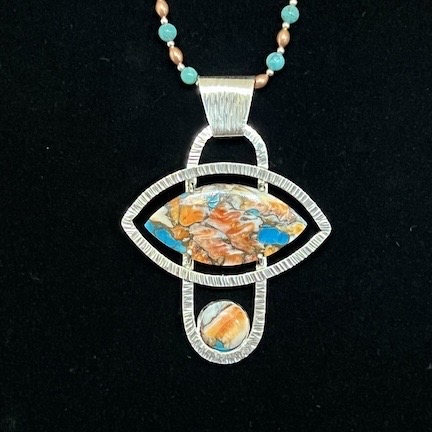
Kingman Turquoise Pendant
This is probably the weirdest piece I ever made. Thick, square hammered sterling silver wire with two Kingman Turquoise and orange spiny oyster shell cabochons set in it. I showed it for several months before it finally sold in Leavenworth, along with the silver, copper, and turquoise necklace I’d made to go with it.

Right now, I’m in an in between world. I’m still making low end items like certain earring styles and wire-framed pendants. These are priced to sell at tourist art shows and festivals. But I’m also making better quality, more artistic items that some folks refer to as “statement pieces.” These take a lot of time and effort to make with high quality materials and specialized tools. I’m charging more money for these things because I have to.

Unfortunately, the only way to sell these items is to attend better art shows. The better art shows have higher booth fees. So it’s a gamble. Is my work good enough to get into the show? Once I’m in, will I get the sales I need to not only break even on the show itself, but to get the percentage returns I need to actually profit?

I think the shows I attend this winter in Arizona will answer that question once and for all.

Battling Irrational Beliefs

Some comments related to an excellent blog post about the ABC model of Rational-Emotive Therapy and being a writer.

One of the blogs I’ve included in my RSS feed reader is called Writer Unboxed. It presents anywhere from 5 to 10 blog posts related to writing each week. Some are extremely specific, such as a recent post about including blurbs with published books. Others are more general, such as the one I’m touching upon today, which discusses psychology.

If you’re serious about writing, whether for yourself or for publication and (hopefully) profit, this is a great blog to follow. I won’t say that I read every post in detail, because I don’t. But I find that many of the ones I do read give me lots of food for thought. I usually share my thoughts in a comment on the blog post — that’s why I really like blogs that allow commenting — but sometimes those comments will trigger a blog post here. That’s what happened today.

The Post

The post that triggered these thoughts and this post is called “The Rational-Irrational Writer” by Therese Walsh. It discusses something called Rational-Emotive Therapy (RET):

…developed by psychologist Albert Ellis. At the heart of RET is a simple but powerful framework that explains how rational and irrational beliefs shape distinct emotional responses: the “ABC model.”

I don’t want to copy and paste Ms Walsh’s post into my blog. I want you to go and read her post, or at least the section titled “An Overabundance of ‘B’,” which explains the ABC(DE) model. It’s short and easy to read and understand. It’ll just take you a second. I’ll wait here.

[calming music plays]

Back? Great!

The post then goes on to explain exactly how the ABC(DE) model applies to writers and our deep-seated fears about calling ourselves writers and being good enough and having all kinds of preconceived beliefs that just aren’t true.

Not Just for Writers!

Everything she’s written is completely valid for writers. But it’s also valid for other people in other endeavors, as I commented on that blog post:

First, this is a great piece that can easily be applied to any endeavor where we have self-doubts.

I’ll elaborate on that here, since I didn’t think it was appropriate on her blog post which is, after all, for writers. I’ll use one of my endeavors as an example: silversmithing.

A stands for activating event. Suppose I apply to a juried art show. (That’s an art show where a panel of judges decide, based on photos of your work, whether your work is appropriate for the show. It usually comes down to quality, originality, etc., but it might also deal with appropriateness for a show’s theme.) I get the jury response and discover that I’m not invited to the show. Being turned down is the activating event.

B stands for belief. On getting turned down, I naturally come to believe that my work is just not good enough.

C stands for consequence. As a consequence of this belief, I start doubting my skills, capabilities, and creativity. I start wondering why I bother to make jewelry and debate whether it’s worth continuing.

D stands for disputation. This is where I (hopefully) start gathering evidence to prove that the belief is wrong. Maybe I applied for six new shows last year and was invited to all of them. Maybe my work sells well at the shows I do attend. Maybe I visit a new wholesale client and she buys half my inventory because she loves it so much. Maybe I discover that the reason I did not get invited to this show was because they limit the number of jewelry artists and all of last year’s artists are returning. (It’s pretty common to give preference to artists who attend each year.)

E stands for effective (and rational) beliefs. I consider all the evidence that my initial belief is wrong and self-defeating and cast it aside to replace it with a more realistic belief that keeps me motivated, working, and improving my skills, allowing me to move forward.

Think about this for a minute and I’m sure you can apply it to anything you do that you might have doubts about.

Imposter Syndrome?

I think Rational-Emotive Therapy can help folks with imposter syndrome. Per Wikipedia:

Impostor syndrome, also known as impostor phenomenon or impostorism, is a psychological experience in which a person suffers from feelings of intellectual and/or professional fraudulence. One source defines it as “the subjective experience of perceived self-doubt in one’s abilities and accomplishments compared with others, despite evidence to suggest the contrary.”

Those who suffer from impostor syndrome often doubt their skills, talents, or accomplishments. They may have a persistent internalized fear of being exposed as frauds. Despite external evidence of their competence, those experiencing this phenomenon do not believe they deserve their success or luck. They may think that they are deceiving others because they feel as if they are not as intelligent as they outwardly portray themselves to be.

Clearly, believing that you are an “imposter” is irrational. After all, you got where you are somehow. Thinking about the situation rationally and disputing those self-defeating beliefs is the first step to getting past imposter syndrome.

‘Nuff said.

One More Word about Writers

I thought I’d share one more thing related to the original post. This is part of the comment I left on that post and it has everything to do with writing or being a writer.

Before I share it, however, I want to remind readers who don’t know me very well that I earned a very good living as writer from around 1990 to 2015. I wrote books about how to use computers at a time when writers couldn’t produce them fast enough to meet the demand from readers, many of whom were just getting started using computers. Things are different now and I doubt many people could make a good living doing this kind of work. But I enjoyed it while it lasted and had a backup career waiting for me (as a helicopter pilot, of all things) when the demand for my kind of books died off.

Here’s what I shared:

I think there are two kinds of writers, with plenty of overlap.

One kind is the writer that I believe that all of us here are: the kind of person who is driven to write, to get words out of our heads and into a format we can share with others. Whether we share it or not is irrelevant. Whether it’s published or not is irrelevant. As you said, writers write. I believe that deep down in my heart. I have been a writer since I was 13.

The other kind of writer is the professional writer: someone who literally writes for some kind of pay. Hopefully, the pay is money, since it’s so much more useful than “exposure,” which too many of us seem to accept. I felt comfortable during my 25 year writing career telling people that I was a writer because that’s how I earned my living. Nowadays, I still write — after all, I’m still that first kind of writer — and I do get paid for some of it, but it’s not how I earn my living. So when people ask now what I do, I don’t tell them I’m a writer.

There’s nothing wrong with being that first kind of writer.

Making Paste Paper

I spend a few hours making decorative paper for bookbinding projects.

I don’t know if I mentioned it here, but I’ve taken up another hobby (as if I didn’t have enough): bookbinding. So far, I’m amusing myself by making little notebooks and the occasional hard covered book with a purpose. I made my friend Jason a Guest Book for his boat and am in the process of making another one for my boat. I’m taking baby steps now, working on easier projects and honing skills before I get more ambitious. It’s fun. I especially like the sewing — yes, all of my books are hand sewn.

One of the things that’s commonly used in bookbinding is decorative paper. While it’s true that I can go out and buy pretty papers to use as book endpapers or covers — and I have, to a certain extent — I prefer to make my own. I want my books to be entirely handmade, except for the paper inside the covers. But I plan on making paper, too, and I’ll probably use it for book covers. One thing at a time.

Paste Paper

Paste paper is a type of decorative paper that’s created by covering paper with a mixture of wheat paste and (usually) acrylic paint. Wheat paste is nothing more than a mixture of flour and water, in the correct proportions, cooked for about 20 minutes.

It’s not difficult to do and it’s kind of fun. You can’t do it wrong. It’s cheap and easy enough to experiment and learn. I find it kind of relaxing, except cleanup. It’s easy enough to clean, but you have to clean the workspace after every sheet. That gets tedious.

Although I have space in my jewelry studio for bookbinding projects, I make paste paper up in my kitchen, on one side of my island’s countertop. This makes it easy to rinse sponges and clean brushes and other tools because the sink is right there. Although there is a bathroom downstairs near my studio, it has a tiny bathroom sink and really isn’t convenient. Why make things more difficult than they have to be?

Cheap Paper

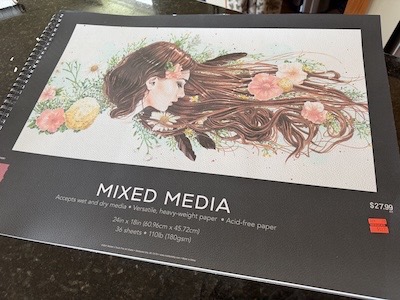
Today I worked with extra large pieces of mixed media paper. I got a smoking deal on the paper at Hobby Lobby the other day. I really hate shopping in a Hobby Lobby — it’s about as close as I get to going to church — but it’s the only game in town around here. They stopped selling a lot of name brand, quality merchandise and, instead, sell their own store brands. The art paper is Master’s Touch and its wood pulp. (I don’t think they sell any cotton or linen paper at all anymore.) It’s pretty much junk and no professional artist would use it. But folks just getting started? Maybe.

Mixed Media Paper on Sale
I could not pass up this deal on large pads of mixed media paper.

I went in for sewing supplies and took a detour to visit the art paper aisle. That when I saw that the largest pads they sell for watercolor and mixed media — 18″ x 24″ — were on clearance for crazy low prices. This pad, which was normally $27.99, was on sale for $6.99. The watercolor pads, which normally sell for $45.99, were $10.99. How could I pass that up, especially with all the bookbinding stuff I’ve got going on? You can always cut large sheets smaller but you can’t make small sheets larger.

So I bought all they had: three watercolor pads and two mixed media pads.

The Process

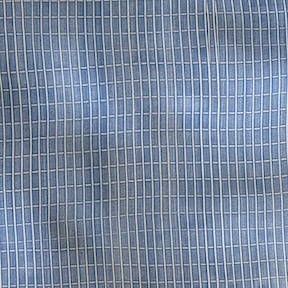
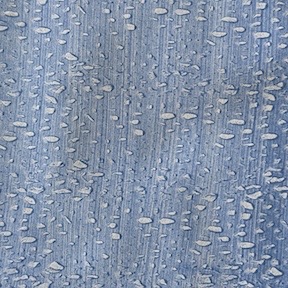
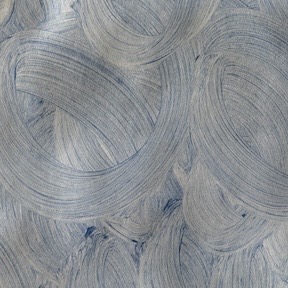
Paste Paper

Paste Paper

Paste paper

Paste Paper

Paste Paper

Paste Paper

PastePaper

Paste paper

If you’re interested in learning how to make paste paper, there are a lot of videos about it on YouTube. I think this one by DAS Bookbinding is the best intro, although he doesn’t get very creative. James Williams gets more creative in this demonstration, but his video is a bit verbose.

But if you don’t want to do it or watch a video, here are the basics:

  1. Put some wheat paste into a cup.
  2. Add paint and stir well to mix the color you want. I usually do one color at a time, but you can mix a bunch at once.
  3. Lay out your paper and use a clean sponge with clean water to soak it. If the paper was smaller and I had the right size bin, I would literally soak it in the water. (That’s the best results, in my opinion, but it’s tough to do with large paper. Also, not all artists wet the paper first. I follow DAS’s instructions; that guy knows what he’s doing.)
  4. Make sure the paper is completely flat on the work surface. This is important. If there are any bubbles under the paper, the paste will not spread properly on it.
  5. Use a brush or roller to cover the paper with colored paste. The way I make my paste, the color of the paper always shows through, but I like that. I use a brush and there are brush strokes.
  6. Use a variety of tools to drag or draw lines and patterns in the wet paste. This is where the creativity comes in.
  7. Lay it out to dry.
  8. While one is drying, you can clean your work surface and make another one. I made nine today.
  9. Once it’s dry, put it under a weight to flatten it; the edges want to curl.

Although most folks seem to really like using a comb to make parallel lines and patterns on the paper, I’m not particularly impressed with that. Instead, I’ve found a pair of rollers that I use to make regular random patterns or I paint with swirl strokes instead of straight ones. I got fancy with one sheet, and used a roller on light green paint, let it dry, and then used stencils with two different colors to add leaves and flowers. (Unfortunately, it looks like Christmas paper, which was not my intention.) DAS Bookbinding has a video that demonstrates using a pattern roller and also demonstrates waxing and burnishing.

I’m satisfied with today’s efforts and now have enough large paper for any project.

Beeswax Paste

I don’t usually wax my paper right after it dries. Instead, I wait until I use it. I cut first and then wax. This way, I’m using less wax paste.

I make my own wax paste from beeswax (from my own bees) and mineral spirits. I got the basic instructions in this Annesi Bindings video. It’s basically 50% bees wax and 50% mineral spirits (by weight) melted in a double boiler. I cook it up right in the canning jar I store it in. If you cover it tightly, it lasts a long time.

Getting Creative

I read somewhere that retired people do things like this — take up creative hobbies. Until I read that, I didn’t realize I was following the pack.

But I really do get a lot of pleasure out of all my creative efforts, whether it’s writing, which I’ve done all my life, or making jewelry, fiddling around with watercolors, making decorate papers like these, or bookbinding. It’s just so relaxing and rewarding to make nice things with your own hands.

What do you think? What’s your creative outlet?

❌