❌

Reading view

There are new articles available, click to refresh the page.

How AI Can Help You Document Your WordPress Projects

Building WordPress websites, plugins, and themes is complicated. Each requires some critical thinking and decision-making skills. There should be sound logic behind every feature.

The problem is that we can’t always remember what we did or why we did it. This is why documentation is so important. It’s a resource we can reference when jumping back in to add or fix something. Not to mention that it’s handy for clients and colleagues as well.

Documenting your projects has traditionally meant taking good notes. We add comments to our code, update readme files, and log what’s new in myriad other forms. Consistency is key, but difficult to achieve. After all, everyone gets busy and forgets to write something down.

Perhaps AI is just the tool we need to document projects without missing a beat. These models, along with the apps they connect with, can take notes for you. They’ll keep track of changes, explain what a feature does, and why it was built a specific way.

With that in mind, here are a few ideas for using AI to create and maintain your project documentation.

Use AI To Analyze and Remember Your Work

The popular AI models like ChatGPT, Claude, and Gemini all have “memory” features. Set your preferred tool to remember what you’ve done, and the model will record it for future reference. This is a goldmine for documenting your WordPress projects.

Before you start, ensure that you understand how your chosen model remembers things. Some have a setting for this purpose. However, you might also directly instruct an AI agent within your chat session. There are different types of memory, so you’ll want to check to see what is (and isn’t) included.

It’s a must-have feature when vibe-coding plugins. Use AI to keep track of your project from the start. That way, you’ll prevent any knowledge from being lost along the way.

But what about existing projects? You’re covered – to a point. AI can analyze your files and note specific functions and features. It’s also a wonderful tool for troubleshooting an issue or inspecting code written by someone else.

As always, double-check the tool’s interpretation of your work for accuracy. You can even use multiple models to inspect the same thing. It’s better to find a mistake early than a year down the road when you really need to know something.

AI models can store important project details in memory

Decide What Project Information You’ll Need

AI can document what’s been done. However, you’ll still need to figure out what information you’ll need to keep.

Much depends on the type of project you have and with whom it needs to be shared. But it’s safe to say that a changelog makes sense for every use case. You’ll want to know what changed, when it was changed, and potentially why.

Custom plugins or theme features would also benefit from usage instructions. It’s easy to forget how something works. As such, a quick step-by-step guide is valuable. Bonus points if you can add screenshots or videos to the mix. It’s perfect for onboarding new team members.

You might even document client requests. This enables you to stay on top of busy collaborative projects. Use it to assess time and energy spent (and how it impacts your billing). This info could also help you build a project roadmap for future changes.

The idea is to keep track of what matters to you and anyone else who touches your project. AI makes it easy to generate.

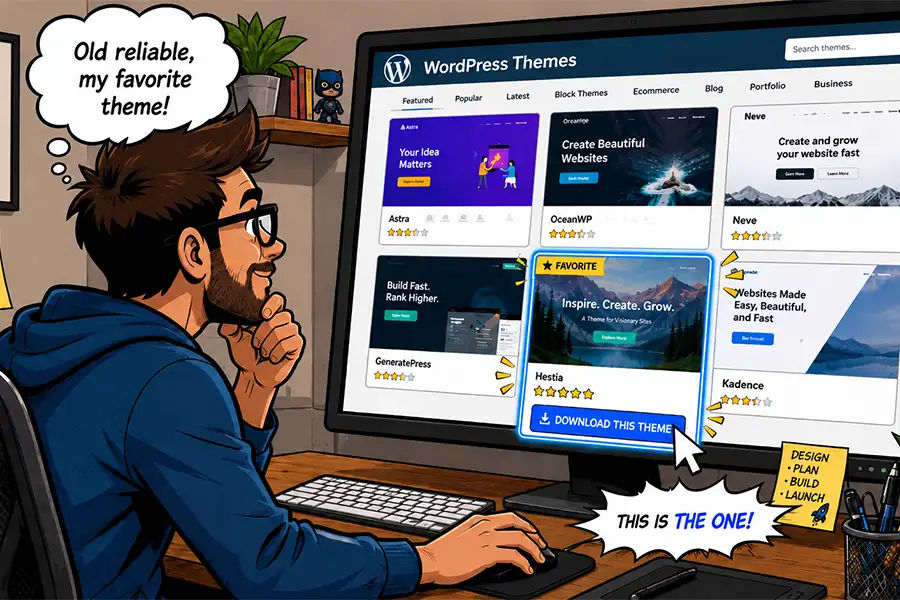
You can use AI to generate basic instructions for using your custom plugin

Create a System for Documenting Your Projects

Next, you’ll need a place to access your documentation and a plan for maintaining it. This is a very personal decision that depends on your preferences. For example, you could generate a custom text file in each project’s folder and be done with it. But there are more in-depth possibilities.

We’re working with WordPress, so using it as a knowledge base is a natural fit. You could build a centralized resource categorized by client or project. There are even support plugins available to help you get started, and the WordPress Connectors API will connect the site to your chosen AI model.

Solo freelancers could get by with a local WordPress installation, while agencies might want to use an internal or external server. A project’s documentation may also live on your client’s site. It’s a convenient feature and a potential selling point.

A Git repository would be great for those who want to version control their documentation. From there, you can feed updated information to virtually anywhere you want. Using AI here also streamlines the workflow.

Then, as things change, AI can automatically write to the destination. Or, you can manually review it and publish when ready. This ensures that you’ll always have the latest data.

Use AI to create a repository of project notes

The Pain-Free Way To Document Your Projects

Writing documentation can be a tedious process. You complete a task and then have to remember to record it. The chore is even harder when you’re juggling multiple clients and websites. Even the best of us will forget something.

AI’s automation capabilities make it seamless. Tell your AI tool what to document, and it remembers to keep track so you don’t have to. Some models may let you create blanket rules that cover all of your current and future projects.

You also get to choose where to store this valuable knowledge. It’s something you can share with others or keep to yourself. Regardless, you’ll have access whenever you need it. That will serve you well when it’s time to dive into a theme you haven’t touched in years.

If you’ve avoided project documentation, there’s no better time than the present to get started. There’s also an opportunity to upgrade what you already have. So, pick your favorite AI tool and let it do the work!

The post How AI Can Help You Document Your WordPress Projects appeared first on Speckyboy Design Magazine.

How Consistency Benefits Your WordPress Agency

Starting an agency is like a grand experiment. You book a few projects and feel the rush of building something from nothing. You also learn some lessons about working with clients and managing money.

Then, just as you think you’ve figured it out, things become hectic. Your to-do list grows faster than you can complete tasks. Unexpected events, such as a broken site, force you into a panic. How will you ever keep up with the demand?

Hiring another developer or project manager can help. However, that’s not always feasible. Budgets only stretch so far.

This is where consistency swoops in to make life easier. By creating processes for getting things done, you’ll have proven steps to take. Better still, you can improve them as you go. The result is better efficiency and less chaos in your day.

The great thing is that you can make a process for just about anything. Tasks like design, troubleshooting, and even client communications are on the table. You can even personalize them to match your needs.

So, how does it work? We’ll show you a few examples of processes that will bring consistency to various parts of your business. Let’s get started!

Start With a Theme and Plugins You Trust

The design-and-build process starts with your chosen theme. Many themes tend to cater to a niche or try to be everything to everyone. The first option isn’t ideal for working with clients in different industries, while the latter may be too bloated and complex. Neither is right for scaling at an agency level.

Look for a theme you can use as the foundation of every new project. For example, starter themes offer handy features without an opinionated design. This flexibility lets you take the design and functionality anywhere you want to go. And there are options for both classic and block themes.

It’s also worth sticking with the same page builder plugin across the board. There are several on the market, and it’s tempting to try them all. But every tool has a learning curve. As such, you’ll spend too much time figuring out how things work instead of getting things done. Using multiple page builders also complicates future maintenance. Not to mention juggling several commercial licenses.

This approach extends to plugins that handle forms, SEO, e-commerce, and other common functionality. Using a set of preferred tools on your projects can lead to more predictable outcomes. Efficiency and expertise come from repeated use.

You’ll reduce friction throughout the project’s lifecycle and always have a solid starting point.

Using a trusted theme means you have one less thing to worry about.

Create Processes To Organize Your Business Tasks

The more clients you have, the more you’ll benefit from organization. Using different billing policies, contract formats, or communication methods becomes messy. The right tools and processes can help you clean things up.

It’s time to simplify. Examples include limiting your maintenance fees to tiered packages, using a single app for billing and invoicing, and storing client information in a customer relationship management (CRM) app. The more you can consolidate these tasks, the better.

Client communication is another area where simple is better. Using email is fine if you have a small client roster. However, a ticketing system can make it easier to keep track of messaging. You could use an outside service or install one on your WordPress website. Take things a step further by designating times of the day for replying.

We can’t forget about your to-do list itself. Project management can be a nightmare without organization. Plenty of apps exist for staying on task, or you could vibe code your own. The point is to know where you stand with each project and have an archive of notes to reference as needed.

Since WordPress is our specialty, you might consider using it to build an admin portal. The free and low-cost options are budget-friendly, and you can tie everything into a single package. Imagine not having to visit multiple sites or download a bunch of apps to run your business!

A project management app will help you keep track of deadlines.

Trust the Process

Creating consistent processes will turn your agency into a well-oiled machine. Doing things the same way and using the same tools allows you to focus on your clients. That’s a growth path you can’t build if you’re bogged down with menial tasks.

You can also pass this knowledge to new employees and contractors. It keeps everyone on the same page and avoids confusion. Onboarding becomes easier, and work happens faster.

Get started by examining how you work. Look for pain points and complicated tasks that you dread. Think about where you spend the bulk of your time.

The post How Consistency Benefits Your WordPress Agency appeared first on Speckyboy Design Magazine.

How AI Can Help You Expand Your Agency’s Service Offerings

As AI continues to evolve, freelancers and agencies are finding new uses for the technology. It makes sense that many of us start by improving our workflow. Resolving those existing pain points helps us accomplish more with less effort.

However, AI also presents opportunities to broaden our horizons. We can use it to do things we haven’t tried before. Even better, we can experiment with ideas that seemed too ambitious a few years earlier. For example, consider projects that had a big learning curve or were time-consuming. Perhaps they don’t seem as daunting in the age of artificial intelligence.

The right tool could be the key to offering new and improved services to your clients. It’s a vehicle for increasing revenue and strengthening customer relationships. What’s not to love?

Let’s look at how AI can help you expand your agency’s service offerings. We’ll cover potential service ideas and considerations before presenting them to clients. You might even find the perfect growth opportunity for your business.

Find Tasks AI Can Do Faster and Better

Time is often the biggest barrier to creating new services. We’re busy enough without having to learn something new or focus on tedious work. More than anything, these are the tasks AI can help us tackle.

If you often find yourself knee-deep in code, you can use AI to lift the burden and increase productivity. Here are a few ideas to get you started.

Performance and Security Audits

Is your client’s website running at peak performance? Is it chock full of vulnerable code? Some plugins can help you find general answers. However, a full audit is often the best way to diagnose and fix issues.

The problem is that it takes significant effort to go through each line of code. You also need to know what to look for during the inspection process. Not everyone has the depth of knowledge in PHP, JavaScript, and other languages found in a WordPress website.

AI tools can save you a ton of time. Even a relatively lengthy code audit can be performed in the background (freeing you to enjoy a cup of coffee or two). Plus, some models are adept at finding security issues and performance bottlenecks.

The big caveat here is that AI can point out issues, but you may not be able to fix every one of them. For example, avoid making changes to WordPress core or third-party plugins. Those changes would be overwritten during a software update. You could, however, alert a plugin author of what you found.

On the other hand, the results can lead you to find better options or use AI to build a custom solution. Regardless, it’s a service you can charge for.

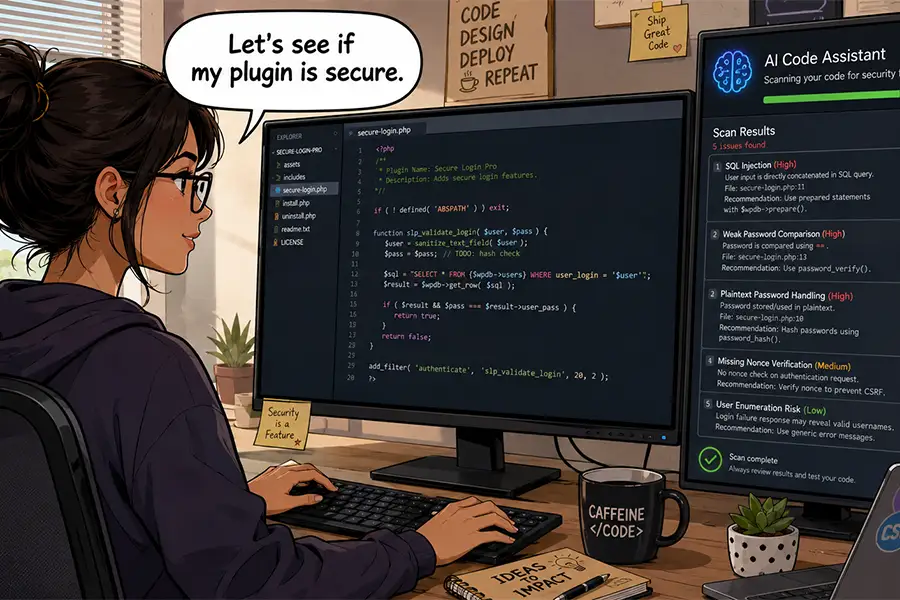
AI tools can scan your site's code for security and performance issues

Custom Plugin Development

There are two truths in agency life: No two projects are the same, and no WordPress plugin can cover every niche. That’s what makes custom development an appealing service.

Here again, we face limits on our time and coding abilities. But even an expert developer may not have enough room in their schedule for a complex plugin. Then there’s the future commitment to maintenance. It’s a lot to put on your virtual plate.

AI models make perfect development companions. They can use WordPress documentation to follow best practices and generate plugins with relative ease. Some more advanced apps can also create a logical file structure for you.

This opens multiple possibilities for your agency. You can create one-off plugins to cover client needs. You might also level up by creating more general-purpose plugins for use across multiple sites. A plugin with enough appeal could be sold in the marketplace.

In every case, there’s an opportunity to boost your revenue. Add custom plugin development to your project and maintenance fees.

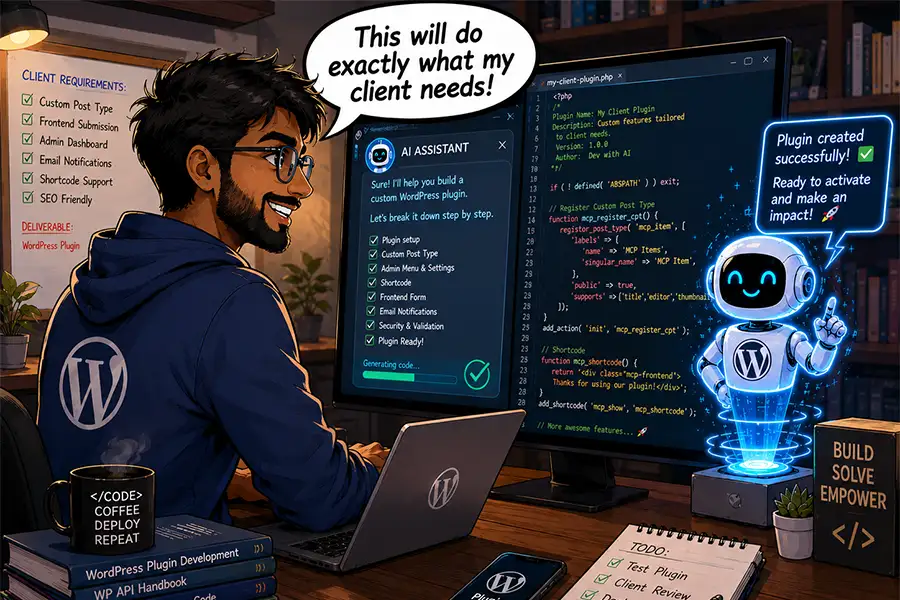
You can use AI to expand your custom development capabilities

Content Starters and Analysis

It seems like content is always a sticking point when working with clients. We’re either waiting for clients to deliver it or we’re tasked with cleaning it up. Then there is also the ever-evolving challenge of SEO.

We still don’t recommend using AI to generate production-ready content. It’s simply too generic and won’t reflect branding without human intervention. However, it can help in several areas.

For one, you can use it to create “starter” content. This is text clients can review and edit to match their needs. The final results might be completely different – but that’s not the point. Seeing content on their screen might be the impetus they need to keep the project moving forward. That saves you time and a few headaches.

AI can also analyze content for accessibility and SEO best practices. Use cases include simplifying language, determining keyword density, improving titles, and generating meta summaries. It’s also handy for researching competitors.

Now, these common tasks can be completed in a fraction of the time. Adding them to your service list provides more value to clients. In addition, the SEO analysis could be a source of recurring revenue.

AI can help you optimize client websites for search engines

AI Could Be Your Agency’s Growth Engine

Perhaps AI’s value to your business is all about perspective. Sure, you could use it to make less-good versions of what you’re already doing. Generating slop and calling it a day isn’t great for your long-term viability. We won’t argue that some people have chosen this path.

However, AI is also capable of helping you be the best version of yourself. It just requires a more thoughtful approach. Use these tools to tackle the busy work while keeping a close eye on the results. Most importantly, be the decision maker in what you build. In other words, don’t accept AI’s initial output as the final answer.

Treating this technology as a partner is a path to growing your agency. The extra time and mental bandwidth you gain will allow you to identify new revenue opportunities. The ideas above are just the tip of the iceberg.

Ask yourself: What can AI do better and faster? How can it strengthen what I do best? How can I use it to improve client services?

The answers might lead you to something great!

The post How AI Can Help You Expand Your Agency’s Service Offerings appeared first on Speckyboy Design Magazine.

Protecting Your WordPress Media: Private Files, Signed URLs, and Access Control

The WordPress media library serves us well for public content, but what about premium assets, private documents, or confidential client data? The default setup makes every uploaded file publicly accessible via a direct URL. This is a critical limitation for membership sites, digital product stores, and businesses sharing sensitive information.

Relying on direct links in your wp-content/uploads folder means anyone who finds the URL can access your content. This is a significant security risk and, for some sites, a potential loss of revenue.

In this article, we address that challenge. We’ll explore a solution to move beyond basic file storage and achieve granular control over your WordPress media, ensuring your valuable or confidential files are securely delivered only to those with proper authorization.

Understanding Public vs. Private Media

To implement a robust system for media delivery, we first need to define the two core types of media access: public and private.

Prepare for the shock of your life: public files are accessible to the public. This is the default for most files you upload to WordPress. Examples include the images embedded in your blog posts, a company logo, or an ungated download, like a template or case study. These files are not sensitive and are intended to be broadly available to anyone and anything that has the direct URL.

A private file, on the other hand, is not directly accessible. If a user attempts to visit its URL directly, they are denied access. This is essential for protecting content that is part of a paid product, membership, or is otherwise restricted. The challenge is that these files still need to be served to the right people. How do we grant access without making the files public?

Implementing Private File Storage

The fundamental principle of private file storage is to separate the file’s physical location from a public-facing URL. Rather than residing in a standard wp-content/uploads directory where all files are inherently public, we move them to a secure, private location. This is where cloud storage solutions come into play.

WP Offload Media acts as a bridge between your WordPress site and this secure cloud storage. Once configured, you can manage a file’s public or private status directly from the WordPress media library. For individual items, you’ll see a dedicated “Offload” meta box that shows the file’s current “Access” status. This status is a toggle link, allowing you to switch a file between “Public” and “Private” in the bucket. The plugin handles the rest, updating the file’s Access Control List (ACL) in the cloud to restrict direct public access.

It’s worth noting an advanced use case for Amazon S3 and CloudFront: if you have “Block All Public Access to bucket” enabled on your S3 bucket, every file is already private by default. In this scenario, WP Offload Media does not need to update the file’s ACL. Instead, all content is delivered through the CloudFront CDN, which relies on signed URLs to manage private access. With this architecture in place, the challenge is no longer about keeping files private, but rather about securely serving them when needed.

Granting Controlled Access with Signed URLs

With our files securely stored in a private cloud bucket, we face the next challenge: how do we grant temporary, controlled access to an authorized user? The direct URL is no longer an option, and routing every download through a slow, resource-intensive server-side script is a performance bottleneck.

The solution is a signed URL. A signed URL is a secure, temporary, and authenticated link that grants a user permission to access a private file for a limited time. It contains a unique signature and an expiration timestamp, making it impossible to share indefinitely.

The process works as follows: when a user requests a private file (for example, by clicking a button to download a premium PDF), WP Offload Media intercepts that request. Instead of serving the file directly, it securely communicates with your cloud storage provider to generate a unique signed URL. This temporary link is then served to the user, allowing them to download or view the file.

The benefits of this approach are substantial. First, it is highly secure, as the link expires after a set period, preventing it from being shared or abused. Second, it is exceptionally performant. The temporary URL serves the file directly from the high-speed content delivery network of your cloud provider, offloading the work from your WordPress server. This process is also seamless to the end user.

This mechanism is ideal for a wide range of applications, from embedding a private video in a members-only area to creating a secure download link for a software purchase or an e-book. It provides a robust and scalable solution for delivering private content without ever exposing the original file’s location.

Wrapping Up

By moving beyond the default WordPress media library, we have established a robust system for securing and delivering your digital assets. We started by identifying the fundamental difference between public and private files, recognizing that not all media is meant for everyone. We then implemented a solution that stores private files securely in cloud storage, completely out of public reach.

The key to granting access to these files lies in the use of signed URLs, which provide a temporary, authenticated, and secure way for authorized users to view or download content without compromising its privacy.

This approach transforms your WordPress site from a simple content platform into a secure delivery mechanism capable of handling sensitive e-books, premium video content, confidential client documents, and more. You are no longer limited by the inherent public nature of the standard media library. Instead, you have a scalable, performant, and highly secure system that ensures your valuable media is always protected and delivered with precision.

The post Protecting Your WordPress Media: Private Files, Signed URLs, and Access Control appeared first on Delicious Brains.

Using Cloud Storage for WordPress User-Generated Content

User-generated content is the proverbial double-edged sword. While it’s a powerful engine for engagement, it’s also a significant technical liability. User uploads are often unpredictable, unoptimized, and can consume server disk space and bandwidth at an alarming rate. This unchecked growth directly impacts site performance, inflates hosting costs, and complicates essential maintenance tasks like backups and migrations.

To manage this, you need an architecture designed for scale. This article will guide you through the strategies for offloading user-generated media to dedicated cloud storage. We’ll cover the foundational techniques for handling simple uploads, advanced methods for integrating with complex community plugins, and the critical best practices for managing file optimization and privacy in a UGC-driven environment.

The Unique Challenges of User-Generated Media

Handling user-generated media isn’t simply a matter of scaling your existing /wp-content/uploads directory. It presents a distinct set of architectural challenges that standard media management workflows are ill-equipped to handle. Before implementing a solution, it’s critical to understand the specific problems you need to solve.

Unpredictable Volume and Unoptimized Files

An administrator typically curates and optimizes media before uploading. Users do not. They will upload 8 MB photos directly from their phone for a profile avatar that will be displayed at 150×150 pixels. This creates an environment of unpredictable and explosive growth. A successful forum thread or community event can result in gigabytes of new, unoptimized media being added in a single day, placing an immediate and heavy strain on your server’s disk space and bandwidth.

Complex Privacy and Access Control

User-generated content may not be intended for the public. Consider a student’s assignment submission on an LMS site, attachments in a private message on a BuddyBoss community, or a member’s “friends-only” photo gallery. These files require sophisticated access control. Simply placing them in a publicly accessible cloud storage bucket is not a secure option, as the files could be accessed by anyone with the direct link.

Organizational Chaos

By default, WordPress places all uploads into date-based folders (e.g., /wp-content/uploads/2025/08/). When user content is added to this mix, your server’s filesystem becomes a chaotic blend of blog post images, user avatars, forum attachments, and form uploads. This lack of separation makes programmatic management, manual auditing, or bulk operations on a specific type of user content nearly impossible.

The Backup and Migration Burden

Routine server operations become increasingly burdensome as the /wp-content/uploads directory swells with gigabytes of user content. Full-site backups that once took minutes can take hours, consuming significant server resources and storage space. Migrating the site to a new host becomes a monumental project, involving massive, time-consuming file transfers that are frequently prone to failure. Separating this volatile user data from your core application files is essential for long-term maintainability.

Offloading UGC with WP Offload Media Lite

The foundational strategy for managing user-generated content is to intercept file uploads and redirect them to a dedicated cloud provider like Amazon S3, DigitalOcean Spaces, or Google Cloud Storage. This immediately separates the storage and delivery of these heavy assets from your web server’s primary responsibilities.

For some cases of UGC, this can be accomplished using the free WP Offload Media Lite plugin. Some plugins that allow frontend submissions—such as forms for guest posts, contests, or simple “upload your photo” features—are coded to use the standard WordPress Media Library uploader.

When a user submits a file through one of these forms, WP Offload Media Lite hooks into the process just as it would for an admin upload. The file is automatically copied to your configured cloud bucket, and its URL is rewritten to serve it directly from the cloud. This provides an immediate, effective solution for offloading user content generated through these standard channels.

However, this foundational approach has a critical limitation: it only works if the content-generating plugin funnels uploads through the core WordPress Media Library. This is often not the case for plugins that need more control over files.

For example, BuddyBoss uses custom handlers for avatars and cover images, and the eCommerce plugin Easy Digital Downloads intentionally stores digital products outside of the public Media Library for security. These uploads bypass the standard WordPress hooks and therefore aren’t detected or offloaded by WP Offload Media Lite. Addressing this requires a deeper level of integration.

Advanced Strategies for UGC Management

Overcoming these limitations and properly managing content from complex plugins requires a tool that integrates more deeply with your site’s ecosystem. The licensed version of WP Offload Media provides specific features designed to solve the core challenges of privacy, organization, and compatibility inherent to user-generated content.

Integration with Complex Plugins

One advantage of the licensed version when dealing with user-generated content is its library of purpose-built integrations.

For platforms that bypass the WordPress Media Library, the plugin doesn’t just watch the /uploads folder, it hooks directly into their specific functions. WP Offload Media intercepts the file at its source to ensure it’s offloaded correctly. In addition, it can process all historical content from these integrations, ensuring your entire existing community’s media is migrated to the cloud.

Managing Privacy with Signed URLs

Solving the privacy challenge is critical. You can’t store a customer’s purchased file or a student’s submitted paper in a publicly accessible bucket. WP Offload Media Pro handles this by allowing you to restrict access to offloaded media.

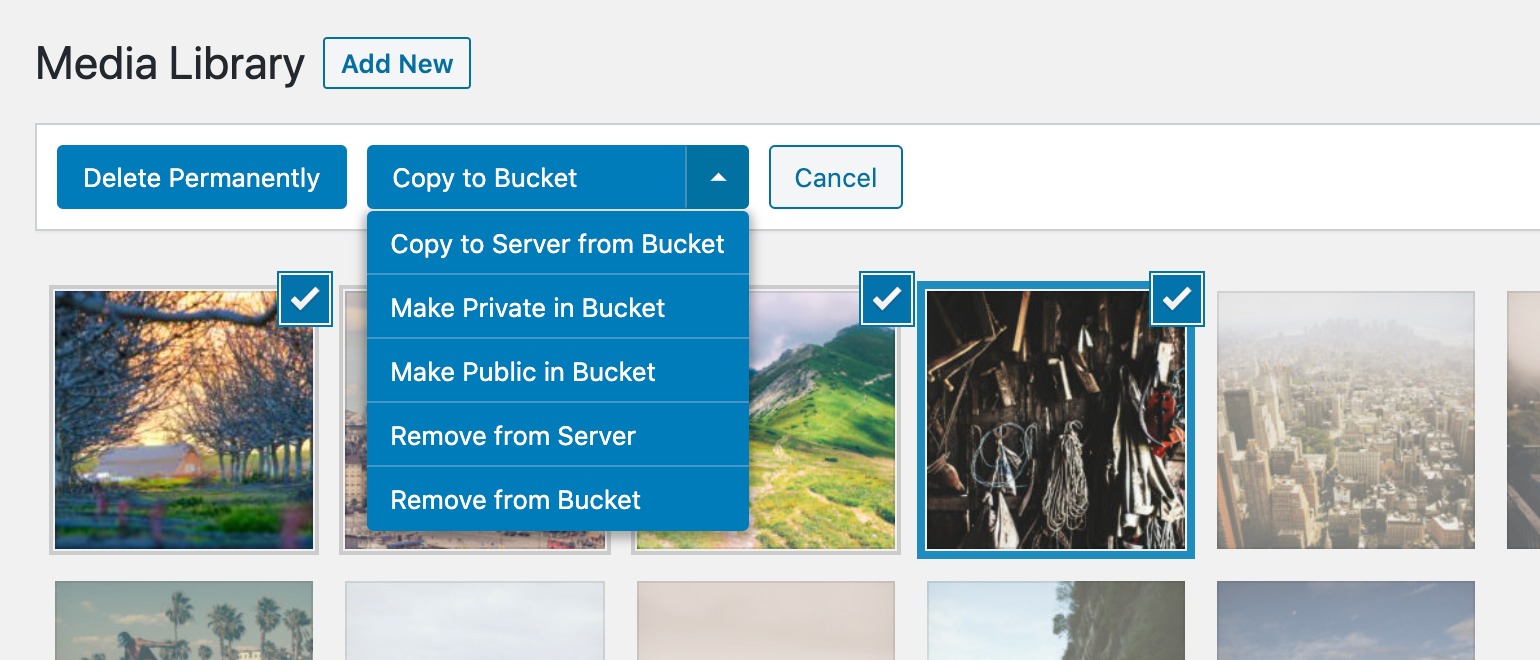
Media Actions

When a legitimate user needs to access the file, the plugin generates a signed, expiring URL on the fly. This unique URL grants temporary access to that specific user, after which it becomes invalid. This is the industry-standard method for serving private content securely from cloud storage, ensuring sensitive files are protected.

Integration-Specific Cloud Organization

Some integrations sort uploaded files into logical paths within your cloud bucket. The level of organization is tailored to the third-party plugin, with some integrations offering highly dynamic structures.

The BuddyBoss integration is the most powerful example of this. It automatically sorts the different types of community media into a structured path system based on context, such as:

  • User Avatars: uploads/avatars/{USER ID}/
  • Group Cover Images: uploads/buddypress/groups/{GROUP ID}/cover-image/
  • Photos & Videos: uploads/bb_medias/{YYYY}/{MM}/

This deep, automatic organization is a key benefit of specific integrations designed to handle complex, user-driven content. However, for many other plugins, the integration’s primary focus is on different challenges, such as security and compatibility.

For many plugins, the most critical function of an integration is to handle security for private files or to ensure that URLs work correctly within complex environments like page builders.

For eCommerce plugins like Easy Digital Downloads and WooCommerce, the integration’s primary role is security. When you upload a digital product, the integration automatically offloads the file, sets its permissions to private in your cloud bucket, and ensures that when a customer makes a purchase, the file is delivered using a secure, expiring URL. This protects your digital assets from unauthorized access.

For page builders like Elementor or plugins like Advanced Custom Fields, the integration focuses on compatibility. These tools often store URLs in their own cached data. The integrations ensure that when media is offloaded or settings are changed, these URLs are correctly found and rewritten, preventing broken images and “mixed content” errors that would otherwise be very difficult to troubleshoot.

Essential Best Practices for Any UGC Platform

A robust storage architecture is the foundation, but a truly resilient UGC platform also requires proactive measures to manage the content itself. Implementing a tool like WP Offload Media solves the “where,” but the following best practices address the “what” and “how” of user content, ensuring your platform is secure and efficient from end to end.

Validate and Sanitize at the Source

The most effective time to stop a problematic upload is before it ever consumes server resources. Your frontend forms are your first line of defense, and it’s critical to implement strict validation to control what users can submit.

This begins with enforcing a strict file type whitelist, where you explicitly define the exact extensions you will accept—such as jpg, png, or pdf—rather than attempting to block specific malicious types. In addition to controlling the file type, you must also set a sensible maximum file size, like 5MB or 10MB, to prevent users from bogging down your server with enormous video files or uncompressed high-resolution images.

Automate Server-Side Image Optimization

You cannot expect your users to upload optimized images. Therefore, you must automate the process on the server. By integrating a plugin like EWWW Image Optimizer, you can process every user-submitted image before it gets offloaded. Such a tool can automatically resize images to appropriate maximum dimensions, apply powerful, lossless compression, and even convert them to efficient formats like WebP. This ensures that only lean, optimized files are sent to your cloud storage, saving on both storage costs and your visitors’ bandwidth.

Establish a Clear Moderation Process

The fact that content was uploaded by a user doesn’t absolve you of the responsibility for what that content is. You must have a clear and consistent moderation workflow in place. Consider whether user-submitted content should be held in a “pending review” state before it goes live, and who on your team is responsible for that review. This should be supported by a public-facing Terms of Service or Acceptable Use Policy that clearly outlines what is and isn’t permitted on your platform, giving you a firm basis for any moderation decisions.

Wrapping Up

User-generated content transforms a website into a living community, but it introduces architectural stresses that can easily undermine the platform’s stability and performance. Treating UGC as just another part of the Media Library is a short-term approach that creates long-term technical debt, resulting in a site that is slow, expensive to maintain, and difficult to migrate.

A professional-grade storage architecture is the solution. By offloading media to a dedicated cloud provider, you immediately solve the core problems of storage and server load. When this foundation is enhanced with deep plugin integrations, secure handling for private files, and disciplined best practices for validation and optimization, you transform UGC from a technical liability into a truly scalable asset.

Ultimately, this is about more than just managing files. It’s about building a technical foundation that allows your community to flourish without limits. By implementing these strategies, you are free to encourage user engagement and foster growth, confident that your platform is engineered to handle the success that follows.

The post Using Cloud Storage for WordPress User-Generated Content appeared first on Delicious Brains.

Preparing Your WordPress Site for High-Traffic: Media Optimization Strategies

Many successful WordPress sites eventually hit an architectural bottleneck. As traffic scales, the web server struggles to handle the dual responsibilities of running the PHP application and serving a library of heavy media assets. This strain on bandwidth is a primary cause of slowdowns and instability under load.

One solution is to decouple these roles. In this article, we discuss a key strategy for building a truly scalable site: offloading the entire WordPress media library to a dedicated cloud storage provider. We’ll cover the practical steps for implementing this, from handling new uploads to migrating an existing library, integrating a global CDN for elite performance, and complementing the strategy with other essential media optimizations.

Decoupling Your Media from Your Server

The standard WordPress setup bundles the application layer (PHP, database) and the asset layer (images, videos) onto a single server. A core strategy for scalability is to decouple these, assigning each role to a specialized environment. This means moving your media assets from the local server filesystem to a dedicated cloud-based object storage service.

In this model, the roles become clear and efficient:

  • Your Web Server’s Job: Its core competency is executing PHP, handling database queries, and dynamically generating the HTML document for the user. Every request it serves for a static image or video file steals CPU cycles and bandwidth from these critical application tasks.

  • The Cloud Storage Provider’s Job: Services like Amazon S3, Google Cloud Storage, and DigitalOcean Spaces are purpose-built for storing and delivering files with extreme reliability and speed. Their global infrastructure is designed for high-concurrency asset delivery, a task they often perform more efficiently than a general-purpose web server.

Adopting this decoupled architecture can yield immediate and significant advantages in performance and stability. Pages can load faster because browsers can establish more parallel connections to different hostnames. Serving assets from a cloud domain allows media to download concurrently without blocking the main document request from your server. This directly reduces server load. With its bandwidth and processing power no longer consumed by asset delivery, the server can dedicate its full capacity to running WordPress, which is crucial for handling traffic spikes without a drop in performance.

This strategy also provides superior scalability and resilience for future growth. Your media library is no longer constrained by the fixed disk space of your hosting plan. Cloud object storage scales almost infinitely on a pay-for-what-you-use basis, allowing your library to grow from gigabytes to terabytes without complex server migrations.

Getting Started: Your First Step into Media Offloading

It’s certainly possible to offload media manually. You could write custom scripts that hook into WordPress’s wp_handle_upload filter, integrate a cloud provider’s SDK to transfer the file, and then filter wp_get_attachment_url to serve the new URL. This path, however, is fraught with complexity and requires significant development and maintenance time.

A more direct and reliable approach is to use a tool purpose-built for the task, such as WP Offload Media Lite. Getting started is a straightforward, three-step process:

  1. First, you’ll need a destination for your files. This requires an account with your preferred cloud object storage provider, such as Amazon S3, DigitalOcean Spaces, or Google Cloud Storage.
  2. Next, install and activate WP Offload Media Lite on your WordPress site.
  3. Finally, connect the plugin to your storage provider by defining your provider and bucket, adding your access keys to your wp-config.php file for security, and running the setup wizard.

The first stage of setting up WP Offload Media in the WordPress admin.

Once configured, the plugin works transparently in the background. Every new file added to the Media Library is automatically copied to your cloud storage bucket. It’s important to note that WP Offload Media focuses purely on the “offloading” step, not image optimization. For that, we recommend a tool like EWWW Image Optimizer, which integrates with WP Offload Media to compress your images before they are offloaded. By default, the original file also remains on your server, but an option in the plugin settings allows you to automatically delete the local file once it’s successfully in the cloud.

The final step is that the plugin rewrites the file’s URL across your site. This can point directly to the cloud provider, or for even faster global delivery, you can configure a Content Delivery Network (CDN) and have the plugin use your custom CDN domain instead.

This is a powerful first step for any site, as it future-proofs all new content. However, for an established website with a history, this solves only part of the problem. Your existing library, which could contain thousands of images and videos, still resides on and is served by your local server. Addressing this is the critical next step in making your site truly ready for high-traffic events.

Scaling Up: Advanced Strategies for a High-Traffic Reality

Handling future uploads is a critical first step, but to make a site truly resilient to traffic, you must address its entire history. An established site’s local media library represents a significant performance liability. The following strategies move from basic preparation to a complete, professional-grade solution for media management at scale.

Offloading Your Entire Existing Library

The most pressing challenge is migrating the thousands of media files already on your server. A manual migration is not a realistic option. This is where the licensed version of WP Offload Media becomes essential. It includes an Offload Tool specifically designed to tackle this. You simply point it at your library, and it systematically copies every existing file to your cloud bucket without interrupting your live site. It can run in the background, processing your entire library from oldest to newest, ensuring that every single asset is eventually moved off the server.

Achieving 100% CDN Coverage

While the Lite version allows you to serve new uploads via a CDN, the full performance benefit is only realized when every asset on your site is delivered with the same global speed. The licensed version’s migration tool makes this possible. Once your entire library is offloaded, every image is then served through your configured CDN. This provides a consistent and fast experience for all users across all content and is the key to a truly scalable delivery architecture.

Full Control Over Storage and Workflow

Once your entire library is offloaded, you can fully reclaim your server’s resources, freeingup gigabytes of disk space. This not only optimizes server performance but can also significantly reduce hosting costs.

Crucially, this does not mean losing control. All of your offloaded media remains fully manageable from the familiar WordPress Media Library. You can browse, search, and even download files back to your server or copy them to a different cloud bucket, all from within the WordPress admin. Your workflow remains the same, even though your files are now served from a highly scalable, external infrastructure.

Beyond Offloading: Other Essential Media Strategies

Offloading provides the architectural foundation for a scalable media strategy, but true optimization also happens at the asset level. A 5 MB image served from a lightning-fast CDN is still a 5 MB image that the user has to download. Combining your offloading architecture with the following best practices will ensure your site is as lean and fast as possible.

Compress and Resize Before Offloading

It’s critical that images are properly sized and compressed before they are copied to your cloud storage. Sending a 4000px-wide image to be displayed in a 800px container is a significant waste of bandwidth. As we mentioned earlier, a dedicated image optimization plugin like EWWW Image Optimizer should be part of your stack. These tools can automatically resize uploads to sensible maximum dimensions and apply powerful compression, integrating with WP Offload Media to ensure only optimized files are sent to the cloud.

Serve Next-Gen Image Formats

Modern image formats like WebP can provide significantly better compression than traditional JPEGs and PNGs, resulting in smaller file sizes at the same visual quality. Many image optimization plugins can automatically create WebP versions of your uploads and transparently serve them to supported browsers, while providing the original format as a fallback. This is a purely additive improvement that reduces bandwidth with no downside.

Implement Lazy Loading

Lazy loading defers the loading of off-screen images and iframes until the user actually scrolls them into the viewport. This dramatically improves the initial perceived performance of a page, as the browser doesn’t have to download every single image at once. While WordPress has included basic native lazy loading since version 5.5, dedicated plugins often provide more granular control over thresholds, animations, and excluding specific images from the behavior. For media-heavy pages, this is more of a necessity than an optimization.

Wrapping Up

Ultimately, a server’s performance under load is dictated by its architecture. A standard WordPress installation that co-locates the application and its heavy media assets is inherently vulnerable during traffic spikes, regardless of the raw power of the hosting plan.

By decoupling the application from asset delivery through media offloading, you solve the primary bottleneck at its source. When you combine this foundational strategy with the global reach of a CDN and diligent asset-level optimizations like compression and lazy loading, the result is a truly resilient infrastructure. Preparing your site for high traffic isn’t about bracing for impact; it’s about engineering an architecture where that impact is negligible. You’re no longer just fixing a slow website, but building for the success you’re working to achieve.

Which other tools do you use to optimize how your WordPress sites store and serve images? Let us know in the comments!

The post Preparing Your WordPress Site for High-Traffic: Media Optimization Strategies appeared first on Delicious Brains.

Moving WordPress to a New Domain: A Step-by-Step Guide Without Breaking Links

Relocating a WordPress website to a new domain is a frequent task for developers, but it often comes with the risk of broken links and lost content. Ensuring a seamless transition where every URL, image, and internal reference correctly points to your new domain is critical for user experience and SEO.

In this article, we outline the steps required to move your WordPress site to a new domain without breaking links. We will primarily utilize WP Migrate Lite for the core migration process, demonstrating precise database and file handling. We’ll also explore how WP Migrate can further streamline and accelerate these domain transfer workflows.

Understanding the Domain Migration Challenge: Why Links Break

Moving a WordPress website to a new domain often results in broken links. This happens because WordPress stores absolute URLs and file paths directly within its database. It doesn’t rely solely on relative paths.

A WordPress site’s primary address is stored in the siteurl and home options within the wp_options table. However, beyond these obvious locations, your old domain’s URL is embedded in countless other places:

  • Within the content of your posts and pages in the wp_posts table.
  • In custom fields managed by plugins or themes (often in wp_postmeta).
  • In widget settings, navigation menus, and various plugin configurations, which are frequently stored as complex, serialized data within the wp_options table or custom tables.
  • Direct links to media files, which also contain the domain name.

The challenge with this deep embedding, particularly with serialized data, is that a simple text-based search and replace on a raw SQL file can corrupt these complex data structures. If the length of the string changes during a simple replacement, it can break the serialization, rendering menus, widgets, and many plugin settings nonfunctional. The solution is to use a tool that can intelligently find and replace these URLs and paths while preserving data integrity.

Pre-Migration Checklist: Preparing for a Smooth Transition

A successful WordPress domain migration relies heavily on thorough preparation. Taking the time to complete a few key steps before you begin the transfer process can save you from significant headaches, unexpected downtime, and data loss. This checklist ensures your source site is ready for export and your destination environment is prepared to receive the data.

Full Backup: Your Essential Safety Net

Before making any changes to your live site, the single most critical step is to create a complete and verified backup of your entire WordPress installation. This includes both your database and all your website files (themes, plugins, media uploads, and core WordPress files). This backup serves as your absolute failsafe. If anything goes wrong during the migration, you can revert to the original state of your site without permanent data loss. Store this backup securely in an off-site location, not on the same server.

Update Everything

Outdated WordPress core files, themes, or plugins can introduce compatibility issues or unexpected behavior during a migration. Before you begin the export, ensure that all components of your source WordPress site are updated to their latest stable versions. This minimizes the chances of encountering errors related to old code when the site is transferred to a new environment.

Clean Up Your Site

To reduce the size of your migration package and streamline the transfer process, it’s beneficial to perform a site cleanup. This involves:

  • Deleting unused themes and plugins: Remove any themes or plugins that are no longer active or necessary.
  • Removing old media: Consider deleting any unused images or media files from your Media Library that are no longer relevant to your site.
  • Cleaning your database: Utilize a database optimization plugin or manually clear old post revisions, spam comments, and transient options. A smaller, cleaner database will export and import faster.

Prepare Your New Domain and Hosting Environment

Before initiating any export from your old site, ensure your new destination is ready.

Make sure the new domain name is registered and accessible and have your new hosting account provisioned and ready. It is generally recommended to start with a completely fresh, default WordPress installation on your new domain. This provides a clean slate to import your old site’s data and files into. You’ll replace its database and wp-content folder with your old site’s data.

Step-by-Step: Moving Your Site with WP Migrate Lite

This section looks at the steps required to export your site’s database and files from your old domain and successfully import them onto your new one, ensuring all internal links are correctly updated.

WP Migrate Lite offers a Full Site export option that bundles both your database and files, but in this case we’re going to export the database and files separately. For a domain migration, this approach emphasizes the critical URL replacement within the database, provides greater control over each component for precise execution, simplifies troubleshooting if issues arise, and can make managing larger site transfers more efficient than a single, massive archive.

Install WP Migrate Lite on Your Old Domain’s WordPress Site

First, ensure the WP Migrate Lite plugin is installed and activated on the WordPress installation running on your old domain. You’ll find it by navigating to Tools .> WP Migrate in your WordPress admin sidebar.

Export Your Database with Domain Replacement

This is the most critical part of a domain migration, as it handles the updating of all old URLs to the new ones directly within your database. WP Migrate Lite’s intelligent Find and Replace feature is essential here.

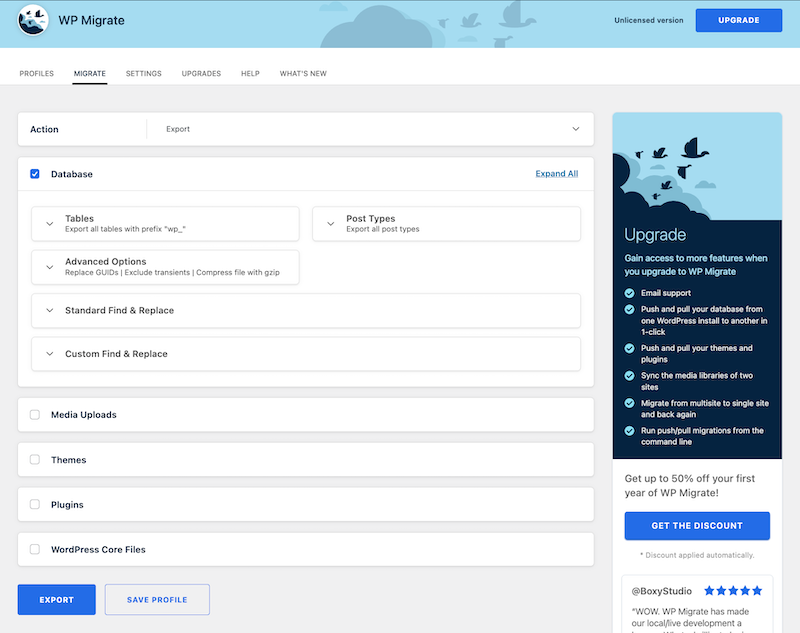
From your old domain’s WordPress admin, access WP Migrate Lite’s main interface, select the Migrate tab, and then click Export

The Migrate tab in WP Migrate Lite, showing various options including "Export."

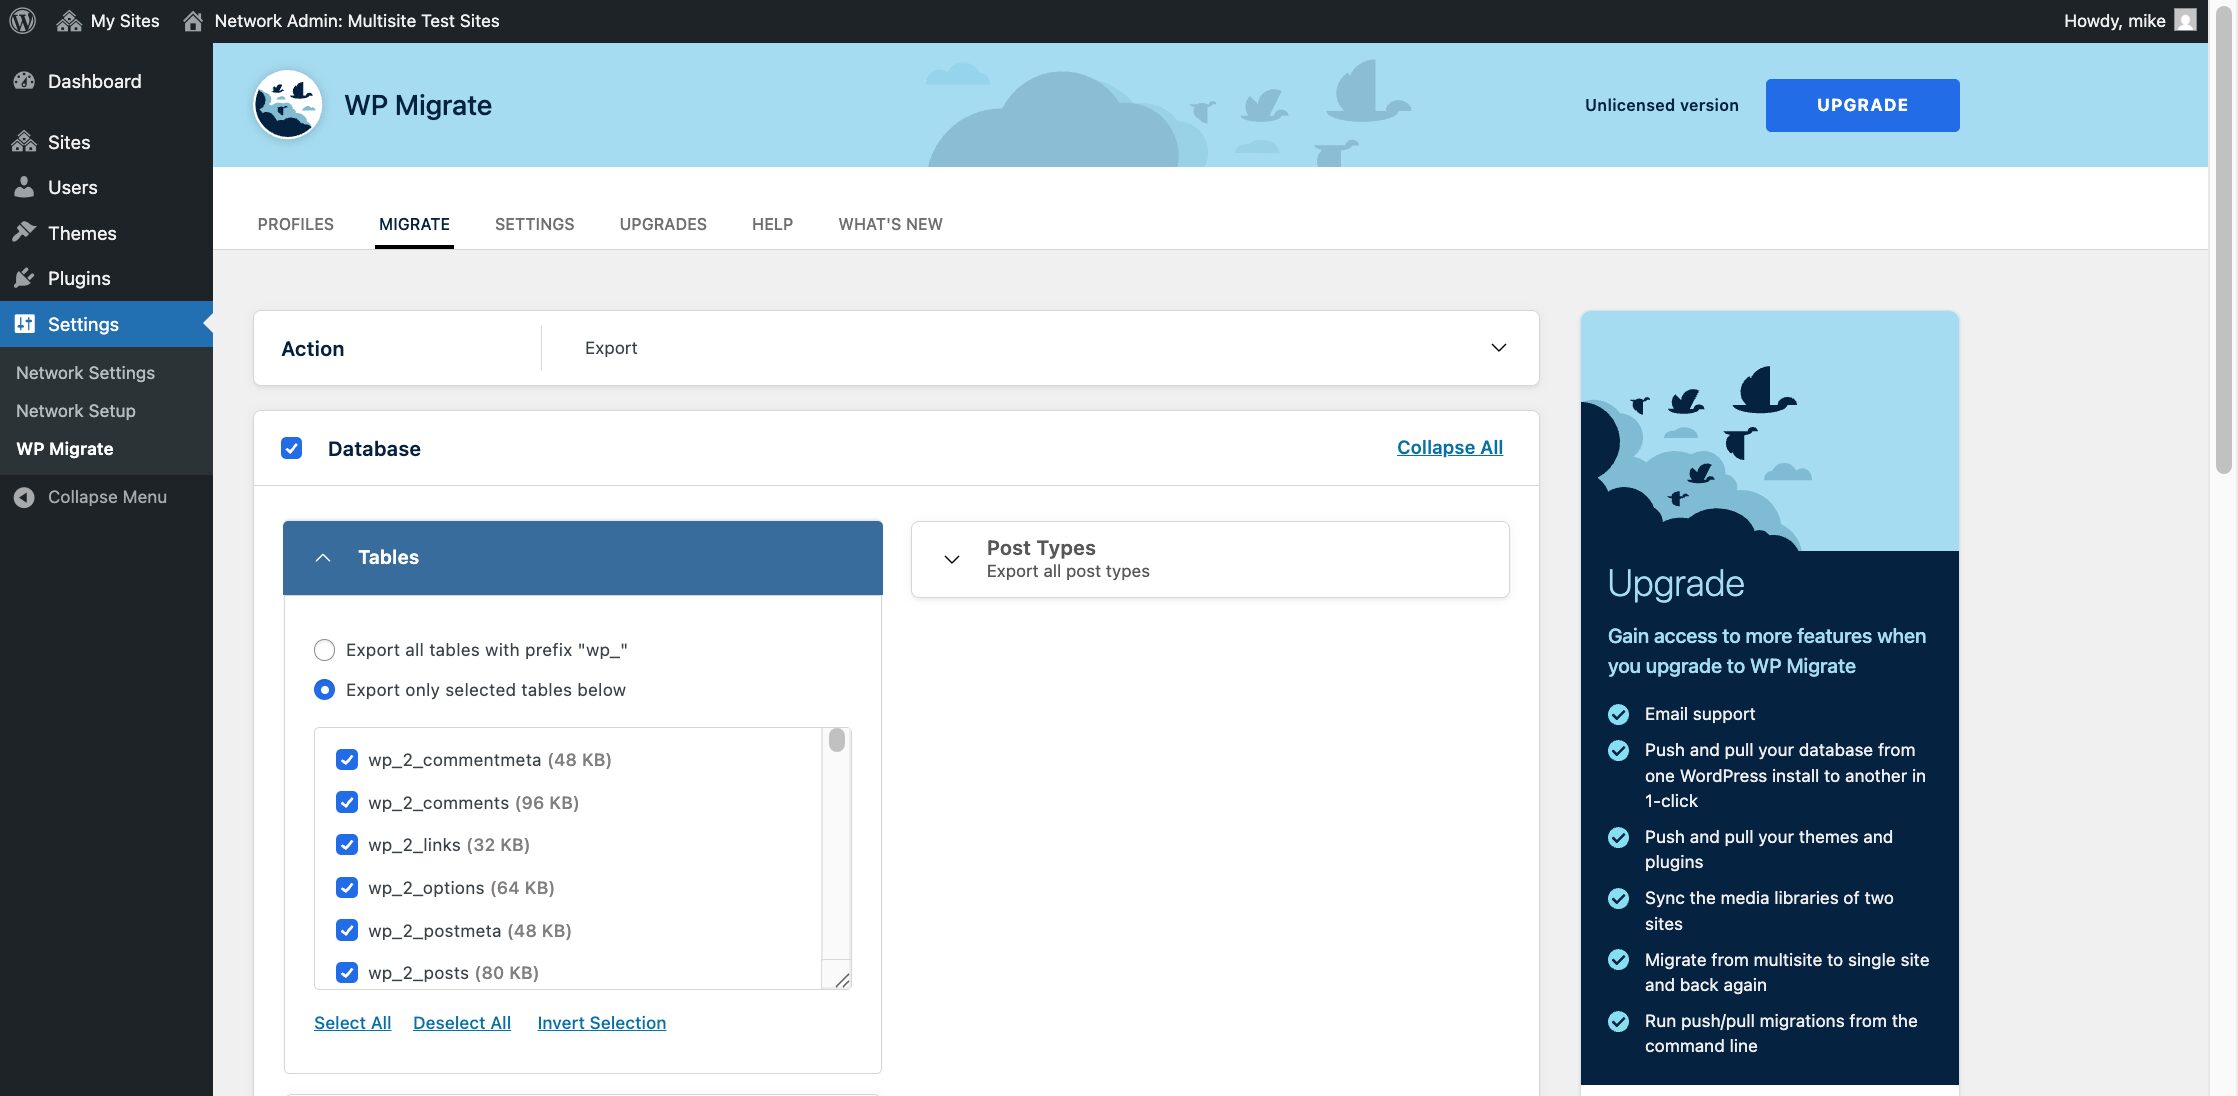
The “Database” checkbox should be checked by default. Next, click Tables, and ensure that the radio button “Export all tables with prefix “wp_”” is selected. This ensures every piece of data stored in the database is included, including site options, post content, and plugin settings.

Selecting database tables to migrate in WP Migrate Lite.

The next step is to configure a “Standard Find & Replace.” The “Find” field should be automatically pre-filled with your current (i.e., old) domain’s URL. In the “Replace” field, carefully enter the full URL of your new domain, ensuring you include the correct protocol (http or https).

WP Migrate Lite will intelligently handle serialized data within your database during this process, which is crucial for preventing data corruption that a simple text search-and-replace often causes.

You can also set a different path for your new domain. This isn’t necessary in most cases, as WP Migrate Lite will automatically set up the new path for you.

Once configured, click the Export button. WP Migrate Lite will process your database, perform the replacements, and generate a SQL file containing your database.

Running a find and replace in WP Migrate Lite.

Export Your WordPress Files

After exporting your database, the next step is to export all the necessary files from your old WordPress installation. This includes your themes, plugins, media uploads, and potentially other custom files or WordPress core itself.

Click on the Migrate tab and then select Export again. The “Database” section will be checked by default. Since you’ve already exported and handled your database in the previous step, the first action here is to uncheck the Database box.

Next, we’ll configure the file exports from the remaining sections.

Media Uploads

This section handles the files within your wp-content/uploads folder. Check the Media Uploads box. A dropdown will then appear offering three options for how to export these files. For a full domain migration where you want all your media to be on the new site, you should select “Export all media uploads”. This option ensures all files from your uploads folder are copied. The other options, “Export new and updated media uploads” and “Export media uploads by date,” are generally more suited for partial content syncs rather than a complete domain transfer.

Themes

This section allows you to export your theme files located in wp-content/themes. Check the Themes box. The accompanying dropdown provides several choices. For a complete domain migration, select Export all themes to ensure every theme from your old site is included. Other options like “Export only active themes” or “Export only selected themes” are available if you have specific needs.

Plugins

Similar to themes, this section manages the export of your plugin files from wp-content/plugins. Check the Plugins box. From the dropdown, select Export all plugins to include all plugins from your old site in the migration package. This section offers the same options as “Themes”, but for plugins.

Other Files

The “Other Files” section is for selecting any additional files or folders found directly within your wp-content directory that are not covered by the “Media Uploads,” “Themes,” or “Plugins” sections. Check the Other Files box. A checklist will then appear, allowing you to manually select individual files or folders you wish to include. These might be custom configurations, uploads outside the standard directory, or other specific assets. None are selected by default, so you must carefully choose any you need.

Each of the “Media Uploads,” “Themes,” “Plugins,” and “Other Files” sections also provides an advanced option to use gitignore patterns to exclude specific files relative to their respective directories. This is useful for highly customized exports where certain files (like cache files or development-specific assets) should not be migrated.

WordPress Core Files

The “WordPress Core Files” section addresses the core WordPress installation itself. Check the “WordPress Core Files” box. Including WordPress core files ensures that the exported archive contains the exact version of WordPress installed on your site, which is particularly helpful when replicating the site precisely in a new environment. This option includes the wp-admin and wp-includes directories, along with various root WordPress files such as index.php, license.txt, readme.html, and crucial configuration files like wp-config.php and wp-config-sample.php.

Once all your desired file sections are configured, click the “Export” button. WP Migrate Lite will package your selected files into a single ZIP archive.

.

Prepare Your New Domain’s WordPress Installation

Before importing your old site’s content, you need a fresh WordPress installation on your new domain to serve as the destination. Ensure your new domain name is pointed to your new hosting environment’s server, and then set up a completely fresh, default WordPress installation on your new domain.

Once the new WordPress site is accessible via your new domain, log in to its admin dashboard and delete any default content (e.g., “Hello world!” post, sample page, sample comment) to provide a cleaner slate for your imported data.

Manually Import the Database to Your New Domain

Now you will replace the fresh WordPress installation’s database on your new domain with the one you exported and modified from your old site.

Access your new domain’s database, typically through a tool like phpMyAdmin via your hosting control panel, or a command-line interface (CLI) if you have SSH access.

If using phpMyAdmin, select the database associated with your new WordPress installation from the left sidebar. Click on the Structure tab. Scroll to the bottom of the list and click the checkbox labeled Check all. From the “With selected:” dropdown menu, choose “Drop”. You will receive a confirmation prompt asking if you truly want to execute the DROP TABLE query. Confirm the action. This step is crucial as it clears out the default WordPress tables to make way for your imported data.

Next, go to the Import tab. Click Choose File and select the SQL file you exported with WP Migrate Lite. Ensure the character set and other options are correct (usually the default is fine). Click Import to begin the import.

If using WP-CLI, SSH into your new hosting environment and navigate to your new WordPress installation’s root directory. Ensure your wp-config.php file has the correct database credentials for the new database. Then, run the command: wp db import /path/to/your/downloaded/database.sql (remember to replace /path/to/your/downloaded/database.sql with the actual path to your SQL file, which you’d need to upload via SFTP first). This command will automatically drop existing tables and import your new data.

Manually Transfer Files to Your New Domain

With the database imported, the final step for WP Migrate Lite is to transfer your themes, plugins, and media files to the new domain.

Extract the contents of the ZIP file you downloaded from WP Migrate Lite. This will give you a “wp-content” folder and potentially other root WordPress files. Using an FTP or SFTP client, connect to your new hosting environment and navigate to the root directory of your new WordPress installation.

Upload the wp-content folder from your extracted ZIP file to your new WordPress installation’s root. When prompted, instruct your FTP/SFTP client to overwrite any existing files and folders within wp-content. This will replace the default themes, plugins, and empty uploads folder with those from your old site.

If your old site had custom .htaccess rules, a robots.txt file, or specific modifications to wp-config.php (beyond database credentials), you may need to transfer these files individually from your extracted ZIP’s root directory to the new site’s root. Exercise extreme caution when transferring or merging wp-config.php, as incorrect details will break your site. It is often safer to manually re-add specific customizations to the new wp-config.php rather than replacing the entire file.

Post-Migration Checks and Final Steps

Even with careful execution, some final checks are essential to ensure your site is fully functional on its new domain.

Log in to the new domain’s WordPress admin and navigate to Settings > Permalinks. Without making any changes to the permalink structure itself, simply scroll to the bottom of the page and click the Save Changes button twice. This action flushes WordPress’s rewrite rules, ensuring all your posts and pages are accessible at their new URLs.

Ensure you clear all caches if you had any caching plugins active on your old site, or if your new hosting uses server-side caching. This prevents the site from serving outdated information or getting stuck in redirect loops.

Finally, thoroughly test your new site. Systematically navigate through it, clicking on various posts, pages, and custom post types, testing all navigation menus, checking all images and media files, submitting forms, and verifying plugin functionalities.

Once you are completely satisfied that your site is working perfectly on the new domain, update your domain’s DNS records to point to your new hosting environment’s server. This is the final step that makes your new domain the primary live address for your website. DNS propagation can take up to 24-48 hours.

If your old domain was previously indexed by search engines and you wish to preserve SEO value, it is highly recommended to set up 301 permanent redirects from every URL on your old domain to its corresponding URL on the new domain. This tells search engines that your content has permanently moved.

Streamlining Domain Migrations with WP Migrate

While WP Migrate Lite provides the necessary tools for a successful manual domain migration, the multi-step process involving file transfers, database imports, and manual configurations can be time-consuming and prone to human error, especially for larger sites or frequent domain changes. WP Migrate directly addresses these challenges, offering a highly streamlined and automated workflow that significantly reduces effort and risk.

One advantage of WP Migrate is its direct push and pull functionality for both databases and files. This feature completely bypasses the need for manual download, upload, and import steps. Instead, you establish a secure, direct connection between your source and destination site. From the source site, you can “push” the entire site directly to the new domain, complete with its database, themes, plugins, and media uploads. WP Migrate handles all the underlying complexities, including intelligently performing the necessary URL and path replacements and correctly dealing with serialized data, all in one coordinated operation. This capability dramatically accelerates the migration process and virtually eliminates the risk of errors associated with manual transfers.

WP Migrate’s WP-CLI integration provides a powerful avenue for automation. This means you can initiate and control domain migrations directly from your command line. For those utilizing version control and continuous integration/continuous delivery (CI/CD) pipelines, this allows domain migration steps to be scripted and integrated into automated deployment processes, enhancing efficiency and reliability across your development ecosystem.

Collectively, these premium features transform a potentially tedious and error-prone domain migration into a fast, reliable, and often automated task. By eliminating manual steps and leveraging intelligent, direct site-to-site communication, WP Migrate significantly reduces both the time commitment and the inherent risks involved in moving your WordPress site to a new domain.

Wrapping Up

Relocating a WordPress website to a new domain doesn’t need to be fraught with broken links or lost content. Ensuring a seamless transition where every URL, image, and internal reference correctly points to your new domain is a matter of using the right processes and tools. A systematic approach allows you to confidently manage your WordPress site’s evolution and ensure it thrives on its new home.

Have you migrated a site to a new domain with WP Migrate or another tool? How was the process? Let us know in the comments!

The post Moving WordPress to a New Domain: A Step-by-Step Guide Without Breaking Links appeared first on Delicious Brains.

Merging WordPress Sites: Consolidating Multiple Installs into a Multisite Network

WordPress Multisite is a powerful tool, highly useful for things like client sites managed by an agency, school or university departments, or large corporate structures where many related sites are needed. However, moving existing standalone sites into that network can be a real headache, with tricky database merges and file juggling.

In this article, we look at two ways to approach this migration: the manual way with a bit of assistance from WP Migrate Lite, and the practically automatic way with WP Migrate.

What is WordPress Multisite?

Multisite is a WordPress feature that allows you to run multiple independent WordPress websites from a single WordPress installation. It allows you to:

  • Manage everything centrally: Handle core updates, themes, and plugins for your entire network from one admin dashboard.
  • Share resources: Themes and plugins can be installed once and activated across multiple sites within the network.
  • Streamline user management: Users can often have accounts across different sites in the network.

Subdomains vs. Subdirectories

A critical choice you’ll make when setting up your multisite network is how the URLs for your individual subsites will be structured.

  • Subdomains: Your subsites will appear as subdomains of your main network domain (e.g., site1.yourdomain.com, site2.yourdomain.com). This often requires your web host to support “wildcard subdomains” and can involve specific DNS configurations.

  • Subdirectories: Your subsites will appear as subfolders of your main network domain (e.g., yourdomain.com/site1, yourdomain.com/site2). This typically relies more on .htaccess rules and is often simpler to set up initially on shared hosting.

This decision is made early in the Multisite setup process and is generally very difficult to change later, so choose wisely based on your hosting capabilities and desired URL structure.

Why Converting to Multisite Can Be Complex

Bringing existing single WordPress sites into the multisite fold isn’t a simple drag-and-drop. The biggest challenges are merging database tables, file organizations, and making sure URLs and serialized strings aren’t broken.

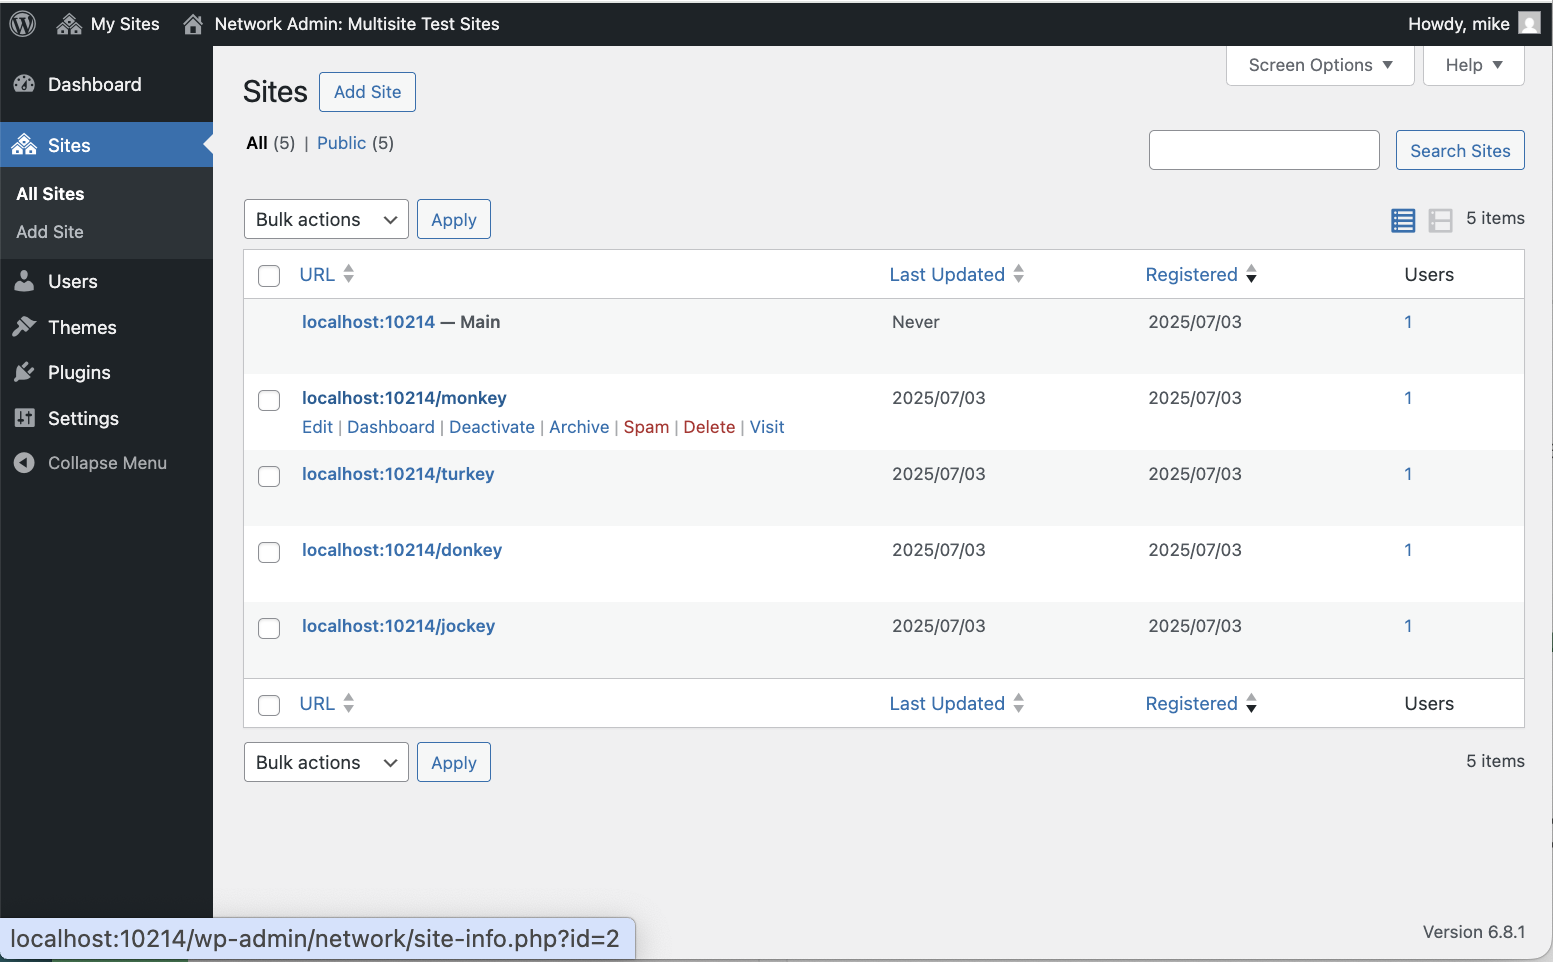
  • Database Structure: Single sites use a straightforward set of database tables (e.g., wp_posts, wp_options). Multisite, however, uses global tables (like wp_users and wp_usermeta for the entire network) alongside site-specific tables, each with a unique prefix (e.g., wp_2_posts, wp_3_options). Merging these correctly without data corruption is the biggest hurdle.
  • File Organization: Media uploads in a single site live in a simple wp-content/uploads/ folder. In a multisite, each subsite gets its own dedicated folder, typically wp-content/uploads/sites/[site_ID]/.
  • URLs and Serialized Data: A single site’s database contains its old URL everywhere. When you move it to a multisite subsite, the URL changes. WordPress also stores complex data (like widget settings, theme options) in a serialized format. A simple find-and-replace on these strings can break them, leading to broken functionality.

Setting Up WordPress Multisite

The first thing you need is a functional WordPress Multisite network. We recommend testing everything on a staging site or in local development before rolling it out to production. Creating a [WordPress Multisite in Local(https://localwp.com/help-docs/advanced/wordpress-multisite-with-local/#Creating-a-new-Multisite-in-Local) is one way to get up and running quickly. Local also integrates with WP Migrate, the tool we’re going to use to transfer our database and files.

Next, create complete backups of all your sites, the single sites you plan to migrate and your fresh WordPress install that will become the multisite network. You never know when you’ll need a backup.

Migrating a Single Site to Multisite the Hard Way

This section outlines the process of converting a single WordPress site into a multisite subsite with a heavy reliance on manual effort. While WP Migrate Lite can help with providing a raw database export, the vast majority of the complex, multisite-specific adjustments will fall squarely on your shoulders.

Preparing the Source Site

Before you begin extracting data, it’s always a good practice to prepare your source site. A clean database will make things slightly less chaotic down the line. We recommend first taking the time to clean up your database by deleting unnecessary data like spam comments, old post revisions, expired transients, and any unused themes or plugins. This can be done directly in your database via a tool like phpMyAdmin or by using a dedicated cleanup plugin.

Once your database is tidied up, you’ll need to export its contents. Install and activate WP Migrate Lite on your single WordPress site, navigate to Tools > WP Migrate, and then click on the Migrate tab. Next, click on Export. From there, you have options to export just the database, or perform a “Full-Site Export” which bundles your database, media uploads, themes, plugins, and other wp-content files into a downloadable ZIP archive.

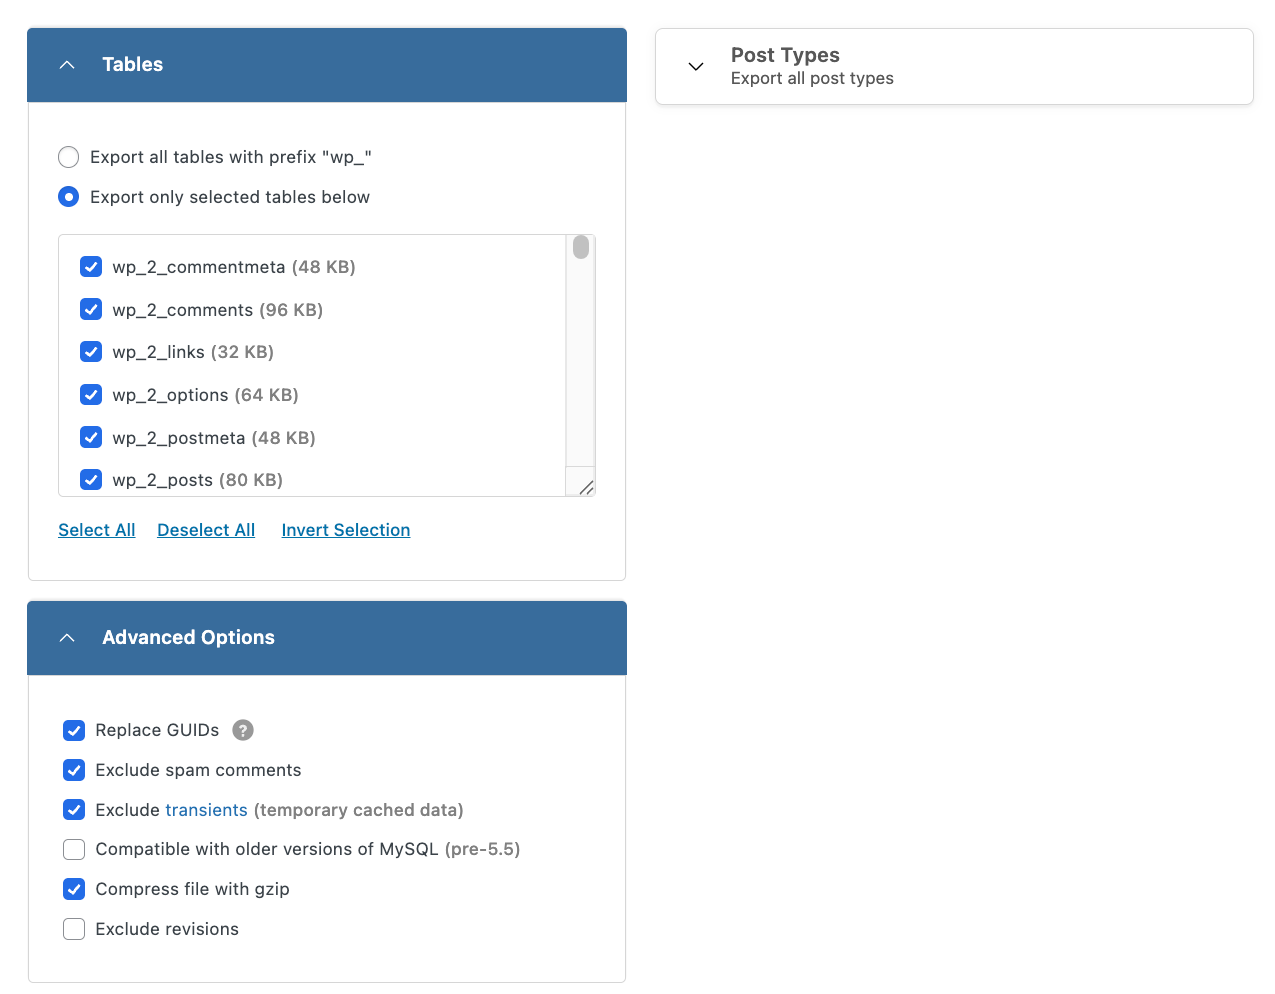
The Export settings in WP Migrate Lite, allowing you to export the database, the whole site, or any portion thereof.

While WP Migrate Lite does offer a “Find & Replace” feature that can safely handle serialized data for general site moves (e.g., changing http://olddomain.com to http://newdomain.com when moving a single site to a new domain), for this specific Multisite scenario, you’ll ultimately need to access the raw .sql file for intricate manual editing. Whether you export just the database or a full site ZIP, you’ll then proceed to the next, most challenging step.

Manual Database Transformation

This is where the real challenge begins, and where even a single misstep can lead to a completely broken site. You’ll be working directly with the raw SQL file that contains your site’s database, so it’s absolutely crucial to have a fresh backup of that file before you start. For this intricate process, you’ll need a powerful text editor, like VS Code, Sublime Text, or Notepad++, that can handle large files and perform advanced find-and-replace operations.

The first major task involves manually adjusting your database table prefixes. Your single site’s database tables likely started with wp_ (for example, wp_posts, wp_options). In a Multisite environment, each subsite needs a unique prefix, typically wp_[subsite_ID]_ (such as wp_2_posts or wp_3_options). You must go into your database’s .sql file and meticulously perform a global find-and-replace for every instance of your old table prefix, replacing it with the new subsite’s prefix.

Now, here’s the huge, critical risk: while WP Migrate Lite’s built-in find-and-replace can handle serialized data safely when you’re just changing URLs within a single site context, it is not designed to automatically adapt serialized data for the complex table prefix changes required when moving a single site into a multisite subsite. WordPress stores complex data, like widget settings, plugin options, and various array data, in a serialized format. If you perform a simple text replacement on a serialized string that changes its length, you will corrupt that data. This often results in broken widgets, non-functional plugins, and missing settings on your new subsite, as standard text editors don’t understand the intricacies of serialized data lengths.

Following the prefix changes, you’ll face a similar challenge with URLs and paths. Your exported database is littered with references to your old single site’s URL. You’ll need to perform another series of global find-and-replace operations to update all these instances to reflect your new subsite’s URL (like http://multisite.com/subsite1 or http://subsite1.multisite.com). Be sure your target URL matches your multisite’s chosen structure, whether it’s http://multisite.com/subsite1 for subdirectories or http://subsite1.multisite.com for subdomains.

Once more, the danger of corrupting serialized data that contains these URLs looms large if you’re not using a specialized tool designed for these complex, length-sensitive replacements across various database structures within a multisite context.

Next comes the particularly thorny issue of user data merging. Multisite utilizes global wp_users and wp_usermeta tables, meaning all users across the entire network share these two tables. Your single site, of course, has its own dedicated wp_users and wp_usermeta tables. You absolutely cannot just import these directly.

Instead, you’ll need to carefully export only the user tables from your single site. Then, you must manually review them. If any user IDs from your single site conflict with existing user IDs on your multisite network, you’ll have to manually reassign new, unique IDs to the single site’s users within their wp_users and wp_usermeta rows. After that, these modified user rows must be meticulously merged into the Multisite’s global wp_users and wp_usermeta tables.

Finally, and this is a step that often requires writing complex custom SQL queries, you’ll need to update the post_author fields in your newly prefixed wp_X_posts table to ensure they correctly reference the new user IDs in the Multisite’s global wp_users table. Beyond these major structural changes, you might also find yourself manually adjusting site_id values in certain option tables to ensure everything correctly points to the new subsite.

Importing the Modified Database

Once you’ve painstakingly edited your SQL file, and double-checked (and triple-checked!) your work, it’s time to import it. It’s important to note that WP Migrate Lite does not provide an in-dashboard import feature for arbitrary SQL files or full-site ZIP archives back into a live WordPress site; its export is designed to be imported using external tools (or specifically into Local). Therefore, you’ll typically use a database management tool like phpMyAdmin. Log in, select the database associated with your multisite installation, and then use the “Import” function to upload your manually edited SQL file. This is often the moment of truth, where you’ll be hoping no errors appear.

Manual File Transfer and Reorganization

With the database n place, your next major task is to sort out the files. Even if you generated a full-site export ZIP with WP Migrate Lite, the manual database edits mean you’ll likely still be managing files externally.

First, connect to your multisite via FTP/SFTP. Navigate to the wp-content/uploads/ directory. You’ll notice a sites/ folder there, and inside sites/, you’ll find folders named after your subsite IDs (e.g., 2/, 3/). You’ll then take all the media files from your single site’s wp-content/uploads/ folder and manually upload them into the correct subsite’s designated directory (e.g., wp-content/uploads/sites/[subsite_ID]/). Even after moving the files, they might not immediately appear in your subsite’s media library. You might need to activate a specific plugin on the subsite to rescan and register these files in its database.

Beyond media, you’ll also need to manually upload any specific themes or plugins that your old single site used, if they aren’t already available network-wide on your multisite. Once uploaded, you’ll then activate the necessary themes and plugins for your new subsite from its dashboard.

Post-Migration Cleanup and Testing

Even if you’ve done everything perfectly, you need to thoroughly check the newly migrated subsite. Begin by clearing any caching plugins on your multisite, as well as any server-side or CDN caches. After that, go to the new subsite’s dashboard, navigate to Settings > Permalinks, and click Save Changes. This can often help re-write the permalink rules for the subsite and resolve potential routing issues.

Now comes the most critical part: extensive testing. Do not assume everything works just because the site loads. You must systematically visit all pages and posts to check that content displays correctly, images load, and all internal links function. Test any forms present on the site, verify that widgets and customizer settings are as expected, and ensure all plugins are functioning without errors. Crucially, test user logins and permissions on the new subsite, and double-check that all media links are correct and images display properly.

As you can see, performing this migration manually is a monumental undertaking. Even with a tool like WP Migrate Lite assisting with the initial database export and its general serialized data handling, the lack of specific multisite integration means you’re left with immensely complex manual tasks. It demands deep technical expertise, meticulous attention to detail, and a significant time investment for each and every site you plan to migrate. The risk of data corruption, especially with serialized data after table prefix and URL changes, and the complexities of merging user tables, remains extremely high. While it’s technically possible, it’s impractical for most, and certainly not scalable if you have more than one or two sites to migrate.

Simplify Your Life: Migrating a Single Site to Multisite with WP Migrate

This method leverages WP Migrate’s powerful premium features, specifically its “Multisite Tools” addon, to automate the most complex and error-prone aspects of migrating a single site into a multisite network. You’ll quickly see a dramatic reduction in the time, effort, and technical expertise required.

Install WP Migrate

The first thing you’ll need is a “Plus” or “Premier” license for WP Migrate, as these licenses include Multisite Tools.

Once you have your license, install and activate the WP Migrate plugin on both your source single WordPress site and your destination Multisite network. This dual installation allows the plugin to establish a secure connection between the two sites, enabling direct data transfer.

Prepare Your Source Site

Compared to the arduous manual method, source site preparation here is significantly simpler. While a general cleanup (like deleting spam comments or old revisions) is always good practice for a leaner migration, WP Migrate’s robust capabilities mean you don’t need to manually export databases or files. The plugin intelligently handles the find-and-replace for URLs and file paths, safely managing all serialized data without corruption.

Prepare the Destination Multisite

The foundational steps of setting up your WordPress Multisite network are still essential. You’ll need to have your multisite environment properly configured and running. Additionally, just as with the manual method, you’ll need to create a new, empty subsite within your multisite network that will serve as the destination for your incoming single site. This provides WP Migrate with the designated slot to pull your site’s data into.

Perform the Automated Pull Migration

This is where WP Migrate truly shines, automating tasks that were previously hours of painstaking manual labor. From your Multisite Network Admin dashboard:

  1. Navigate to the WP Migrate plugin interface.
  2. Select the “Pull” option. This tells the plugin you want to pull data from a remote site to your current multisite network.
  3. You’ll then be prompted to connect to your remote source site (your original single WordPress installation). Once connected, WP Migrate will intelligently detect your multisite setup.
  4. The plugin will offer you precise options for the migration. You’ll be able to select the specific single site you want to pull from, choose the newly created subsite on your multisite network as the exact destination for this migration, and select which components you wish to migrate: the database, media files, themes, and plugins.
  5. With your selections made, you’ll initiate the migration. WP Migrate then takes over, performing a series of automated, complex tasks. It intelligently handles the find-and-replace for URLs and file paths, safely managing all serialized data without corruption. The plugin also correctly adjusts all database table prefixes from your single site to match the unique prefix of the target subsite (e.g., wp_ becomes wp_2_). It also merges your single site’s user data into the multisite’s global wp_users and wp_usermeta tables, correctly handling user ID assignments and references. Media files directly to the correct subsite-specific wp-content/uploads/sites/[subsite_ID]/ directory, and it even transfers your selected themes and plugins, making them available for activation on your new subsite.
  6. You can monitor the progress of the migration directly within the WP Migrate interface, which provides clear feedback as it processes your data.

Post-Migration Testing is Still Important

Even with the automation provided by WP Migrate, thorough testing remains a critical step. While the likelihood of fundamental errors is drastically reduced, it’s always wise to verify everything works as expected.

  • Clear Caches: As always, clear any caching plugins on your Multisite, along with server-side and CDN caches.
  • Resave Permalinks: Navigate to your new subsite’s dashboard (Settings > Permalinks) and click Save Changes. This helps ensure the permalink structure is correctly refreshed within the multisite environment.
  • Comprehensive Testing: Systematically check all aspects of your newly migrated subsite. Visit all pages and posts, verify images and media links, test forms, ensure widgets and customizer settings are correct, and confirm that all plugins are functioning as intended.

Comparing Methods

The contrast between the two methods is stark. The second way, powered by WP Migrate, transforms a labor-intensive, technically precarious process into a few clicks. What could take hours or even days of manual debugging and highly specialized knowledge is condensed into minutes, with a dramatically lower risk of error and data corruption. This powerful automation means less stress, more reliability, and ultimately, a much more efficient use of your time.

Wrapping Up

We’ve explored two distinct paths for migrating a single WordPress site into a multisite network. On one hand, the meticulous manual approach demands deep technical knowledge and carries a high risk of data corruption. On the other, a specialized tool transforms this complex process into an efficient and reliable operation.

The difference in effort and risk is striking. What could be a multi-day debugging nightmare becomes a matter of a few clicks, drastically reducing your time and stress.

This contrast clearly highlights a choice: tackle an incredibly intricate task with painstaking manual effort, or leverage automation designed to handle its complexities safely. For most, the investment in a solution that provides such efficiency, reliability, and peace of mind is invaluable.

The post Merging WordPress Sites: Consolidating Multiple Installs into a Multisite Network appeared first on Delicious Brains.

Splitting a WordPress Multisite: Migrating a Subsite to its Own Single Installation

WordPress multisite networks offer flexibility, but a subsite often needs its own single installation for client needs, scaling, or simplified management. Separating a subsite is complex due to Multisite’s unique database structure, making manual migrations prone to errors, especially with serialized data. In this article, we look at the precise steps to migrate a subsite using WP Migrate Lite, and discuss the advanced automation and time-saving features available with WP Migrate.

The Unique Nature of Multisite Subsite Data

Migrating a subsite isn’t a simple copy-and-paste job because of how WordPress Multisite stores data. Unlike single WordPress installations, a multisite network uses a combination of shared and unique database tables.

  • Shared Tables: The main network (site ID 1) uses standard WordPress tables like wp_options, wp_users, wp_usermeta, wp_posts, etc. These tables often contain data relevant to the entire network or default settings.
  • Unique Subsite Tables: Each subsite within the network has its own set of dedicated tables. These tables are prefixed with wp_X_, where X represents the unique numerical ID of that specific subsite (e.g., wp_2_posts, wp_3_options). These tables hold all the content, settings, and user data specific to that individual subsite.

The importance of precision here cannot be overstated. A successful split demands the careful extraction of only the subsite’s relevant data. This includes its wp_X_ tables and, often, a subset of the wp_users and wp_usermeta tables if you intend to migrate specific users with the subsite. Furthermore, meticulous URL replacement is critical to prevent broken links and corrupted content after the migration.

Attempting this manually with raw SQL exports and basic find-and-replace operations is highly risky. WordPress stores a lot of data in a serialized format. This means simple text replacements can corrupt the data structure, leading to broken widgets, theme settings, and plugin configurations. This is where tools like WP Migrate become invaluable, as they are specifically designed to handle serialized data safely during migrations.

Pre-Migration Checklist: Essential Preparations

Thorough preparation is paramount for any migration. Skipping these steps can lead to data loss or significant headaches down the line.

1. Create a Full Backup of Your Entire Multisite Network

This is the single most crucial step. Before you touch anything, create a complete backup of your entire multisite network. This includes:

  • All Database Tables: Both shared and subsite-specific.
  • All Files: Your wp-content directory (themes, plugins, uploads), core WordPress files, and any custom files (e.g., .htaccess, wp-config.php).

For a full site backup, consider your hosting provider’s backup solutions or a dedicated backup plugin. This backup is your safety net, allowing you to revert if anything goes wrong.

2. Choose Your Destination Environment

Determine where your subsite will live as a single installation. This could be a new hosting provider and domain, a new domain on your existing hosting, or a local development environment like Local. It’s worth noting that Local integrates with WP Migrate.

Ensure your chosen destination meets the minimum WordPress requirements (PHP version, MySQL version, etc.).

3. Create a Fresh WordPress Single Site Installation

On your chosen destination, perform a completely fresh installation of WordPress. It’s critical that this is a clean install, without any existing content, themes, or plugins (other than the default ones). This provides a clean slate for your migrated subsite data.

4. Install WP Migrate Lite on Both Sites

To facilitate the migration, you’ll need WP Migrate Lite installed and activated on your source multisite network, and on the single-site destination.

Having WP Migrate Lite on both ends will enable the smooth export from the multisite and prepare the destination for the incoming data.

Step-by-Step Guide: Migrating a Subsite with WP Migrate Lite

Now that your preparation is complete, let’s dive into the core migration process using WP Migrate Lite.

Exporting the Subsite Database from the Multisite

The first critical step is to accurately export only the necessary database tables from your multisite network.

Access WP Migrate Lite

Log in to your multisite network’s WordPress admin area. Navigate to Settings > WP Migrate to go to the WP Migrate Lite dashboard.

Target the Subsite’s Database Tables

This is the most crucial part of a multisite split. You must select only the tables associated with the specific subsite you are migrating.

To identify your subsite’s unique ID, go to Sites > All Sites. Hover over the subsite you intend to migrate, and its ID will appear in the URL preview (for example, site-edit.php?id=X, where X is the ID).

Finding the site ID in a multisite setup by hovering over the subsite in the WordPress admin. The site ID is displayed in the lower left corner.

Next, return to the WP Migrate interface. Click on the Migrate tab, and then click Export. Open the “Tables” dropdown, and click Export only selected tables below.

WP Migrate defaults to selecting all of the tables. It’s certainly possible to manually deselect all of the tables you don’t want to migrate, but it’s probably easier to just click Deselect All and then select only those tables that begin with wp_X_ (where X is your subsite’s ID). In other words, if your subsite ID is 2, you would select tables like wp_2_posts, wp_2_options, and wp_2_terms.

Additionally, you will typically need to include the main network’s wp_users and wp_usermeta tables if you intend to migrate the existing users of that subsite, and potentially other users, to the new single installation. If you plan to create new users on the destination and only need the subsite’s content, these tables can be omitted.

Selecting the correct database tables in WP Migrate Lite.

Perform Find & Replace for URLs

WP Migrate’s find and replace feature is vital for updating all instances of your old subsite URL to the new single site URL.

In the “Find” field, enter the full URL of your subsite on the Multisite network. This could be a subdirectory (e.g., https://your-main-domain.com/subsite-name/) or a subdomain (e.g., https://subsite.your-main-domain.com/). In the “Replace” field, enter the full URL of your new single site installation, such as https://new-subsite-domain.com/. WP Migrate automatically manages serialized data during this process, ensuring no data corruption occurs.

Configure Export Options

When configuring export options, the plugin will generate an SQL file by default. The “Advanced Options” section provides checkboxes to refine this SQL export. You may choose to Exclude spam comments and Exclude transients to help keep your new database cleaner and reduce its size. The “Compress file with gzip” option will create a smaller .gz archive of your SQL file. The “Replace GUIDs” box is checked by default. GUIDs are typically not changed on live sites, but in the specific case of splitting a subsite from a multisite to a new standalone installation, updating GUIDs is recommended. This ensures the new site’s content correctly references its new domain and maintains its independence from the old multisite structure.

Selecting Advanced Options in WP Migrate Lite.

Initiate Export

Finally, initiate the export by clicking Export. WP Migrate Lite will process the selected tables, generate an SQL file, and download it to your local machine. This file contains all the database content for your subsite, pre-processed with the new URLs.

Preparing and Importing into the New Single Site

With your subsite’s database exported, the next step is to prepare your new single WordPress installation and import the data.

Access New Site’s Database

Log into phpMyAdmin or your hosting provider’s equivalent database management tool for the new, fresh single WordPress installation. Ensure you are connected to the correct database associated with your new site.

Clear Existing Tables

This is a critical step. Before importing your subsite’s data, you must clear the existing tables in the new database. Proceed with extreme caution here, as this will permanently delete all data in the selected database. Select all tables in the new single site’s database (which are typically prefixed with wp_) and use the “Drop” or “Delete” function to remove them. This creates a clean slate for the incoming subsite data.

Import and Verify

The exact method you use to do this will depend on the tool you’re using and/or your host.

After the import is complete, briefly browse the tables in your new database. You should now see the subsite’s tables (which WP Migrate automatically re-prefixes to the standard wp_ during export) present, containing your subsite’s content.

Migrating Media Files, Themes, and Plugins

WP Migrate Lite gives you the option of exporting your media files, themes, plugin and WordPress core files from within the dashboard. However, in the specific case of splitting a site off of a multisite install, transferring your media files, themes, and plugins requires manual steps when using the Lite version. This approach ensures precise control over the subsite’s specific assets and avoids potential complexities that can arise when using the full site export functionality for a multisite split.

WP Migrate allows you to use .gitignore patterns to exclude specific files from a migration, however this won’t transform the file paths from a multisite structure to a single site structure during export.

For a multisite subsite, manually transferring ensures you correctly extract only the subsite’s media (from its unique wp-content/uploads/sites/X/ directory) and place it in the standard wp-content/uploads/ directory of the new single site. Similarly, while WP Migrate Lite allows for the selection of individual themes and plugins for export, ensuring their seamless integration and correct pathing after a subsite split is best achieved by installing fresh copies or manually placing them.

Media Files

Your subsite’s media files are stored in a specific location within the multisite’s wp-content/uploads/ directory. To transfer these, connect to your multisite network via FTP or SFTP.

Navigate to the wp-content/uploads/sites/X/ directory, where X represents your subsite’s unique ID. Download the entire contents of this sites/X/ folder to your local machine.

Once downloaded, connect to your new single site via FTP or SFTP. Upload the previously downloaded media files directly into the wp-content/uploads/ directory on the new site. The sites/X/ structure is no longer necessary in a standard single site installation.

Themes

First, identify the theme that was active on your subsite within the multisite network. The most reliable method for transferring this is to install a fresh copy of the same theme directly onto your new single site through the WordPress admin interface. If the theme is custom, you will need to download the theme folder from wp-content/themes/ on your multisite and then upload it to wp-content/themes/ on your new single site. After the theme is successfully transferred to your new site, activate it from the Appearance > Themes section of the WordPress admin.

Plugins

Begin by making a comprehensive list of all plugins that were active on your subsite in the multisite network. Similar to themes, the best practice is to install fresh copies of these plugins directly on your new single site. For any custom or premium plugins, download their respective folders from wp-content/plugins/ on your Multisite and then upload them to wp-content/plugins/ on your new single site. Once installed, activate the necessary plugins from the “Plugins” section of your new WordPress admin.

Post-Migration Steps

After the database and files are in place, a few final steps are necessary to ensure your new single site functions correctly.

Re-Save Permalinks

This is a crucial step to refresh WordPress’s rewrite rules. Log into the new single site’s WordPress admin, go to Settings > Permalinks, and click Save Changes. You don’t need to make any actual changes to the permalink structure, just saving it will regenerate the .htaccess file or the equivalent rules for Nginx.

Thorough Testing

Dedicate time to comprehensively test your newly migrated site. Browse all pages and posts to ensure content displays correctly. Check all internal links, images, and embedded media to confirm they point to the new domain. Test forms, comments, and any custom functionality specific to your subsite, and verify user logins and roles.

Delete Old Subsite

Once you are absolutely confident that your new single site is fully functional and stable, you can safely delete the original subsite from your Multisite network. This step should only be performed after extensive testing and confirmation that the migration was successful.

Streamline and Automate with WP Migrate

WP Migrate Lite gives you a good foundation for splitting a multisite subsite, but WP Migrate makes the entire process practically painless with time-saving features and powerful automation that are invaluable for professional developers and agencies. These premium advantages transform a multi-step manual process into a streamlined, often one-click, operation.

One-Click Subsite Push/Pull

This is arguably the most significant game-changer offered by WP Migrate Pro, specifically through its Multisite Tools. .

Instead of manually exporting a database, clearing tables, importing, and then separately transferring files via FTP, WP Migrate allows you to directly “push” a subsite from your network to a fresh single site installation. Conversely, you can also “pull” a single site into a subsite on your network.

This functionality automates the entire database and file transfer process between the two sites, eliminating the need for tedious manual FTP operations for media, themes, and plugins. It intelligently handles all the underlying complexities, including serialized data, making the migration incredibly efficient and less prone to human error.

Automated File Migration

Beyond the database, WP Migrate seamlessly handles the comprehensive transfer of all associated files. This means your media library, active themes, and installed plugins are migrated directly between your multisite and the new single installation. This automated file handling negates the need for manual downloading from wp-content/uploads/sites/X/ and re-uploading to the new site’s wp-content/uploads/ directory, saving substantial time and ensuring all assets are correctly linked and available on the new standalone site.

WP-CLI Integration for Scripting

For developers who manage numerous migrations or integrate them into their deployment workflows, WP Migrate’s WP-CLI integration is a powerful asset. This allows you to execute and automate the entire migration process from the command line. You can script complex migration routines, making it incredibly efficient for repetitive tasks, continuous integration, or managing large-scale deployments without needing to interact with the WordPress admin interface.

Granular Control and Targeted Migrations

WP Migrate offers even finer control over your migrations. While WP Migrate Lite allows table selection, the premium version provides more advanced options for precisely including or excluding specific database tables and even particular post types. This granular control is especially useful for complex scenarios where you only need to migrate a subset of data, ensuring your new single site is as lean and optimized as possible from the outset.

Wrapping Up

Splitting a subsite from a multisite network is more straightforward with the right tools. WP Migrate Lite provides the essential functionality for database export, intelligent URL replacement, and manual file transfer.

For professional developers and agencies, the premium version, WP Migrate, offers much greater automation and efficiency. Its one-click push/pull capabilities, automated file migration, WP-CLI integration, and granular control over data ensure that even the most challenging multisite splits become seamless operations.

Have you split off part of a multisite into a single-site installation? How did it go, and which tools did you use? Let us know in the comments!

The post Splitting a WordPress Multisite: Migrating a Subsite to its Own Single Installation appeared first on Delicious Brains.

Minimizing DNS Propagation Issues With a Reverse Proxy

Migrating servers is a complex process that involves many moving parts. One of the most challenging aspects of server migration is dealing with DNS propagation. When you update your DNS records to point to a new server, it can take several hours for the changes to propagate globally. During this time, some users may still be directed to the old server, which can lead to issues with data consistency, ordering, and revenue loss.

A reverse proxy can help mitigate these issues by allowing you to control the exact moment when the new server starts serving all requests to your domain. In this article, we’ll explore how to set up a reverse proxy using Nginx or Apache, and discuss some additional considerations and alternatives.

What is a Reverse Proxy?

A reverse proxy is a server that receives requests from the internet, obtains the requested resource from the server it’s acting as a proxy for, and then returns that resource to the requester. This is different from a forward proxy, which is typically used to cache frequently requested resources or hide internal IP addresses.

You may have already used a reverse proxy in your setup, for example, by installing Nginx in front of Apache to take advantage of Nginx’s speed and caching capabilities.

How Can a Reverse Proxy Help with DNS Propagation?

A reverse proxy can’t speed up DNS propagation, but it can help mitigate the issues associated with waiting for it to happen. When you’re migrating a server, you can set up the old server as a reverse proxy for the new server. This way, even though some users may still be directed to the old server, the reverse proxy will ensure that all requests are served by the new server.

For example, suppose you’re moving a client’s eCommerce site from an old server to a new server at a different provider. You’ve set up everything on the new server and are ready to switch over the DNS. However, you realize that some users may still be directed to the old server until their local DNS cache is updated. By setting up the old server as a reverse proxy for the new server, you can ensure that all requests are served by the new server, even if some users are still being directed to the old server.

Proactively Shortening DNS Time-to-Live

While a reverse proxy mitigates the problem, you can proactively minimize the duration of the propagation window by adjusting your DNS Time-to-Live (TTL) settings.

The TTL is a value (usually measured in seconds) that tells recursive DNS servers and client machines how long to cache your domain’s IP address before requesting an update. Common TTL values range from 3600 seconds (1 hour) to 86400 seconds (24 hours).

To prepare for a migration:

  1. Reduce the TTL: At least 24 hours before the migration, log into your DNS registrar or host and reduce the TTL for your A records to a very short value, such as 300 seconds or even 60 seconds.
  2. Wait for the Old TTL to Expire: You must wait for your original, longer TTL to expire (e.g., if your old TTL was 24 hours, wait 24 hours) to ensure the low value has been cached everywhere.
  3. Perform the Migration: Once the TTL is low, any DNS change you make will propagate and take effect much faster, minimizing the overlap time where users might be hitting the old server.
  4. Restore the TTL: After the migration is complete and you are confident all traffic is hitting the new server, you can restore the TTL to a longer, more typical value (like 3600 seconds) to reduce load on your authoritative DNS servers.

By reducing the TTL, you drastically reduce the period during which a reverse proxy is necessary, making your migration cleaner and faster.

Check Your Host’s Recommendations

Your hosting provider may have specific recommendations and policies regarding reverse proxies. WP Engine, for example, generally doesn’t recommend using reverse proxies. There are certain situations where they support it, but it requires some additional configuration.

WP Engine already utilizes reverse proxy technology in their server setup, with Nginx serving as a traffic director and CDN services distributing static files globally. If you still need to use a reverse proxy, WP Engine recommends forwarding real IP addresses to ensure accurate identification of users and prevent potential security issues.

WP Engine allows two primary proxy configurations: hosting only a subdirectory and hosting both a subdirectory and top-level domain. Each of these has specific configuration instructions.

In addition to your host’s recommendations, there are some other things you should consider before going down this route. Using a reverse proxy can introduce additional latency and resource usage. Make sure to monitor your server’s performance and adjust your configuration accordingly. In addition, the reverse proxy will not proxy database connections, so you’ll need to update your database connection settings to point to the new server.

Using a reverse proxy introduces several security risks. It can become a single point of failure, and if not properly configured, it can expose vulnerabilities. Reverse proxies can store sensitive information like IP addresses and passwords, which can be problematic if managed by a malicious party. Additionally, they are susceptible to HTTP request smuggling attacks and can disrupt operations if they fail. Proper setup and ongoing management are crucial to mitigate these risks effectively.

Configuration and Security Planning

Before modifying any server configurations, it’s vital to address potential security and conflict issues that arise when using a reverse proxy.

  • Prevent Configuration Conflicts: On the old server (the proxy), ensure your new proxy rules don’t conflict with existing virtual hosts or default server blocks. You may need to disable the original virtual host that was serving the website files. If you’re using Nginx, this often means removing or renaming the site’s configuration file from /etc/nginx/sites-enabled/. In Apache, you’ll use sudo a2dissite mydomain.com.conf. This guarantees that the server processes traffic using only the new proxy configuration.

  • Secure Sensitive Files: The configuration steps require placing your SSL certificate and private key files on the old server (the proxy). While necessary for HTTPS traffic, ensure these files are stored outside of any publicly accessible web directory and protected with strict file permissions (e.g., owned by root, read-only by the web server user) to prevent unauthorized access.

  • Avoid Caching Issues: If the old server (proxy) uses any form of server-side caching (like Varnish or a built-in Nginx/Apache cache), you must ensure these caches are disabled or bypassed for the proxy traffic. If the proxy serves a cached page instead of forwarding the request to the new server, your efforts to ensure data consistency will fail.

Addressing these issues ensures that your migration is not only seamless for the user but also secure and stable during the entire DNS propagation window.

Setting up the Reverse Proxy

The original version of this article only included instructions for setting up a reverse proxy with Apache. We’ve updated those instructions, and added the process for using Nginx. You can skip to the Apache process here.

Setting up a Reverse Proxy Using Nginx

Create a new file in the /etc/nginx/conf.d/ directory, such as my-proxy.conf. This file will contain the configuration for your reverse proxy.

sudo nano /etc/nginx/conf.d/my-proxy

In the my-proxy file, add the following configuration for both HTTP and HTTPS traffic:

server {
    listen 80;
    server_name mydomain.com www.mydomain.com;

    error_log /var/log/nginx/proxy-error.log crit;
    access_log /var/log/nginx/proxy-access.log combined;

    location / {
        proxy_pass http://new-server-ip-address:8080;
        proxy_set_header Host $host;
        proxy_set_header X-Real-IP $remote_addr;
        proxy_set_header X-Forwarded-For $remote_addr;
    }
}

server {
    listen 443 ssl;
    server_name mydomain.com www.mydomain.com;

    error_log /var/log/nginx/proxy-error.log crit;
    access_log /var/log/nginx/proxy-access.log combined;

    ssl_certificate /path/to/your/certificate.crt;
    ssl_certificate_key /path/to/your/private.key;

    location / {
        proxy_pass https://new-server-ip-address:8080;
        proxy_set_header Host $host;
        proxy_set_header X-Real-IP $remote_addr;
        proxy_set_header X-Forwarded-For $remote_addr;
    }
}

Replace mydomain.com with your site’s domain name, new-server-ip-address with the IP address of your new server, and update the paths to your SSL certificate and private key files. Finally, restart Nginx to apply the new configuration:

sudo service nginx restart

Nginx Considerations

There are a couple of things you should keep in mind when setting up a reverse proxy with Nginx:

  • Proxy Caching: Nginx has built-in support for proxy caching, which can help reduce the load on your origin server. You can enable proxy caching by adding the proxy_cache directive to your configuration.

  • Buffering: Nginx can buffer responses from the origin server, which can help improve performance. You can enable buffering by adding the proxy_buffering directive to your configuration.

Setting up a Reverse Proxy Using Apache

To set up a reverse proxy using Apache, you’ll need to enable the proxy_http and ssl modules, and create a new virtual host configuration file. Here’s an example of how to do this on Ubuntu 22.04:

sudo a2enmod proxy proxy_http ssl
sudo nano /etc/apache2/sites-available/my-proxy.conf

In the my-proxy.conf file, add the following configuration:

<VirtualHost *:443>
    ServerName mydomain.com
    ServerAlias www.mydomain.com
    ErrorLog ${APACHE_LOG_DIR}/proxy-error.log
    CustomLog ${APACHE_LOG_DIR}/proxy-access.log combined

    SSLEngine on
    SSLCertificateFile /path/to/your/certificate.crt
    SSLCertificateKeyFile /path/to/your/private.key

    ProxyRequests Off
    ProxyPass / https://new-server-ip-address:8080/
    ProxyPassReverse / https://new-server-ip-address:8080/
    ProxySet Header Host $host
    ProxySet Header X-Real-IP $remote_addr
    ProxySet Header X-Forwarded-For $remote_addr
</VirtualHost>

Replace mydomain.com with your site’s domain name, new-server-ip-address with the IP address of your new server, and update the paths to your SSL certificate and private key files.

To enable the new configuration, run the following command:

sudo a2ensite my-proxy

Finally, restart Apache to apply the new configuration:

sudo service apache2 restart

Apache Considerations

There are a few things you should keep in mind when setting up a reverse proxy with Apache:

  • SSL Configuration: Make sure to update the SSLCertificateFile and SSLCertificateKeyFile directives to match the paths to your SSL certificate and private key files.
  • Server Aliases: Update the ServerName and ServerAlias directives to match your site’s domain name.
  • Proxy Settings: Consider using a more secure way to store your SSL certificate and private key files, such as using a password-protected file or a secure keyring.

Configuring WordPress to Recognize the Real IP

While your reverse proxy is now configured to correctly forward the client’s real IP address using the X-Real-IP or X-Forwarded-For headers, WordPress does not automatically recognize these. By default, WordPress only reads the REMOTE_ADDR server variable, which now contains the IP address of the old server.

To ensure WordPress properly logs, analyzes, and enforces security rules based on the true client IP, you must add a small snippet to your wp-config.php file on the new server.

Place the following code snippet above the line that says /* That's all, stop editing!

<?php
// Set the client's real IP address when behind a reverse proxy
if (isset($_SERVER['HTTP_X_REAL_IP'])) {
    $_SERVER['REMOTE_ADDR'] = $_SERVER['HTTP_X_REAL_IP'];
} elseif (isset($_SERVER['HTTP_X_FORWARDED_FOR'])) {
    $ips = explode(',', $_SERVER['HTTP_X_FORWARDED_FOR']);
    // The first IP is the actual client IP
    $_SERVER['REMOTE_ADDR'] = trim($ips[0]);
}
?>

Wrapping Up

Using a reverse proxy can be a useful tool for mitigating the issues associated with DNS propagation, but it requires careful planning and configuration to ensure that it is implemented correctly. Make sure to look into your host’s recommendations before you begin, and be aware that there are security risks that come with implementing a reverse proxy.

A reverse proxy can be an incredibly powerful tool for routing traffic around and through tough situations, but there’s always more than one way to do it. What are your best tips for migrating servers or creative uses of the reverse proxy? Let us know in the comments!

The post Minimizing DNS Propagation Issues With a Reverse Proxy appeared first on Delicious Brains.

❌